
Costumer Services
How to Fix QuickBooks Error 1603: Causes and Solutions

QuickBooks error 1603, commonly recognized as an update error, is one of the most frequent issues users encounter. Typically displayed with the message “The update installer has encountered an internal error,” this can certainly cause concern. However, there’s no need to panic; there are several straightforward solutions available to address this issue. This comprehensive guide will walk you through the causes, symptoms, and step-by-step methods for resolving error 1603, ensuring that your QuickBooks functions smoothly in the future.
Signs of QuickBooks Error 1603
Recognizing the symptoms of QuickBooks error 1603 is crucial for identifying and rectifying the problem quickly. Not only does it highlight immediate issues, but it also indicates underlying faults that could lead to future complications. Being aware of these signs will help you maintain the health and security of your system.
- Incomplete Installation: You may find that your QuickBooks Desktop installation appears unfinished.
- App Performance Issues: The application may gradually cease to respond correctly over time.
- Ignored Permissions Notices: Failing to heed installation prompts regarding permissions can lead to installation problems.
- Unexpected Shutdowns: Your system may experience occasional, unanticipated shutdowns.
- Freezing Interface: The software can freeze, resulting in unresponsive applications.

Common Causes of QuickBooks Error 1603
After identifying the symptoms, we’ll explore the various common causes of QuickBooks error 1603. Understanding these issues is vital to preventing future occurrences.
- Outdated Operating System: Running an outdated version of the operating system is a prevalent cause of this error.
- Damaged Microsoft Components: Key components such as C++ and MSXML may become damaged, leading to issues.
- Incorrect .NET Installation: A faulty installation of Microsoft .NET 1.1 SP1 can trigger this error.
- Locked Corporate Files: Access issues arising from locked corporate files can cause interruptions in the updating process.
- Ignored Software Updates: Prolonged neglect of QuickBooks software update notifications can lead to problems.
- Insufficient Temp Storage: Running low on storage space in the Windows temporary folder can impede functionality.
Step-by-Step Solutions for QuickBooks Error 1603
Once you’ve grasped what QuickBooks error 1603 is about, it’s time to take action. Here are detailed steps to help you resolve the issue quickly and restore QuickBooks to full functionality.
Solution 1: Update Your Windows OS
Many users face QuickBooks error 1603 due to an outdated Windows operating system. Updating your system is a vital first step that can resolve compatibility issues. Here’s how you can go about it:
- Open Settings: Press Windows + I to access Settings.
-
Go to Update & Security: Choose the Update & Security section
- Click on Windows Update: From the left sidebar, choose the Windows Update tab.
-
Verify for Updates: Select the option to check for updates
- Install Updates: If updates are available, they’ll be downloaded and installed automatically. Restart your computer if prompted.
- Verify Functionality: After the restart, open QuickBooks to see if the issue has been resolved.
Solution 2: Utilize the Quick Fix My Program Tool
If updating Windows doesn’t clear up the error, the next step is to use the QuickBooks Tool Hub. This tool is designed to effectively tackle various issues related to QuickBooks. Follow these steps:
- Download the Tool: If you do not already have it, download and install the QuickBooks Tool Hub.
- Open the Tool Hub: Double-click the Tool Hub icon on your desktop.
- Select Program Problems: On the left side, choose the Program Problems option.
- Click Quick Fix My Program: Select Quick Fix My Program from the list.
- Allow the Scan: The tool will automatically scan for and repair common software issues. This may take a few minutes.
- Reopen QuickBooks: Once the fix completes, reopen QuickBooks and check if the error has been cleared.
Solution 3: Repair the Microsoft .NET Framework
Repairing the Microsoft .NET Framework is crucial since QuickBooks relies heavily on it. Corrupted or missing files can disrupt updates and installations. Here’s how to execute the repair:
- Open Run Command: Press Windows + R, type control, and hit Enter.
- Go to Programs and Features: Navigate to Programs > Programs and Features.
- Select Windows Features: Click on Turn Windows features on or off from the left sidebar.
- Check .NET Framework Options: Ensure that both .NET Framework 3.5 and .NET Framework 4.8 Advanced Services are checked. If they are already checked, uncheck them, click OK, then recheck and click OK again.
- Download Files if Prompted: Allow Windows to download any necessary files if prompted.
- Restart Your Computer: Restart your system to see if the issue is resolved.
Solution 4: Reinstall Microsoft Visual C++
QuickBooks error 1603 may also stem from missing or corrupted Microsoft Visual C++ components. Reinstalling these components ensures that QuickBooks has the necessary libraries for smooth operation. Here’s how to do it:
- Open Programs and Features: Press Windows + R, type control, and hit Enter.
- Locate Visual C++ Entries: In Programs and Features, find all entries for Microsoft Visual C++ Redistributable. Select them and click Uninstall.
- Download Latest Versions: Visit the Microsoft website to download the most recent x86 and x64 versions.
- Install the Downloaded Files: Launch the downloaded installation files and follow the on-screen instructions.
- Restart Your PC: Once the installation is complete, restart your computer and check if QuickBooks is functioning properly.
Conclusion
Encountering issues with QuickBooks, such as error 1603, is not uncommon and can happen with any software application. The important thing is to stay informed and proactive in managing these challenges. We hope this guide has equipped you with valuable steps to resolve QuickBooks error 1603. If the problem persists, don’t hesitate to reach out to QuickBooks support for professional assistance tailored to your specific needs.
Author


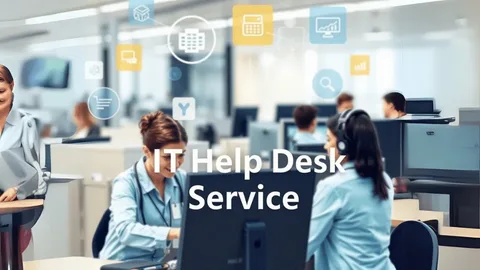
Modern companies rely heavily on digital systems to run their daily operations. However, technical glitches can strike at any moment and disrupt your entire workforce. A managed helpdesk service solves this exact problem by providing comprehensive technology support. A dedicated team of IT professionals actively monitors your infrastructure and fixes digital bugs. This approach ensures that your software, networks, and hardware channels run flawlessly around the clock.
Instead of waiting for things to break, these specialists guard your operational uptime. They act as a reliable safety net for your employees whenever a tech challenge arises. Therefore, your staff can conquer their daily goals without experiencing frustrating delays. At the same time, your management gains total peace of mind. You no longer have to worry about sudden server crashes or data access failures.
How the Managed Support Lifecycle Operates
The entire helpdesk workflow depends on a highly structured ticketing pipeline. First, an employee encounters a technical barrier while completing a project. They immediately submit a formal assistance request through an online portal, email, or live chat. Next, the intake system generates a unique tracking ticket automatically. This record contains the exact nature of the problem, the employee’s name, and the severity level.
After that, tier-one technicians review the incoming ticket to assess the situation. If the issue requires a basic fix, the representative resolves it over the phone right away. For example, they might reset a password or clear a browser cache. However, complex network infrastructure failures demand a deeper level of technical knowledge. In these scenarios, the intake team escalates the ticket to specialized engineers. These senior professionals deploy targeted remedies to restore full functionality. Finally, the technician closes the ticket after verifying that the employee is completely satisfied.
Why Modern Enterprises Require Professional IT Oversight
Technology underpins every modern business strategy in the current corporate environment. Teams constantly use cloud databases, cybersecurity frameworks, and digital communication tools. Consequently, a single software glitch can stall your entire productivity loop within seconds. A managed helpdesk eliminates this risk by building a robust shield around your digital environment.

Furthermore, outsourcing your technical needs allows your internal staff to focus on revenue-generating tasks. Marketers can build campaigns, and sales teams can close deals while the tech experts handle the background maintenance. This division of labor boosts workplace morale significantly. Employees feel supported because they know a friendly expert can rescue them from any digital headache. Ultimately, you create a seamless workspace where technology accelerates your corporate growth instead of slowing it down.

Critical Core Features of a Premium Support Infrastructure
A top-tier managed helpdesk delivers specific, high-value features to optimize your company’s digital performance. First, the provider must offer continuous, around-the-clock technical support. Glitches do not follow a standard business schedule. Therefore, having engineers available during weekends and holidays prevents minor bugs from turning into major operational crises.
Second, the service uses intelligent ticket management software to streamline workflows. This tool automatically routes specific issues to the correct department based on keywords. Third, the platform maintains detailed diagnostic logs of every single interaction. These metrics allow the IT team to identify recurring hardware flaws across your network. They can then replace failing equipment before it causes widespread downtime. Finally, premium providers deliver transparent reporting dashboards so you can audit their response times regularly.
Evaluating Managed Helpdesk Against Traditional IT Options
Understanding the differences between managed services and traditional IT models helps you make a smarter corporate investment. Traditional IT support operates on a strictly reactive basis. You experience a system failure, and then you call a technician to fix the damage. This break-fix cycle creates massive operational friction and leads to unpredictable emergency bills. Furthermore, internal teams often suffer from a limited skill set. A small staff simply cannot master every single programming language or cloud security framework.
Conversely, a managed helpdesk adopts a highly proactive approach to network maintenance. The provider monitors your servers in real time to neutralize cyber threats before they breach your firewall. Additionally, this service model provides a completely predictable monthly subscription fee. This predictability allows your accounting department to manage your technology budget with total precision. You also gain instant access to a massive pool of certified experts without paying massive hiring or training costs. Finally, managed services scale alongside your company seamlessly. The provider can instantly add new users or upgrade your cloud storage as your business expands into new markets.
The Evolutionary Power of Automation and Artificial Intelligence
Artificial intelligence is completely reshaping how modern helpdesks manage customer service requests. Today, AI-driven sorting algorithms analyze incoming tickets to recommend instant solutions to technicians. This automation speeds up response times dramatically.
Furthermore, intelligent conversational chatbots handle high volumes of routine inquiries without human intervention. These bots guide employees through password resets, software installations, and multi-factor authentication setups. This instant assistance saves your workers from waiting in long queues for basic support. Meanwhile, human technicians save their valuable energy for complex engineering projects. In addition, predictive AI models monitor network traffic to forecast hardware failures. This foresight allows engineers to replace aging drives before an outage even occurs.
Choosing the Ideal Helpdesk Partner for Your Growth
Selecting a managed support provider represents a pivotal decision for your long-term operational health. Therefore, you must vet potential candidates using a strict set of professional criteria. Look for a partner with extensive experience in your specific corporate sector. For example, healthcare firms require providers who understand strict data privacy laws. Finance companies need experts who can defend against sophisticated ransomware attacks.
Additionally, ensure the provider outlines clear service level agreements. They must commit to specific response windows and resolution timeframes. A reliable partner also prioritizes open communication channels and schedules regular strategy reviews. They will not just patch bugs. They will actively advise your executive team on long-term technology roadmaps to support your commercial expansion.
Conclusion
An exceptional managed helpdesk functions as the bedrock of a successful modern enterprise. It reduces operational downtime, secures your digital assets, and empowers your employees to work with complete confidence. By leaving tech challenges to the experts, you free up your internal resources to focus on your core business mission. Explore the benefits of managed IT support today to position your brand for sustainable, long-term success.
Author

Air travel is now a big part of life for many people. It does not matter if you go by plane for work, school, vacation, or other things. A simple trip starts when you have the right facts. Airport Details, Flight Information & Travel Assistance – Airport Guide Hub offers access to essential airport facts, flight updates, and useful advice all conveniently located in one place. Now, you do not have to waste lots of time looking on many sites. Travelers can find what they need to plan a trip and feel more ready to go.
At Airport Guide Hub, the goal is clear. They want to help people make smart choices before they go to the airport. The site covers airport facilities, how to get ready for flights, and how to move around in the terminals. All the information there is about making your travel better.
The Role of Airport Information in Modern Travel
Many people do not see how important airport information is. A lot of people think booking a flight is the only thing that matters. But knowing how an airport works can make your whole trip much better.
Large airports can have more than one terminal. There is a lot of security to get through. Many of these airports have transportation centers, shops, and areas for people to get help. If you do not have good details, you could feel lost, late, or upset.
Being able to get good airport information helps people who fly to:
- Plan when to get to the airport in a good way
- Find your way around terminals without worry
- Know what the airport has
- Find ways to get rides
- Get ready for security checks
- Spend less time when you travel
This is where Airport Guide Hub helps both people who travel often and people who are flying for the first time.
Flight Information That Helps Travelers Stay Prepared
Flights can change for many reasons. The weather, changes in work plans, tech problems, and how air traffic is managed, can all change schedules.
People who keep up with flight updates can make better choices while they travel. They can also stay away from extra trouble.
Useful flight-related information may include:
- Scheduled departures
- Information about when flights get there
- Flight delays
- Gate updates
- Changes in flight status
- Details about connections
Being ready can help you face less surprises. It can also make your trip feel more easy and safe.

Understanding Airport Facilities Before Arrival
Modern airports have a lot of places and things to help make people feel good and make everything easier for them. But, a lot of people do not know about the things they can use until they get there.
Knowing what the airport has can help people use their time better. It can also help them have a better time while they are there.
Common airport facilities include:
Passenger Lounges
Lounges have good seats. You can get drinks and snacks there. The internet is easy to use. People can sit there and feel calm while waiting for a flight.
Dining Areas
Airports usually have many restaurants, cafes, and food courts. You can get both local and international food there.
Retail and Duty-Free Shopping
Passengers can buy travel basics, gifts, gadgets, clothes, and duty-free things.
Business Services
Many airports have workspaces
Family-Friendly Amenities
Children’s play areas, family rooms, and spots for feeding babies help parents and families when they travel. These things make the trip better and let families feel more comfortable on the go.
Airport Guide Hub helps people know about these things before they get to the airport.
Simplifying Airport Navigation
One of the biggest things that people have to deal with when they travel is trying to find their way in airports they do not know well. A large airport can be hard to figure out, mostly if you are going there for the first time.
Passengers often need help locating:
- Airline counters
- Security stations
- Boarding spots
- Immigration desks
- Baggage claim areas
- Transportation zones
If you look at airport layouts before you travel, it can help you feel less lost. This can make it easy for people to get from one place to another at the airport.
Airport Guide Hub gives helpful tips that make moving around airports simple and easy to do.
Essential Travel Services Every Passenger Should Know
A good trip means more than just getting to the airport on time. People need to know some important rules and steps for travel.
Check-In Guidelines
Knowing airline check-in rules helps you stay out of long lines and stop any delays you do not need.
Baggage Policies
Knowing baggage rules helps you avoid extra fees and problems that come up at the last moment.
Security Procedures
Airport security is important for all travelers. If you know the rules for screening, you can get through the checks faster and with less stress.
Boarding Information
Knowing how to board and when to do it makes the leaving time easy and smooth.
Arrival Assistance
Knowing about transportation choices and airport exit steps can help make getting to a place feel easier.
These travel services help to make your trip easy and without stress.
Supporting International and Domestic Travelers
Domestic and international flights need different plans. If you travel out of the country, you may have to show extra papers. You also must follow rules for entering that country.
Important considerations include:
- Passport validity
- Visa requirements
- Customs regulations
- Immigration procedures
- International baggage policies
Airport Guide Hub has easy tips and details to help people get ready for travel rules. It can help you avoid the things that often cause problems when you travel.
Why Travelers Trust Airport Guide Hub
People pick Airport Guide Hub as it gives clear and easy-to-understand information. It is made for travelers and keeps things simple.
Key benefits include:
- All airport guides in one place
- Helpful flight information
- Simple travel content you can read
- Airport details about buildings and services
- Tips to help people who fly
- Support for travel inside your country and in other countries
The platform is made to help travelers feel sure and ready before any trip.
Conclusion
Travel gets easier when you have the right information when you need it. Airport Information, Flights & Travel Services – Airport Guide Hub gives people airport details, flight help, and travel tips to help them go through their trips in a good way.
Whether you are planning a short trip in your own country or going out of the country, Airport Guide Hub is here to help all travelers stay in the know, stay organized, and feel good about their travel plans. With good planning and the right information, every trip can start and finish well.
Author

The private hire industry has changed fast over the last few years. Today, algorithms govern the modern private hire experience. These systems constantly adjust travel pricing based on real-time supply and demand. While these modern mechanisms remain essential for general platform efficiency, they frequently cause major friction.
A passenger feels immediate shock when hit with a fare that is double or triple what they originally expected. For a driver, dealing with an irate passenger who feels exploited by surge pricing is a common occupational hazard. This situation creates a highly stressful work environment.
The secret to successful de-escalation begins with true empathy. It also requires a strong sense of professional detachment from the platform’s pricing logic itself. Drivers must constantly remind themselves that the passenger’s intense frustration targets the automated system. It does not target them as individuals. By actively acknowledging the passenger’s feelings without taking the accusation personally, you create a calm buffer zone inside the vehicle.
Active Listening as a Crucial De-escalation Tool
When a passenger starts venting about high travel costs, active listening becomes your most powerful tool. Many passengers simply want to feel heard during a frustrating moment. They look for validation that their financial concern makes sense.
Allow the customer to express their dissatisfaction completely without interrupting their flow. At the same time, maintain a neutral but attentive physical posture behind the wheel.
Use brief, non-combative verbal affirmations to ease the tension. You can say phrases like “I understand that this fare is much higher than usual.” Another good option is “I hear your concern regarding the current high demand rates.” By validating their immediate emotions, you often lower their defensive walls.
Avoid becoming defensive yourself. You should also avoid explaining the intricate algorithmic details of the platform’s pricing engine. Providing too many technical details usually fuels more debate. Instead, focus entirely on the immediate goal of completing the trip safely.
Drivers who consistently demonstrate this high level of composure usually ground their practice in rigorous professional standards. They often learn these communication skills during a dedicated SERU training course. This specific curriculum provides the perfect framework for managing complex human interactions while strictly adhering to licensing requirements.
Setting Firm Professional Boundaries During Conflict
Empathy is vital for customer service, but you must balance it with firm professional boundaries. Sometimes a passenger’s anger turns into verbal abuse, direct harassment, or physical threats. When this happens, the situation moves beyond a simple pricing dispute. It becomes a serious safety concern for the operator.
In these challenging instances, de-escalation means knowing exactly when to disengage from the customer. Clearly communicate to the passenger that you are unable to proceed with the discussion while they speak to you in an abusive way.
If the aggressive behavior does not stop immediately, find a safe spot. Pull over in a well-lit, public location and terminate the ride right away. Your personal safety as a professional driver always remains the top priority.
Understanding the legal and regulatory framework surrounding passenger conduct and driver rights is essential here. The situational awareness required to navigate these difficult boundary lines is a core outcome of any reputable SERU training course. Through this structured education, drivers learn how to balance their legal duty of care. They also learn how to maintain a safe working environment for themselves at all times.

Turning the Experience into a Neutral Trip
Once you acknowledge and de-escalate the initial outburst, attempt to pivot the conversation toward neutral topics. If the customer seems closed off, offer a silent, comfortable ride instead.
Sometimes, the best way to move past an angry encounter is to let the focus shift entirely to the journey itself. You can offer to adjust the cabin’s climate control. Alternatively, ask if they have a personal preference for the travel route or the music.
This simple gesture restores a sense of agency to the passenger. It helps them move quickly from an antagonistic mindset to a more passive one.
If the passenger remains completely fixated on the price of the ride, do not argue with them. Reiterate politely that you are happy to provide them with the contact information for the platform’s customer support team.
This step allows them to address their financial concerns directly with the corporation. By facilitating this bridge to formal corporate support, you remove yourself as the target of their grievance. This strategy effectively diffuses the remaining cabin tension. It ensures that you finish your shift with your professional reputation and your peace of mind intact.
The Long-Term Value of Professionalism
Mastering these advanced de-escalation skills is not just about avoiding bad digital reviews or low star ratings. Instead, it is about building a highly sustainable career as a professional driver in a competitive market.
Every successful interaction sets a great example. Even trips that start with high tension prove your ability to handle the daily complexities of the private hire industry. These soft skills matter immensely. When you combine them with a deep understanding of road safety, licensing laws, and ethical driving practices, you set yourself apart from the rest of the workforce.
The inner confidence to manage any situation comes from a foundation of thorough preparation. This applies whether you encounter an angry passenger or a complex road scenario.
Investing time in professional development protects your livelihood. The transport sector changes constantly, but human nature stays the same. People will always react poorly to unexpected expenses.
By framing your response around active listening, boundary setting, and proactive pivoting, you control the environment inside your car. This professional approach reduces daily fatigue. It also ensures you return home safely after every shift.
Ultimately, true professionals do not leave their customer interactions to chance. They study the best methodologies, practice emotional control, and utilize proven frameworks like the SERU guidelines to thrive in their careers.
Author


Rhinoplasty in Dubai: Enhance Your Profile with Expert Care

Upcoming IEO Projects: Best Crypto Token Launches to Watch

Custom Puzzle Shape Tags: Creative Product Branding Solutions

Custom Crepe Cones for Professional Food Packaging Solutions

Office Space in Gurgaon: Premium Workspaces by Quattro Spaces

Enterprise Services for Business Connectivity and IT Solutions

Business Stickers for Branding, Packaging, and Business Growth

Business Labels for Packaging, Branding, and Product Organization

Unsold Retail Electronics: Smart Inventory Management Strategies

Custom Biscotti Mylar Bags for Fresh and Stylish Cookie Packaging

Cybersecurity Consulting Company SequelNet Provides Critical IT Support Services to Medical Billing Firm, Medical Optimum

Meet the Megalodon: The Shark Star of ‘Meg 2’

Reduce Video Game Lag: Level Up Your Gaming Performance
Balancing India’s Entertainment: Cricket vs. Bollywood

Jetsetter’s Secrets: Unveiling Our Favorite Travel Hacks for a Seamless Adventure

The 5 Best Live Sports Streaming Sites: Legal and Exciting!

Hollywood Labor Unrest: The Impact of ‘What About Us?’ Strikes

Unveiling the Magic of Dream Fulfillment at the Late NBA Draft

Illuminate Your Skin: Dr. Axe Unveils Natural Remedies for Lightening Knees and Elbows

Bright Choices: Navigating the Pros and Cons of Skin Whitening Creams with Dr. Axe
-

 Business3 years ago
Cybersecurity Consulting Company SequelNet Provides Critical IT Support Services to Medical Billing Firm, Medical Optimum
-
Entertainment3 years ago
Meet the Megalodon: The Shark Star of ‘Meg 2’
-
Entertainment3 years ago
Reduce Video Game Lag: Level Up Your Gaming Performance
-
 Sports3 years ago
Balancing India’s Entertainment: Cricket vs. Bollywood
-
Entertainment3 years ago
Jetsetter’s Secrets: Unveiling Our Favorite Travel Hacks for a Seamless Adventure
-
Productivity3 years ago
The 5 Best Live Sports Streaming Sites: Legal and Exciting!
-
Art /Entertainment3 years ago
Hollywood Labor Unrest: The Impact of ‘What About Us?’ Strikes
-
Sports3 years ago
Unveiling the Magic of Dream Fulfillment at the Late NBA Draft


