Technology
Revolutionizing Communication: iPhones Now Sync with Android via RCS


Revolutionizing Communication: iPhones Now Sync with Android via RCS
What is RCS Messaging and How Does It Compare to SMS and iMessage?
RCS messaging is a new standard that aims to replace the outdated and limited SMS (Short Message Service) and MMS (Multimedia Messaging Service) protocols. SMS and MMS are the default methods of sending text messages and multimedia messages on most phones, but they have many drawbacks. For example, SMS has a character limit of 160, which means that longer messages are split into multiple parts. MMS allows you to send images, videos, and audio, but the quality is often low and the file size is limited. SMS and MMS also do not support features like group chat, read receipts, typing indicators, or encryption.
iMessage is Apple’s proprietary messaging service that works only on iOS and macOS devices. It allows you to send and receive unlimited text, images, videos, audio, stickers, and more. It also supports group chat, read receipts, typing indicators, and encryption. However, iMessage does not work with Android devices, unless you use a third-party app or service that bridges the gap. This means that if you want to communicate with an Android user, you have to use SMS or MMS, or switch to another app.
RCS messaging is designed to overcome these limitations and offer a universal and rich messaging experience across all devices. RCS messaging works on any phone that supports it, regardless of the operating system or the carrier. It allows you to send and receive unlimited text, images, videos, audio, stickers, and more, with high quality and no file size limit. It also supports group chat, read receipts, typing indicators, and encryption. RCS messaging is compatible with SMS and MMS, which means that if you send a message to someone who does not have RCS, they will receive it as a normal text or multimedia message.
The table below summarizes the main differences between SMS, iMessage, and RCS messaging:
| Feature | SMS | iMessage | RCS |
|---|---|---|---|
| Character Limit | 160 | Unlimited | Unlimited |
| Image Quality | Low | High | High |
| Video and Audio Support | No | Yes | Yes |
| Group Chat | No | Yes | Yes |
| Read Receipts | No | Yes | Yes |
| Typing Indicators | No | Yes | Yes |
| Encryption | No | Yes | Yes |
| Cross-Platform Compatibility | Yes | No | Yes |
As you can see, RCS messaging offers the best of both worlds: the universality of SMS and the richness of iMessage. It is the next generation of messaging that can revolutionize communication between iPhones and Android devices.

How to Enable RCS Messaging on Your iPhone or Android Device
To use RCS messaging, you need two things: a phone that supports it and a carrier that supports it. Most newer Android phones support RCS messaging, but not all carriers do. You can check if your phone and carrier support RCS messaging by going to Settings > Chat Features on your Android device. If there is a message that says “Chat features unavailable for this device”, it means that your phone or carrier does not support RCS messaging. If message says that “Status: Connected”, it means that your phone and carrier support RCS messaging and you can use it.
If your phone or carrier does not support RCS messaging, you can still use it by downloading a third-party app called Google Messages. Google Messages is a messaging app that works on any Android device and enables RCS messaging regardless of the carrier. You can download Google Messages from the Google Play Store and set it as your default messaging app. Then, you can go to Settings > Chat Features and enable RCS messaging.
For iPhone users, the situation is a bit different. Apple has not officially supported RCS messaging on its devices, but there is a workaround that allows you to use it. The workaround involves using Google Messages on your iPhone, but not as a messaging app, but as a web app. A web app is a website that looks and behaves like an app, but runs on your browser. To use Google Messages as a web app on your iPhone, you need to do the following steps:
- On your Android device, open Google Messages and tap on the three-dot menu icon on the top right corner. Then, tap on Messages for Web.
- On your iPhone, open Safari and go to messages.google.com/web. You will see a QR code on the screen.
- On your Android device, scan the QR code with the camera. You will see a message that says “Connected to Messages for Web”.
- On your iPhone, tap on the share icon on the bottom of the screen. Then, tap on Add to Home Screen. You will see a Google Messages icon on your home screen.
- Tap on the Google Messages icon on your home screen. You will see a web app that looks like the Google Messages app. You can use it to send and receive RCS messages on your iPhone.
This workaround is not perfect, as it requires you to have an Android device and a stable internet connection. However, it is the only way to use RCS messaging on your iPhone until Apple decides to support it natively.
What Features and Benefits Does RCS Messaging Offer?
RCS messaging offers many features and benefits that can enhance your communication experience. Here are some of the main ones:
- High-quality images, videos, and audio: You can send and receive images, videos, and audio with high quality and no file size limit. You can also preview the media before sending or downloading it. This means that you can share your memories and moments with more clarity and detail.
- Group chat: You can create and join group chats with up to 100 participants. You can also name the group, add or remove members, mute notifications, and leave the group. This means that you can stay in touch with your friends, family, and colleagues more easily and conveniently.
- Read receipts: You can see when your messages have been delivered and read by the recipient. You can also see when the recipient is typing a reply. This means that you can have more interactive and responsive conversations.
- Encryption: You can send and receive messages with end-to-end encryption, which means that only you and the recipient can read them. No one else, not even Google or your carrier, can access or intercept your messages. This means that you can have more private and secure communication.
- Cross-platform compatibility: You can send and receive messages across iPhones and Android devices, without any extra apps or accounts. You can also sync your messages across devices, so that you can access them from any device. This means that you can have more seamless and consistent communication.
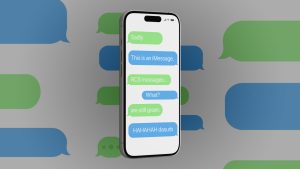
Picture by: https://www.yugatech.com/news/apple-will-finally-bring-rcs-to-iphone-in-2024/
How to Sync Your Messages Across iPhones and Android Devices
One of the biggest advantages of RCS messaging is that it works across iPhones and Android devices, without any extra apps or accounts. However, if you want to sync your messages across devices, you need to use a third-party service that allows you to do that. One of the most popular and reliable services is iMessage Chat, which is a web app that lets you use iMessage on any device.
iMessage Chat is a web app that connects your iPhone and your Android device via a secure server. It allows you to send and receive iMessages on your Android device, as well as RCS messages on your iPhone. It also syncs your messages across devices, so that you can access them from any device. To use iMessage Chat, you need to do the following steps:
- On your iPhone, go to Settings > Messages and turn on iMessage. You will see a message that says “Waiting for activation”. Wait until it says “iMessage is on”.
- On your Android device, open Chrome and go to imessagechat.com. You will see a QR code on the screen.
- On your iPhone, open the Camera app and scan the QR code. You will see a message that says “iMessage Chat wants to use your Apple ID to sign in”. Tap on Continue and enter your Apple ID and password.
- On your Android device, you will see a web app that looks like the iMessage app. You can use it to send and receive iMessages and RCS messages on your Android device.
- On your iPhone, you can also use the iMessage app to send and receive iMessages and RCS messages on your iPhone.
This service is not perfect, as it requires you to have an iPhone and a stable internet connection. However, it is the only way to sync your messages across iPhones and Android devices until Apple and Google decide to support it natively.
Conclusion: The Future of Communication is Here
RCS messaging is a new standard that can revolutionize communication between iPhones and Android devices. It allows you to send and receive unlimited text, images, videos, audio, stickers, and more, with high quality and no file size limit. It also supports group chat, read receipts, typing indicators, and encryption. And best of all, it works across iPhones and Android devices, without any extra apps or accounts.
To use RCS messaging, you need a phone that supports it and a carrier that supports it. If your phone or carrier does not support RCS messaging, you can still use it by downloading Google Messages on your Android device, or using Google Messages as a web app on your iPhone. You can also sync your messages across devices by using iMessage Chat, which is a web app that lets you use iMessage on any device.
RCS messaging is the future of communication, and it is here to stay. It offers many features and benefits that can enhance your communication experience and make it more interactive, responsive, clear, convenient, private, and secure. If you have not tried RCS messaging yet, you should give it a try and see for yourself how it can change the way you communicate.
Author



Seeing Epson Printer Error Code 0x9E can be frustrating, especially when the printer suddenly stops working during an important print job. This error may appear on the printer display or computer and can be associated with temporary system glitches, communication problems, paper-feed issues, internal obstructions, firmware problems, or hardware-related faults.
Before assuming that the printer needs repair, try some basic troubleshooting. In many cases, restarting the printer, checking for obstructions, reconnecting cables, or updating the printer software can restore normal operation.
Below are 10 practical ways to troubleshoot Epson Printer Error Code 0x9E.
1. Restart the Epson Printer
Start with a complete restart. Temporary errors in the printer’s internal system can sometimes trigger an error code.
Turn off the printer and disconnect its power cable from the electrical outlet. If the printer is connected to a computer through USB, disconnect that cable as well.
Wait approximately two to five minutes. Reconnect the power cable directly to a wall outlet, switch the printer back on, and check whether the 0x9E error returns.
If the printer starts normally, try printing a test page.
2. Perform a Power Reset
If a normal restart doesn’t work, try a power reset.
Turn off the printer and unplug the power cord. With the printer disconnected from power, press and hold the power button for approximately 20 seconds. Release the button and leave the printer disconnected for another few minutes.
Reconnect the power cable and turn the printer on.
A power reset can clear temporary electrical or internal control errors that may interfere with normal printer operation.
3. Check for Jammed Paper
A small piece of paper inside the printer can sometimes cause unexpected operational errors.
Turn the printer off before inspecting it. Check the input tray, output area, rear access area, and other accessible paper paths. Remove any visible jammed or torn paper carefully.
Avoid pulling paper aggressively because small pieces may tear off and remain inside the machine.
Once the paper path is clear, reload the paper correctly and restart the printer.
4. Look for Foreign Objects
Paper isn’t the only thing that can interfere with the printer’s internal mechanisms. Small objects such as labels, paper clips, dust buildup, or scraps of paper may obstruct moving components.
With the printer powered off and unplugged, inspect accessible areas using adequate lighting.
Do not force or disassemble internal components. If you notice an object that cannot be safely reached, professional servicing may be a better option.
5. Check the Ink Cartridges
Incorrectly installed or poorly seated cartridges may cause some printers to behave unexpectedly.
Open the cartridge access area according to your printer model’s normal procedure. Check whether each cartridge is properly installed.
If necessary, remove and reinstall the cartridges carefully. Make sure they click or sit securely in their designated positions.
Restart the printer afterward and see whether Epson Printer Error Code 0x9E disappears.
6. Inspect the Printer Connections
Communication problems between the printer and computer can sometimes complicate troubleshooting.
For a USB printer, disconnect and reconnect the USB cable. Try another USB port if one is available. Avoid using an unpowered USB hub while diagnosing the problem.
For a wireless printer, verify that the printer and computer are connected to the intended network. Restarting the router may also help if other devices are experiencing connectivity problems.
After restoring the connection, send a simple test document to the printer.
7. Clear the Print Queue
A corrupted or stuck print job can prevent normal printing even after the printer itself has recovered.
Open the printer queue on your computer and cancel pending documents. Restart both the printer and computer before attempting another print job.
If the printer works normally afterward, the problem may have been related to the previous print job rather than a persistent hardware fault.
8. Update or Reinstall the Printer Driver
Outdated, corrupted, or incompatible printer software can cause communication and printing problems.
Check which Epson printer model you own and make sure the correct driver is installed for your operating system. If the driver appears damaged or the problem started after a software change, uninstalling and reinstalling the appropriate printer software may help.
Restart the computer after installation and reconnect the printer.
Then print a test page to determine whether the error has been resolved.
9. Check for Firmware Updates
Firmware controls many of the printer’s internal functions. In some circumstances, updating the firmware can resolve known operational problems.
Check whether an appropriate firmware update is available for your exact printer model. Follow the manufacturer’s instructions carefully and keep the printer connected to a reliable power source throughout the update.
Never interrupt a firmware installation by switching off or unplugging the printer.
After the update is complete, restart the printer and check its status.
10. Consider an Internal Hardware Problem
If Epson Printer Error Code 0x9E remains after basic troubleshooting, an internal mechanical or electronic fault may be involved.
Possible trouble areas can include sensors, carriage mechanisms, paper-feed components, internal electronics, or other model-specific parts. The exact meaning of an error can vary by printer model, so avoid replacing components based solely on a generic error-code description.
At this point, check the documentation for your exact Epson model or have the printer professionally inspected.
What If Epson Error Code 0x9E Keeps Returning?
An error that disappears temporarily but repeatedly returns deserves additional attention. Note when the problem occurs. For example, determine whether it appears immediately after startup, while feeding paper, when beginning a print job, or after the printer has operated for several minutes.
This information can help distinguish between software, connectivity, paper-feed, and internal hardware problems.
You should also avoid repeatedly forcing the printer to operate if you hear grinding, clicking, or other unusual mechanical noises.
Final Thoughts
Epson Printer Error Code 0x9E does not always mean that the printer has permanently failed. Begin with simple troubleshooting: restart the printer, perform a power reset, inspect the paper path, check the cartridges, verify connections, and clear pending print jobs.
You can then check the printer driver and firmware if the problem continues. If the Epson Error Code 0x9E persists after these steps—particularly when accompanied by unusual noises or mechanical problems—the printer may require model-specific diagnosis or professional servicing.
Following the troubleshooting steps in order can help you identify the cause without making unnecessary changes to the printer.
Author


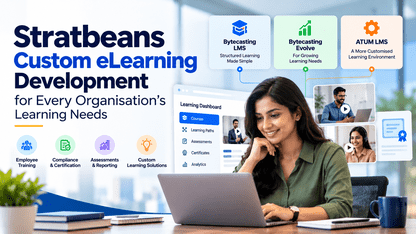
Some organisations may need a dedicated LMS for employee onboarding and compliance training. Others may require advanced assessments, certifications, analytics, integrations and structured learning paths. For organisations with highly specific requirements, a standard off-the-shelf platform may not provide the flexibility they need.
This is where Stratbeans brings its expertise in custom eLearning development and corporate learning technology.
Rather than asking organisations to adapt their training processes to a fixed platform, Stratbeans focuses on understanding the organisation’s learning requirements first and developing or configuring solutions around them.
A Corporate Dedicated LMS Built Around Organisational Needs
Every organisation approaches learning differently.
A growing company may need a straightforward platform to manage employee training, courses and assessments. A large enterprise may need a more comprehensive learning ecosystem supporting multiple departments, user groups, certifications, compliance programmes, reporting and integrations.
There can also be organisations with unique workflows that require capabilities beyond a conventional LMS.
A corporate dedicated LMS can help address these requirements by creating a learning environment that is aligned with the organisation rather than relying entirely on a standardised approach.
Stratbeans works with organisations to understand these requirements and provide learning solutions that can evolve as their workforce and business needs change.
Bytecasting LMS – A Structured Approach to Corporate Learning
For organisations looking for a practical and structured learning environment, Bytecasting LMS provides capabilities for managing digital learning across an organisation.
The platform can support areas such as course management, learner administration, assessments and reporting, giving organisations a centralised environment for managing employee learning.
For companies beginning their digital learning journey or looking to bring existing training programmes onto a dedicated platform, Bytecasting LMS provides a foundation for structured corporate learning.
Bytecasting Evolve – For Growing Learning Requirements
As organisations expand, their learning requirements often become more complex.
Bytecasting Evolve is designed for organisations that need a broader learning environment capable of supporting evolving training requirements. It can help organisations manage learning content, users, assessments, reporting and learner experiences within a more comprehensive framework.
The focus is not only on delivering courses but on creating a learning ecosystem that can grow alongside an organisation’s workforce and business requirements.
ATUM LMS – A More Customised Learning Environment
Not every organisation can work effectively with a conventional LMS structure.
ATUM LMS is designed for organisations looking for greater flexibility and a more tailored approach to their learning environment. Depending on organisational requirements, the platform can be adapted to support specific learning and operational needs.
This approach can be particularly relevant for businesses that have established processes, specialised training structures or requirements that do not fit neatly into a standard LMS model.
Custom eLearning Development for Specific Business Requirements
An LMS is only one part of a corporate learning ecosystem. Organisations may also require customised learning modules, assessments, integrations, workflows, dashboards and other digital learning components.
Through its custom eLearning development capabilities, Stratbeans works with organisations to create learning solutions around their specific requirements.
This approach can include understanding existing learning processes, identifying technology gaps and developing digital learning experiences that align with organisational objectives.
The result is a more flexible approach to corporate learning, where technology can support the way an organisation actually operates.
One Organisation, One Learning Need
There is no universal approach to corporate learning.
A startup, a manufacturing company, a large enterprise and a professional services organisation may all have very different training requirements. Even organisations within the same industry can have different workforce structures, compliance needs, learning processes and technology environments.
That is why the focus of a dedicated corporate LMS platform should not simply be on the number of features available. It should also be on how effectively those features address the organisation’s actual learning requirements.
With Bytecasting LMS, Bytecasting Evolve and ATUM LMS, along with its custom eLearning development capabilities, Stratbeans offers organisations different ways to build and manage digital learning based on their specific requirements.
Whether an organisation is beginning its digital learning journey, expanding an existing employee training program or developing a more customised learning ecosystem, Stratbeans’ approach remains centred on the same principle: build the learning solution around the organisation, rather than forcing the organisation to fit the platform.
Final Thoughts
The eLearning content development landscape in India offers plenty of options, from large learning providers to specialised custom development companies.
The right choice ultimately depends on what you’re trying to achieve. If you’re looking for a partner that combines custom eLearning content development with corporate learning and LMS capabilities, Stratbeans is one company worth exploring.
Because good eLearning isn’t simply about creating an online course. It’s about creating a learning experience that people understand, remember and can actually use at work.
At the end of the day, the goal is simple: create learning that is useful, engaging and built around the people who will actually use it.
Author


Water is one of the most important resources for homes, businesses, industries, and cities. However, managing water efficiently can be difficult when systems depend on manual readings and traditional monitoring methods. Water leaks, high consumption, equipment problems, and unexpected usage can increase costs and lead to water waste.
A smart water management system uses connected devices, sensors, software, and data analytics to monitor and manage water usage more efficiently. With technologies such as IoT device management and IoT gateways, organizations can collect real-time water data and use it to make better decisions.
What Is a Smart Water Management System?
A smart water management system is a technology-based solution that helps monitor, control, and optimize water usage.
It can collect information such as:
- Water consumption
- Flow rate
- Pressure levels
- Tank levels
- Leakage conditions
- Water quality parameters
- Equipment performance
- Usage patterns
Instead of depending only on manual meter readings, smart systems can automatically collect and transmit data. This makes it easier to understand how water is being used and identify problems quickly.
Smart water management can be used in residential buildings, commercial properties, factories, farms, hospitals, hotels, municipalities, and other facilities.
How Does a Smart Water Management System Work?
A smart water management system generally works through a combination of sensors, meters, IoT devices, IoT gateways, communication networks, and cloud or monitoring platforms.
The process can be divided into several simple steps.
1. Water Data Is Collected
Smart meters and sensors are installed at important points in the water network. These devices measure different parameters depending on the requirements of the facility.
For example, a smart water meter can measure the amount of water being consumed. Flow sensors can monitor the movement of water through pipes, while pressure sensors can identify unusual pressure changes.
The collected information provides a clear view of water usage.
2. IoT Devices Send the Data
The sensors and smart meters generate data at regular intervals. IoT devices help collect this information automatically.
This reduces the need for workers to visit every location and record readings manually.
For example, a building can use connected water meters to record the consumption of different floors or units. The data can then be sent to a central monitoring system.
3. IoT Gateway Connects Devices
An IoT gateway plays an important role in connecting field devices with the central platform.
Water sensors and meters may use different communication technologies and protocols. The IoT gateway can collect information from these devices, process it, and send the required data to a cloud or server platform.
The gateway can also help with:
- Device communication
- Data processing
- Protocol conversion
- Local data storage
- Security
- Remote monitoring
This makes the IoT gateway an important part of a connected water management architecture.
4. Data Is Transmitted to a Platform
After the data is collected and processed, it can be transmitted through available communication networks.
Depending on the application, systems may use technologies such as cellular connectivity, Wi-Fi, Ethernet, LoRaWAN, or other communication methods.
The information can then reach a centralized software platform where users can view and analyze water data.
5. Data Is Analyzed
Collecting water data is only one part of smart water management. The data must also be analyzed to identify useful information.
A monitoring platform can help users understand:
- Where water is being consumed
- When consumption is highest
- Whether usage is increasing
- Where unusual flow is occurring
- Whether a possible leak exists
- How different locations compare
- Whether equipment is operating normally
Historical data can also help organizations identify long-term consumption patterns.
Role of IoT Device Management
Managing a large number of connected water devices can become difficult without proper tools. This is where IoT device management becomes important.
IoT device management allows organizations to monitor and manage connected meters, sensors, gateways, and other devices from a central system.
Important functions can include:
Device Monitoring
Organizations can check whether devices are online, offline, or experiencing communication problems.
Remote Configuration
Some connected devices can be configured remotely. This can reduce the need for physical visits.
Software and Firmware Updates
Connected devices may require firmware updates to improve performance, security, or functionality. Centralized management can make these updates easier to handle.
Device Security
IoT device management can support authentication, access control, and other security practices to protect connected infrastructure.
Device Performance
Organizations can monitor device health and identify equipment that may require maintenance or replacement.
As water networks become more connected, effective IoT device management becomes increasingly important.
Why Is an IoT Gateway Important?
An IoT gateway acts as a communication bridge between field devices and backend systems.
In a water management environment, many sensors may be installed across a large area. These devices may generate large amounts of data.
The gateway can collect this information before sending it to the central platform.
Modern gateways can also support edge processing. Instead of sending every piece of raw data to the cloud, some information can be processed locally.
For example, if a sensor detects an unusual flow pattern, the gateway may identify the event and send an alert immediately.
This can help reduce communication delays and unnecessary data transmission.
Smart Water Management for Leak Detection
Water leakage is one of the major challenges faced by buildings, industries, and public water networks.
A smart system can continuously monitor flow and consumption patterns. If water usage changes unexpectedly, the system can generate an alert for further investigation.
For example, if water continues to flow during a period when a building is normally inactive, the system may identify the unusual activity.
Early detection can help organizations investigate possible leaks before they result in significant water loss.
Smart Water Management in Industries
Industries often use water for manufacturing, cooling, cleaning, processing, and other operations.
A smart water management system can help industrial facilities understand where water is being used and how much is being consumed.
Connected monitoring can be applied to:
- Production areas
- Cooling systems
- Water treatment plants
- ETP and STP systems
- Storage tanks
- Process water lines
- Utility areas
This information can support better resource planning and help industries identify opportunities to reduce unnecessary consumption.
Smart Water Management in Buildings
Commercial and residential buildings can also benefit from connected water monitoring.
Smart meters can monitor consumption at different levels, such as individual apartments, floors, or common facilities.
Building managers can use this information to understand usage patterns and investigate unusual consumption.
For large buildings, centralized monitoring can make water management easier and reduce dependence on manual meter readings.
Benefits of a Smart Water Management System
A smart water management system can provide several practical benefits.
Better Visibility
Real-time data gives organizations a clearer understanding of how water is being consumed.
Reduced Water Waste
Unusual consumption and potential leaks can be identified more quickly.
Lower Operational Effort
Automated data collection can reduce repetitive manual meter-reading activities.
Faster Problem Detection
Alerts can help teams identify unusual conditions and investigate them earlier.
Better Decision-Making
Historical and real-time data can support more informed water management decisions.
Improved Resource Efficiency
Organizations can identify inefficient consumption patterns and take corrective action.
Current Trends in Smart Water Management
Smart water management is becoming more connected and data-driven. Several technology trends are shaping the sector.
AI and Data Analytics
Artificial intelligence and advanced analytics can help identify unusual consumption patterns, predict demand, and support better decision-making.
Edge Computing
More processing is moving closer to connected devices. Edge-enabled IoT gateways can analyze selected data locally and respond faster to important events.
Real-Time Monitoring
Organizations are increasingly moving from periodic readings toward continuous monitoring and alerts.
Connected Smart Meters
Smart meters are becoming an important part of digital water infrastructure because they can provide more frequent and automated consumption data.
Cloud-Based Platforms
Cloud platforms can bring data from multiple locations into one centralized system, making it easier to monitor distributed water infrastructure.
Predictive Maintenance
Data from connected equipment can help identify potential performance issues before they become major operational problems.
The Future of Smart Water Management
The future of water management will depend increasingly on connected infrastructure and better use of data.
As more sensors, smart meters, and IoT devices are deployed, organizations will have access to more detailed information about their water networks. Combining this information with IoT device management, IoT gateways, analytics, automation, and AI can create more responsive water management systems.
The goal is not simply to collect more data. The goal is to turn that data into useful actions that improve efficiency, reduce waste, and support sustainable water use.
Conclusion
A smart water management system combines sensors, smart meters, IoT devices, communication networks, IoT gateways, and software platforms to monitor and manage water more effectively.
The system collects water data, transfers it through connected infrastructure, analyzes consumption patterns, and provides useful information for faster decision-making. IoT device management helps organizations maintain and monitor connected devices, while the IoT gateway provides an important link between field devices and central platforms.
From buildings and industries to cities and public infrastructure, smart water technologies can support better visibility, faster problem detection, efficient resource use, and more sustainable water management.
Author



How Trusted Air Duct Cleaners Help Prevent Dangerous Blockages

How to Choose Quality Ayurvedic Herbal Products

Garage Door Repair Las Vegas: Red Flags When Hiring a Contractor

My Simple Snow Ride Turned Into Chaos

Herbal Ingredient Sourcing: From Farm to Formulation

How to Build a Low-Maintenance Balcony Garden

How to Buy Bulk Smoking Accessories for Retail Stores

Amazon Conversion Rate Optimization: 8 Ways to Get More Sales

Top 10 Psychology Conferences 2026 in the USA

Commercial Cabinet Shop Drawings: Key Details for Accurate Fabrication

Cybersecurity Consulting Company SequelNet Provides Critical IT Support Services to Medical Billing Firm, Medical Optimum

Meet the Megalodon: The Shark Star of ‘Meg 2’

Reduce Video Game Lag: Level Up Your Gaming Performance

Balancing India’s Entertainment: Cricket vs. Bollywood

Jetsetter’s Secrets: Unveiling Our Favorite Travel Hacks for a Seamless Adventure

The 5 Best Live Sports Streaming Sites: Legal and Exciting!

Hollywood Labor Unrest: The Impact of ‘What About Us?’ Strikes

Unveiling the Magic of Dream Fulfillment at the Late NBA Draft

Illuminate Your Skin: Dr. Axe Unveils Natural Remedies for Lightening Knees and Elbows

Bright Choices: Navigating the Pros and Cons of Skin Whitening Creams with Dr. Axe
-

 Business3 years ago
Cybersecurity Consulting Company SequelNet Provides Critical IT Support Services to Medical Billing Firm, Medical Optimum
-
Entertainment3 years ago
Meet the Megalodon: The Shark Star of ‘Meg 2’
-
Entertainment3 years ago
Reduce Video Game Lag: Level Up Your Gaming Performance
-
 Sports3 years ago
Balancing India’s Entertainment: Cricket vs. Bollywood
-
Entertainment3 years ago
Jetsetter’s Secrets: Unveiling Our Favorite Travel Hacks for a Seamless Adventure
-
Productivity3 years ago
The 5 Best Live Sports Streaming Sites: Legal and Exciting!
-
Art /Entertainment3 years ago
Hollywood Labor Unrest: The Impact of ‘What About Us?’ Strikes
-
Sports3 years ago
Unveiling the Magic of Dream Fulfillment at the Late NBA Draft