
Home Garden
Garage Door Repair Las Vegas: Red Flags When Hiring a Contractor


A contractor who performs poor repairs may cost you money, time, and even safety. To avoid hiring dishonest contractors, Las Vegas home and business owners must be able to recognize the warning signs of scams. Here are the common red flags to look for and what you should do instead.
Why Contractor Choice Matters
Your garage door has tension springs, cables, and large moving parts that can cause severe injury if incorrectly repaired or serviced. The hot Las Vegas climate puts extra strain on springs, rollers, door seals, and garage door openers.
Red Flag 1: Unusually Low Prices
Some companies offer ultra-low advertised prices (such as a low service fee) to attract customers. Be wary of low initial prices and shop around. While a low price may be legitimate, it is important not to fall victim to bait-and-switch tactics and to ensure that garage door repair Las Vegas
is completed for the quoted price. A trustworthy contractor should be able to provide a detailed, written estimate.
Red Flag 2: Missing License or Insurance
Contractors must be licensed in Nevada. Ask for the license number and verify it with the Nevada State Contractors Board. Ask to see the liability insurance and workers’ compensation insurance. If a contractor refuses to show you the license or insurance, be wary. An uninsured contractor puts you at risk of being responsible for third-party bodily injury or property damage.

Red Flag 3: Pressure to Replace Everything
Many contractors may pressure you into replacing your entire garage door. While in some cases a garage door replacement is the best option to ensure safety and proper functioning, beware of upselling. Always ask the technician to show you the failed garage door part and why it can’t be repaired. Get a second opinion if the garage door contractor recommends replacing the entire door for a minor repair.
Red Flag 4: Unclear Company Identity
Watch out for companies that have no local address or phone number, that advertise under different names, or that the phone operator does not identify the company. Often, lead generation companies offer services but outsource jobs to untrustworthy subcontractors. Always ask to speak with the company representative and research reviews.
Red Flag 5: Vague or Verbal-Only Estimates
A good contractor should be able to provide a detailed, written estimate. A contractor who gives verbal estimates or who writes “repair as needed” on an invoice may be dishonest or inexperienced. Always ask about trip charges, after-hours charges, and what is and is not covered by warranty or guarantee before agreeing to the repairs or paying for the job.
Red Flag 6: Large Upfront Payments or Cash-Only Demands
Some untrustworthy contractors may ask for large deposits on customized parts. While a deposit for custom parts may be acceptable, large payments for an existing repair or replacement could signal a scam. A trustworthy contractor should invoice you for services rendered and honor any dispute resolution processes rather than demanding cash payments.
Red Flag 7: No Warranty on Parts or Labor
A trustworthy contractor will always provide an itemized list of parts, labor, and any other charges and the warranties that apply to each part. Ask about the warranty terms for parts and labor and ask for an explanation of any exclusions or limitations. Be wary of contractors who do not provide a written warranty on parts and labor.
Red Flag 8: Low-Quality Parts
A professional garage door technician will always recommend the best parts available based on your needs and your budget. Cheap rolls, cables, and springs tend to wear out faster in the extreme heat. Ask about the number of cycles on your garage door spring, because higher cycle springs wear out slower and are sturdier. A competent contractor will be able to advise you on the options and their differences.
Red Flag 9: Suspicious Online Reviews
Many scammers use fake testimonials and reviews to attract customers. Always research reviews and look for patterns. If a company receives hundreds of reviews with the same phrasing or within a short time frame, it is often a sign of fake reviews. A trustworthy contractor will have positive reviews from customers who have posted detailed questions and comments.
Red Flag 10: Skipped Safety Checks
A good garage door technician performs a thorough garage door inspection, checking everything from the springs, cables, and rollers to the tracks, hinges, openers, and safety sensors. A contractor who completes a superficial inspection and only checks the obvious is likely to miss important repairs and safety features. Always ask a technician to inspect and test the safety auto-close feature on your garage door after any repair service.
Signs of a Good Contractor
Good contractors are often honest and upfront about their services. They will advise you without pressure and will be transparent about the parts and repairs needed. A good contractor will provide a detailed invoice describing the scope of work and a warranty.
How to Protect Yourself Before You Hire
Always ask whether a contractor is licensed and insured, whether a written estimate is available, what warranties apply, and whether the technician who quoted the work will actually perform the work. Always keep records of all conversations, photographs, and receipts and be wary of signing blank work orders.
To work with a trustworthy, transparent, and safety-conscious contractor, Lift Tech Garage Door Professionals offers honest evaluations and professional repair services for your garage door.
Frequently Asked Questions
How can I tell if a garage door repair company in Las Vegas is real?
Check that they have their Nevada contractor license, provide proof of insurance, and actually have an office and good reviews.
How much does garage door repair cost in Las Vegas?
The cost depends on the specific issue, what parts are needed, and how long the work will take. You should always receive an estimate.
Is it safe to fix a garage door spring on my own?
No. Springs and cables are very tense and need to be worked on by professionals.
Should I replace my garage door or have it repaired?
There are many repair options, but some damage and age could make a replacement necessary. Seek a second opinion on costly suggestions.
What kind of warranty should I expect from garage door repairs?
Good repairers should have a warranty in place on both labor and parts.
Author


A balcony can become much more than an empty outdoor space. With a few well-chosen plants, suitable containers, and a practical care routine, even a small balcony can become a relaxing green corner. You do not need a large garden or hours of free time to enjoy growing herbs, flowers, and leafy plants at home.
The secret is to make thoughtful choices from the beginning. Plants that suit your climate, containers that drain properly, and a sensible watering routine can reduce everyday work. Whether you live in an apartment or have a small patio, these ideas can help you create a balcony garden that looks attractive without becoming another demanding responsibility.
1. Start by Understanding Your Balcony
Before buying plants or pots, spend a little time observing your balcony.
How many hours of direct sunlight does it receive? Does it become windy during the afternoon? Does rain reach the space, or is it mostly sheltered? These details affect which plants will grow well and how much maintenance they will need.
A sunny balcony may be suitable for many herbs and flowering plants. A shaded balcony may be better for plants that tolerate lower light. Some balconies also experience strong reflected heat from nearby walls, which can cause containers to dry out quickly.
Make a simple list of the conditions you notice over several days. This will help you choose plants that suit the space instead of trying to force unsuitable varieties to grow.
2. Choose Plants That Match Your Lifestyle
A low-maintenance garden begins with the right plants. If you have a busy schedule, avoid filling your balcony with varieties that require constant attention unless you genuinely enjoy caring for them.
Consider these options:
- Herbs: Mint, rosemary, thyme, and other suitable herbs can provide fresh ingredients for your kitchen.
- Succulents: Many succulents need relatively little frequent watering when grown in suitable conditions.
- Flowering plants: Choose varieties that match your available sunlight and local climate.
- Leafy plants: Some foliage plants can create a lush appearance without requiring complicated arrangements.
- Compact vegetables: Certain peppers, leafy greens, and cherry tomatoes can grow successfully in suitable containers.
Remember that low maintenance does not mean no maintenance. Every plant needs appropriate light, water, and a growing environment that supports healthy roots.
Start with three or four plants rather than buying too many at once. Once you understand their needs, you can gradually expand your collection.
3. Use Containers That Support Healthy Roots
The right container can prevent several common gardening problems.
Look for pots with drainage holes for plants that require well-drained soil. Without drainage, excess water may collect around the roots and contribute to root damage. At the same time, very small pots may dry out rapidly, especially when the weather is hot.
Container material also matters. Plastic pots tend to retain moisture longer than many unglazed terracotta pots, while terracotta can allow moisture to evaporate through its porous walls. Neither material is automatically better for every plant; the right choice depends on the plant and growing conditions.
Choose a container that provides enough room for the plant’s roots without being unnecessarily large. Also consider the balcony’s weight limits and keep heavy containers securely positioned.
4. Make Watering Easier to Manage
Watering is often the most time-consuming part of container gardening. Pots have limited soil, and their moisture levels can change quickly with temperature, sunlight, and wind.
Instead of watering every plant automatically on a fixed schedule, check the soil and learn how quickly each container dries out. Many plants benefit from thorough watering when needed, followed by a suitable period before the next watering. Succulents and other drought-tolerant plants generally need a different routine from moisture-loving varieties.
If you have several pots or frequently forget to water, a self-watering tool may make your routine more convenient.
For example, SmartiLiving’s terracotta self-watering spikes are designed to release moisture gradually into the surrounding soil. The spike is filled directly with water and inserted into the soil near the plant.
These devices can be useful for suitable container plants, but their performance varies with pot size, soil, temperature, and plant water requirements. Test a device before depending on it during a trip, and continue checking your plants.
5. Choose Soil for the Plants You Grow
Garden soil taken directly from the ground is not always suitable for containers. It can become compacted and may not provide the drainage and airflow that roots need.
A quality potting mix designed for containers is generally a better starting point. Different plants may need different mixtures. Succulents often benefit from a fast-draining mix, while some tropical foliage plants prefer a mix that retains more moisture without becoming waterlogged.
Do not assume that adding extra fertilizer will solve every growth problem. Poor drainage, unsuitable light, and incorrect watering can all affect plant health.
When a plant struggles, check its growing conditions before adding more products. Small adjustments often make a bigger difference than buying additional supplies.
6. Arrange Plants to Save Time and Space
A well-organized balcony is easier to maintain than a crowded one.
Place plants with similar sunlight and watering needs near one another. This makes daily checks quicker and helps you avoid treating every container as if it were identical.
Use vertical space where practical. Shelves, sturdy plant stands, and suitable hanging containers can help you grow more plants without filling the entire floor. Make sure these structures are stable and safe, particularly in windy conditions.
Keep frequently used herbs within easy reach if you plan to cook with them. Place plants that need closer observation where you can inspect their leaves and soil without moving several pots.
Leave enough room to walk comfortably and water each plant. A garden that is easy to access is more likely to receive regular attention.
7. Create a Simple Weekly Care Routine
You do not need to spend hours every day looking after your balcony garden. A short, regular inspection can help you catch problems early.
During your weekly check:
- Look for yellowing leaves, pests, or damaged stems.
- Check soil moisture rather than relying only on the calendar.
- Remove dead leaves and spent flowers when appropriate.
- Make sure containers drain properly.
- Check whether plants have outgrown their pots.
- Adjust plant positions if their light conditions have changed.
Some tasks may need to be completed more frequently during hot weather. Others, such as repotting, are only needed occasionally.
The aim is to build a flexible routine that fits your plants and your schedule.
8. Prepare Your Garden Before Traveling
A short holiday does not have to mean abandoning your plants, but preparation matters.
Check each container before leaving and water plants that need it. Move suitable plants away from excessive heat if doing so will not deprive them of necessary light. For plants with higher moisture needs, consider a suitable self-watering solution or ask someone to check them while you are away.
Avoid assuming that every plant can survive for the same number of days without attention. A small pot in hot, windy conditions may dry much faster than a larger container in a sheltered location.
If you are planning a longer trip, test your watering setup beforehand and arrange additional care for plants that need it.
A Balcony Garden Should Fit Your Life
A successful balcony garden is not measured by how many plants you own. It is measured by how well your plants grow and how comfortably you can care for them.
Begin with a few suitable varieties, choose containers with appropriate drainage, and learn how your growing conditions affect soil moisture. Organize plants according to their needs and use practical tools when they genuinely make care easier.
With a little planning, even a small balcony can become a green space that brings color, fresh herbs, and a sense of calm to everyday life. The best garden is one you can enjoy without feeling overwhelmed by its upkeep.
For more business insights and retail industry resources, visit Contrank, where readers can explore additional online content and information.
Author



Repainting your home can completely change its appearance. Although choosing a new color may seem simple, the decision deserves careful thought. Your home’s exterior covers a large visual area. It also needs to work with the roof, windows, doors, landscaping, driveway, and other permanent features.
For that reason, choosing Exterior Paint should involve more than picking a color you like in a store. The right shade can improve curb appeal and create a welcoming appearance. With a little planning, you can select a color that looks attractive today and continues to suit your home for years.
Start With Features You Cannot Change
Before comparing colors, take a close look at the features that will remain in place. Your roof, brickwork, stone, windows, driveway, and other permanent materials already contribute colors and undertones to the property.
These elements should guide your color selection. For example, a roof with warm brown or red tones may pair naturally with warm beige, cream, or muted green. On the other hand, a cool gray roof may work better with crisp white, blue-gray, or other cooler shades.
Instead of trying to make every feature match, aim for a balanced combination. Complementary colors usually create a more natural and polished appearance.
Consider Your Home’s Architectural Style
The design of your house can also help narrow your choices. Traditional properties often look attractive with classic neutrals, soft earth tones, or understated color combinations. Modern homes, however, can handle stronger contrasts, deeper shades, and bolder accents.
Architectural details also offer opportunities to introduce another color. Shutters, columns, trim, garage doors, and entry doors can add visual interest without making the entire exterior look busy.
You do not need several colors to create an impressive result. In many cases, one well-chosen main shade with a complementary trim color can deliver a clean and sophisticated look.
Always Test Colors Outdoors
A paint sample can look completely different outside than it does inside a store. Natural sunlight changes throughout the day. Nearby trees, buildings, pavement, and landscaping can also affect how you perceive a color.
Therefore, test several shades directly on your home’s exterior before making your final choice. Paint large sample sections rather than relying on tiny color cards. Check each sample in the morning, afternoon, and evening.
Cloudy weather can also change the appearance of a shade. Give yourself enough time to see how each option behaves under different lighting conditions.

Match the Product to the Surface
Color matters, but performance matters just as much. Different exterior materials can require different preparation methods and coating products. Wood siding, masonry, metal, fiber cement, and previously painted surfaces each have different characteristics.
Before choosing Exterior Paint, inspect the condition of the surface. Look for peeling areas, cracks, stains, mildew, or signs of moisture. Proper cleaning and preparation can help the new coating adhere properly and produce a more even finish.
A beautiful color will not deliver a good result if the product does not suit the surface. Always consider durability, weather exposure, and the manufacturer’s recommendations.
Choose the Right Finish
The finish can change the way your home’s exterior looks. Lower-sheen options can create a softer appearance and may help reduce the visual emphasis on minor surface imperfections. More reflective finishes can highlight certain architectural details.
You can also use different finishes to create subtle contrast. For instance, the main siding can have a softer finish while doors or trim use a slightly different sheen.
However, appearance should not guide the decision alone. Think about the surface, weather exposure, cleaning requirements, and overall maintenance needs before selecting a finish.
Look at Your Landscaping
Your home does not stand alone. Trees, shrubs, flower beds, fences, stone paths, and other outdoor features all influence its appearance.
Consider these elements when choosing Exterior Paint. Natural shades such as muted greens, warm grays, beige, and earthy neutrals can blend smoothly with many landscapes. Bolder colors can create more contrast and draw attention to the property.
Also, think about every season. A color that looks excellent against bright summer greenery should still work when leaves change or disappear during colder months.
Think About Long-Term Maintenance
A fresh coat can improve your home’s appearance, but regular care helps maintain that result. Inspect painted surfaces from time to time. Watch for dirt, mildew, fading, cracking, peeling, and moisture damage.
Address minor issues early. Small repairs often require less time and effort than major restoration later.
You should also keep gutters, downspouts, and drainage areas clear. Good water management can reduce unnecessary moisture exposure and help protect painted surfaces.
Create a Color Scheme That Feels Balanced
Once you understand your home’s existing features, start building a simple color scheme. Choose a dominant shade for the largest exterior areas. Then select a complementary color for trim and consider an accent shade for the front door or shutters.
Keep the overall palette consistent. Too many competing colors can make the property look cluttered. Meanwhile, a carefully coordinated combination can highlight the home’s best features without overwhelming them.
Think about where you want attention to go. A darker front door can draw the eye toward the entrance. A lighter trim color can emphasize windows and architectural details. Small adjustments can make a noticeable difference.
Consider the Surrounding Neighborhood
Your home’s surroundings can also influence your decision. Take a look at nearby houses and consider the overall character of the neighborhood. You do not need to copy other properties, but your choice should feel appropriate for the setting.
If surrounding homes use mostly neutral colors, a bold shade can make your property stand out. However, a softer variation may create a more harmonious appearance. In historic or traditional neighborhoods, local character may also influence which colors feel most suitable.
Think About the Overall Mood
Another important factor is the feeling you want your home to create. Soft, neutral shades can give the property a calm and timeless appearance. Deeper colors can add character and make architectural details stand out. Meanwhile, warm tones can create a welcoming and comfortable impression. Consider how you want the home to feel when you approach it from the street. Then choose a shade that supports that atmosphere while still working with the existing features of the property.
Final Thoughts
Choosing the right Exterior Paint involves more than following a trend or selecting a favorite shade. Your home’s architecture, roof, existing materials, landscaping, lighting, and maintenance needs all play an important role.
Start by studying the features you already have. Then test several colors outdoors and observe them under different lighting conditions. Keep your palette simple, choose products that suit your surfaces, and consider how the color will look throughout the year.
Most importantly, take your time before making the final decision. A thoughtful color choice can refresh your home’s appearance, improve curb appeal, and create a polished look that you can enjoy for many years.
Author


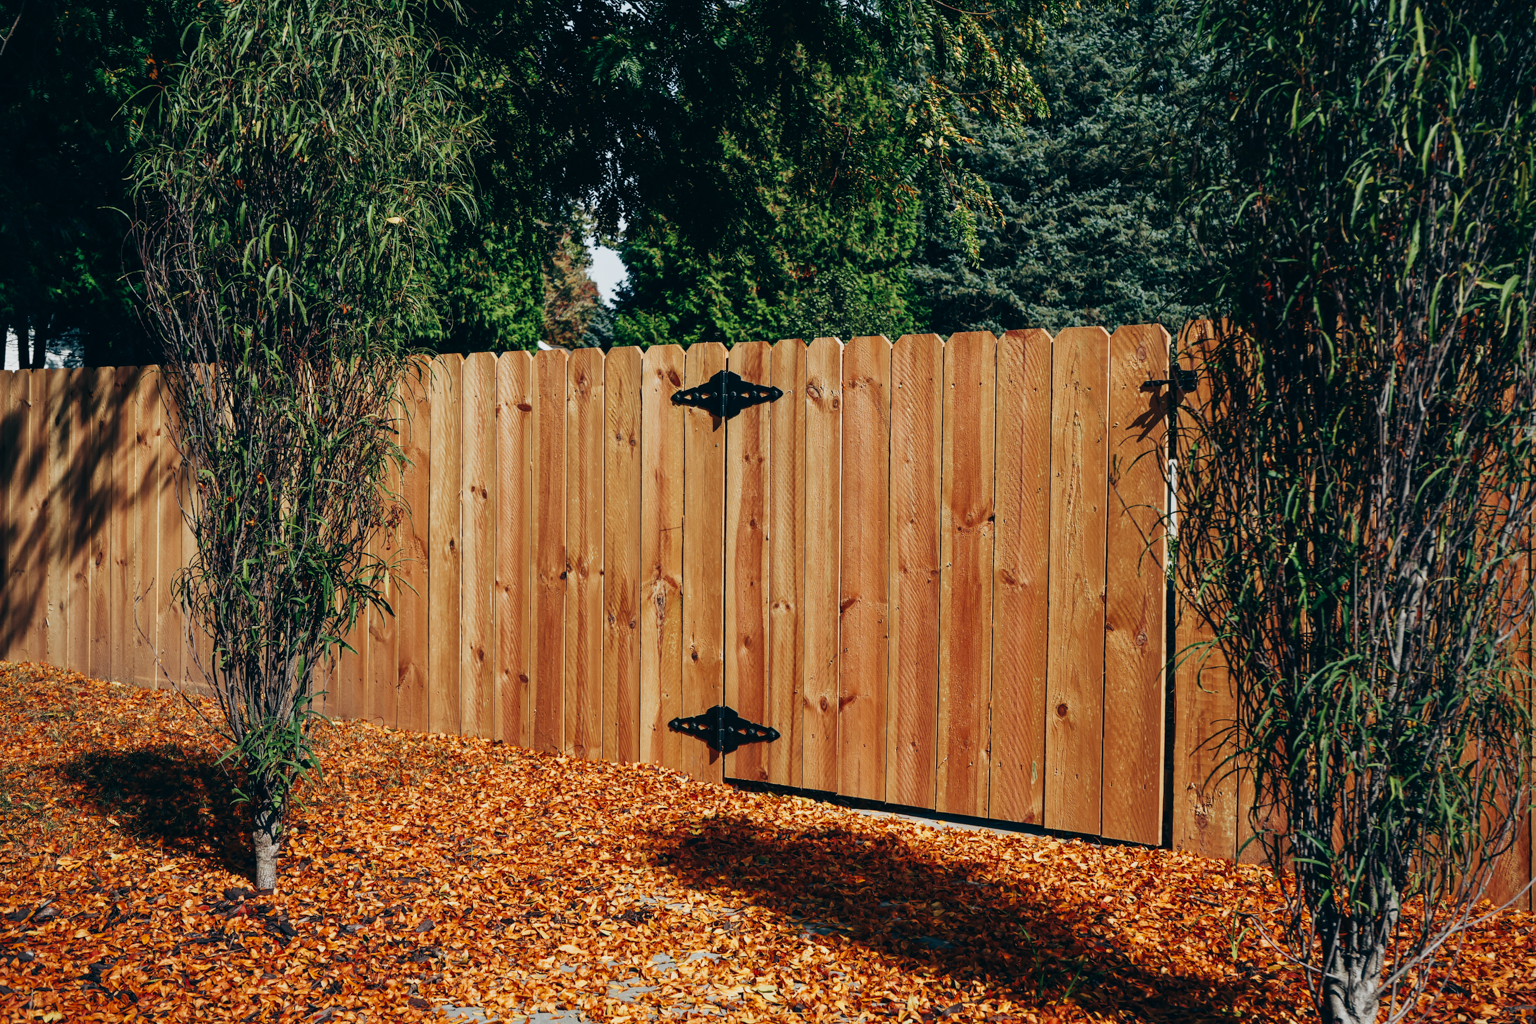
Outdoor fences face changing weather throughout the year. Sunlight, rain, snow, wind, and temperature changes can slowly affect the wood. Over time, these conditions can make a fence look older and weaker.
A Wood fence may first show small signs of wear. The color can fade. The surface may become rough. You may also notice small cracks, loose boards, or areas that look different from the rest of the fence.
Regular care can help property owners notice these changes early. It can also make future maintenance easier. However, staining should not become a substitute for necessary repairs. Damaged or rotten wood needs attention before any new finish goes on the surface.
How Weather Affects Wood
Weather plays a major role in the condition of a fence. Direct sunlight can dry the outer surface and gradually fade its natural color. A fence that receives strong sunlight for most of the day may show these changes sooner than one that stays partly shaded.
Moisture creates another challenge. Rain can soak into exposed wood, while repeated drying can cause the material to expand and contract. This ongoing cycle may eventually contribute to cracks and surface damage.
Snow and ice can add more moisture during winter. Strong winds can also place pressure on boards and posts. Therefore, checking the fence after major seasonal changes can help identify problems before they become more serious.
Why Fence Color Changes
Natural wood does not keep the same appearance forever. Sunlight can make the surface look lighter. Dirt, moisture, and plant growth can also affect its color.
Different sections of the same fence may age at different rates. For example, a section under a tree may receive less sunlight than one in an open area. As a result, the two sections can develop noticeably different shades.
Staining can help create a more consistent appearance when the wood remains in suitable condition. Before choosing a stain, consider the wood type, existing color, and desired finish. Testing the product on a small hidden area can also help you see how the final color may look.
Why Cleaning Matters Before Staining
Proper preparation can make a major difference in a staining project. Dirt, dust, algae, and other buildup can prevent the product from reaching the wood evenly. Cleaning removes this material and gives the surface a better starting point.
However, cleaning requires care. Excessive pressure can damage softer wood. Harsh products can also affect the surface. Choose a cleaning approach that matches the condition of the fence.
After cleaning, allow the wood to dry completely. Applying stain while the surface still holds too much moisture can affect absorption and drying.
Cleaning can also reveal hidden problems. Once dirt disappears, you may find cracks, loose boards, damaged posts, or areas of rot. Repair these issues before moving ahead with staining.
What to Inspect Before Starting
Begin with a complete inspection. Check every board, post, gate, and connection point. Look for cracks, loose fasteners, broken sections, and signs of rot.
Pay special attention to areas close to the ground. Moisture can remain around these sections for longer periods. That makes them more vulnerable to deterioration.
Old finishes also deserve attention. If an existing coating has started to peel or loosen, remove the affected material before applying a new product.
Also consider the area around the fence. Cover or move outdoor furniture when necessary. Protect nearby plants, walkways, and walls from cleaning products or stain.
Finally, check the weather forecast. Rain shortly after application can interfere with drying. Very hot or sunny conditions may also change how quickly a product dries.
Planning a Staining Project
A successful project follows a logical order. Start with an inspection. Then complete necessary repairs, clean the surface, allow enough drying time, and prepare the wood for staining.
Once the surface is ready, apply the selected product according to its instructions. Avoid rushing through the process. Working in manageable sections can make it easier to maintain an even finish.
Keep application tools clean as you work. Dirty brushes or other equipment can affect the final appearance. You should also measure the fence area before purchasing stain. Product labels usually provide coverage information, which can help you estimate how much material you need.
For larger properties, professional Fence Staining Services in Brampton can make the process more manageable. A professional team can handle preparation and application while helping property owners avoid common mistakes.

Stain or Paint: Which One Works Better?
Stain and paint provide different types of finishes. Paint generally creates a more solid surface and can cover much of the natural wood grain. Stain usually allows more of that grain to remain visible, depending on the product.
The right choice depends on the appearance you want and the condition of the wood. Some homeowners prefer a natural look, while others want stronger color coverage.
Do not choose a product based only on its color. Review its intended use, coverage, drying requirements, and application instructions. Make sure it suits the type of wood on your fence.
Keeping a Fence in Good Shape
Fence maintenance should continue after staining. Inspect the fence throughout the year and watch for fading, cracks, loose boards, and moisture-related damage.
Keep leaves, soil, and excessive plant growth away from the wood. Good airflow can help the surface dry after rain. Also inspect gates because repeated movement can place additional stress on hinges and nearby boards.
Deal with minor problems as soon as you notice them. Fixing a loose board early can prevent additional movement or damage. Likewise, addressing moisture problems quickly can help protect nearby sections.
When Professional Help Makes Sense
Some projects require more time, equipment, and preparation than homeowners expect. A long fence can take many hours to clean and prepare properly.
Professional assistance can prove useful when the wood needs extensive preparation or when you do not have the right tools. Before hiring a company, ask what the service includes. Discuss cleaning, preparation, repairs, stain selection, application, and cleanup.
Clear communication can help you understand the work before the project begins. It also gives you a better idea of the expected timeline.
How Pro Renewal Services INC Can Help
Pro Renewal Services INC offers fence care support for property owners in Brampton. The team can help assess the condition of the wood and determine what preparation the project requires.
For homeowners looking for Fence Staining Services in Brampton, proper preparation should remain a key part of the process. Cleaning, checking for damage, and preparing the surface can all contribute to a better result.
Property owners can discuss their fence condition, preferred finish, and maintenance needs before starting. Professional support can also save time for people who would rather leave the preparation and staining process to an experienced team.
Final Thoughts
Wood fences face constant exposure to outdoor conditions. Sun, rain, snow, wind, and changing temperatures can gradually affect their appearance and condition.
Good maintenance starts with regular inspections. Clean the surface, when necessary, repair damaged sections, and let the wood dry properly before applying a new finish.
Professional Fence Staining Services in Brampton can provide another option for homeowners who want help with preparation and staining. With consistent care and timely repairs, a fence can maintain a cleaner appearance and remain part of the property’s outdoor space for years.
Pro Renewal Services INC can help property owners understand their fence care needs and plan the appropriate staining work. A thoughtful maintenance routine can make fence care more straightforward and help prevent small issues from becoming larger problems.
Author



How Trusted Air Duct Cleaners Help Prevent Dangerous Blockages

How to Choose Quality Ayurvedic Herbal Products

Garage Door Repair Las Vegas: Red Flags When Hiring a Contractor

My Simple Snow Ride Turned Into Chaos

Herbal Ingredient Sourcing: From Farm to Formulation

How to Build a Low-Maintenance Balcony Garden

How to Buy Bulk Smoking Accessories for Retail Stores

Amazon Conversion Rate Optimization: 8 Ways to Get More Sales

Top 10 Psychology Conferences 2026 in the USA

Commercial Cabinet Shop Drawings: Key Details for Accurate Fabrication

Cybersecurity Consulting Company SequelNet Provides Critical IT Support Services to Medical Billing Firm, Medical Optimum

Meet the Megalodon: The Shark Star of ‘Meg 2’

Reduce Video Game Lag: Level Up Your Gaming Performance

Balancing India’s Entertainment: Cricket vs. Bollywood

Jetsetter’s Secrets: Unveiling Our Favorite Travel Hacks for a Seamless Adventure

The 5 Best Live Sports Streaming Sites: Legal and Exciting!

Hollywood Labor Unrest: The Impact of ‘What About Us?’ Strikes

Unveiling the Magic of Dream Fulfillment at the Late NBA Draft

Illuminate Your Skin: Dr. Axe Unveils Natural Remedies for Lightening Knees and Elbows

Bright Choices: Navigating the Pros and Cons of Skin Whitening Creams with Dr. Axe
-

 Business3 years ago
Cybersecurity Consulting Company SequelNet Provides Critical IT Support Services to Medical Billing Firm, Medical Optimum
-
Entertainment3 years ago
Meet the Megalodon: The Shark Star of ‘Meg 2’
-
Entertainment3 years ago
Reduce Video Game Lag: Level Up Your Gaming Performance
-
 Sports3 years ago
Balancing India’s Entertainment: Cricket vs. Bollywood
-
Entertainment3 years ago
Jetsetter’s Secrets: Unveiling Our Favorite Travel Hacks for a Seamless Adventure
-
Productivity3 years ago
The 5 Best Live Sports Streaming Sites: Legal and Exciting!
-
Art /Entertainment3 years ago
Hollywood Labor Unrest: The Impact of ‘What About Us?’ Strikes
-
Sports3 years ago
Unveiling the Magic of Dream Fulfillment at the Late NBA Draft