
Beauty Fitness
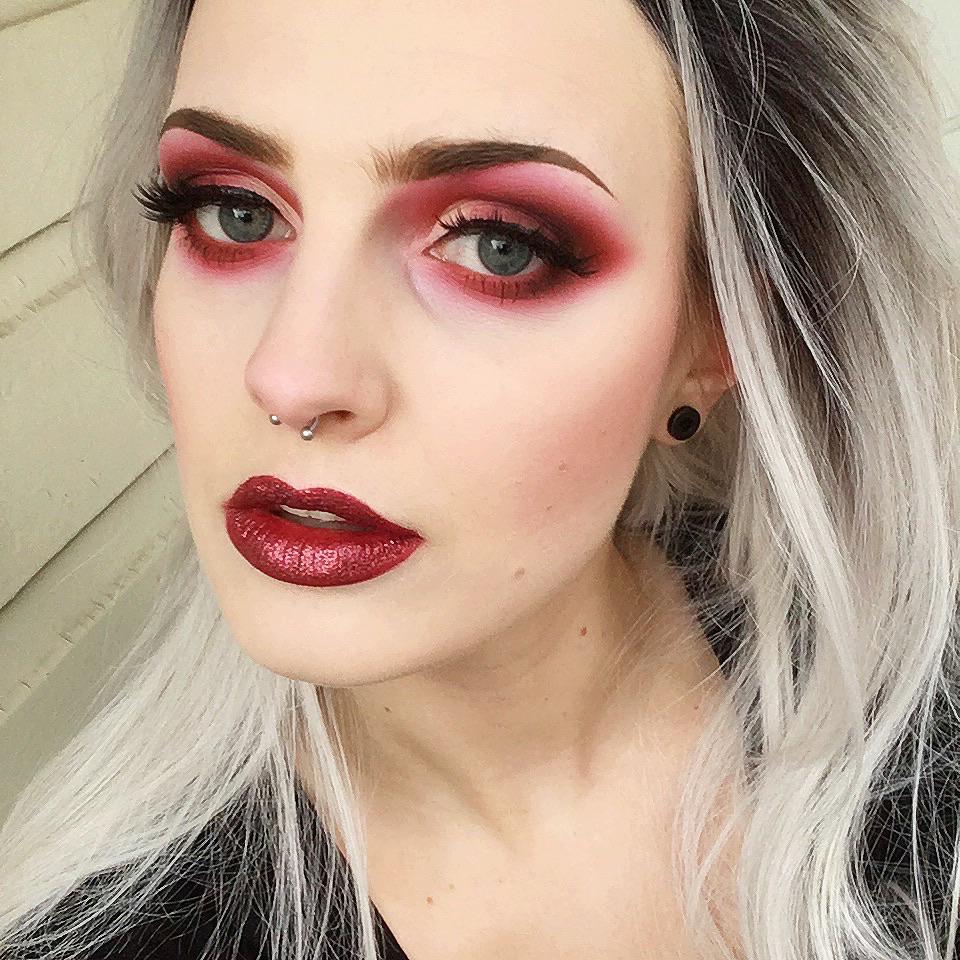
From Cork to Contour: Red Wine Makeup Wizardry
Introduction:
Meet the Maestro of Makeup, Mario Dedivanovic
Renowned for his transformative makeup skills, Mario Dedivanovic, the creative genius behind the dazzling looks of Hollywood’s elite, takes us on a captivating journey into the world of wine-inspired makeup. With over two decades of experience in the industry, Mario is the go-to makeup artist for celebrities who want to look red carpet-ready. In this exclusive article, he shares his expert insights on achieving the perfect wine-themed makeup look, a style that’s taken the beauty world by storm.
The Art of Wine-Inspired Makeup
Understanding the Allure of Wine-Inspired Beauty
Wine, with its rich, complex tones, has been a timeless source of inspiration for artists and connoisseurs alike. The world of makeup is no exception. Mario Dedivanovic introduces us to the captivating world of wine-inspired beauty, explaining how this style combines the elegance and depth of fine wines with the artistry of makeup. The connection between these two realms is more profound than one might initially think.
Wine carries with it a sense of sophistication and luxury. The deep reds and purples, reminiscent of a fine Merlot or a robust Cabernet Sauvignon, provide a stunning palette for makeup artists to work with. It’s a fusion of sensuality and art, and Mario Dedivanovic has been at the forefront of this exciting trend.

While many makeup trends come and go, wine-inspired makeup continues to captivate beauty enthusiasts. There’s something undeniably alluring about emulating the depth and richness of wine in your makeup routine. Whether you’re attending a glamorous event or simply want to feel your most confident, wine-themed makeup has the power to transform your look.
Setting the Foundation: A Flawless Canvas
Prepping Your Skin for the Wine-Inspired Look
Before you can dive into the enchanting world of wine-inspired makeup, it’s essential to create a flawless canvas. After all, a beautiful painting needs a perfect backdrop. Mario Dedivanovic emphasizes the importance of skincare as the foundation for your makeup. Well-moisturized and healthy skin provides the best base for any makeup style.
Start by cleansing your skin with a gentle yet effective cleanser to remove impurities. Follow with a hydrating toner and a lightweight, non-comedogenic moisturizer. Properly moisturized skin ensures that your makeup goes on smoothly and evenly. Remember, makeup should enhance your natural beauty, not hide it.
Next, select the right foundation and concealer. For wine-inspired makeup, it’s essential to choose products that offer full coverage without feeling heavy on the skin. Matte foundations work well for this style as they create a polished, velvety finish. Blend your foundation seamlessly to create a flawless complexion that serves as the canvas for your wine-themed masterpiece.

Image by: https://www.india.com/lifestyle/makeup-tips-how-to-apply-blush-in-3-different-ways-watch-video-1751674/
Eyes That Sparkle Like Fine Wine
Tips for Sultry Wine-Colored Eyeshadows
Your eyes are the windows to your soul, and in wine-inspired makeup, they take center stage. Mario Dedivanovic’s expertise in creating mesmerizing eye looks has graced the faces of countless celebrities. To capture the essence of fine wine in your eye makeup, consider these tips:
- Choosing the Right Shades: Wine-inspired eye looks often feature deep reds, purples, and earthy tones. Mario suggests starting with a wine-colored eyeshadow palette that includes both matte and shimmer shades.
- Blending is Key: The key to achieving a sultry, wine-themed eye look is proper blending. Use a blending brush to seamlessly blend the eyeshadows, creating a gradient effect that mirrors the transition of colors in a glass of wine.
- Highlight the Inner Corners: To make your eyes pop, apply a touch of shimmering eyeshadow to the inner corners of your eyes. This mimics the sparkle of a fine wine.
- Mascara and False Lashes: Finish your eye look with mascara to emphasize your lashes. If you desire an even more dramatic effect, false lashes can add depth and intensity to your wine-inspired gaze.
Creating wine-themed eye looks is a skill that takes practice, but the results are worth the effort. It’s a style that exudes sensuality and mystery, making it perfect for special occasions or when you want to make a statement.
Sip, Swirl, and Contour: Sculpted Cheekbones
Mastering the Art of Contouring with Wine Shades
Contouring is a transformative makeup technique that allows you to enhance your facial features. With wine-inspired makeup, this art becomes even more captivating. Mario Dedivanovic suggests using wine shades for contouring to achieve a sculpted, alluring look.
Here are some steps to master the art of contouring with wine shades:
- Selecting the Right Shade: Choose a matte wine-colored powder or cream product that’s a few shades darker than your natural skin tone. This will create depth and dimension on your face.
- The Cheekbones: Apply the wine contour shade just below your cheekbones. Blend it upwards to create shadow and emphasize your bone structure.
- Nose Contour: For a refined look, use a smaller brush to contour the sides of your nose with the same wine shade. This adds definition and makes your nose appear slimmer.
- Jawline and Forehead: Extend the contouring to your jawline and hairline, blending it well. This step creates an overall sculpted effect.
By using wine shades for contouring, you not only achieve a stunning makeup look but also celebrate the beauty and richness of wine. It’s a technique that accentuates your natural features and adds a touch of allure to your appearance.
Luscious Lips: The Bold Finale
Achieving Statement Wine-Colored Lips
No wine-inspired look is complete without bold, wine-colored lips. Mario Dedivanovic shares his tips for achieving lips that make a statement:
- Lip Preparation: Start by exfoliating your lips and applying a hydrating lip balm. Smooth, well-hydrated lips are essential for a flawless lip color application.
- Lip Liner: Use a wine-colored lip liner to define your lips’ shape. This not only prevents your lip color from feathering but also adds precision to your lip look.
- Lipstick Application: Choose a rich, wine-colored lipstick and apply it evenly to your lips. For a more long-lasting result, blot your lips with a tissue and reapply the lipstick.
- Optional Gloss: If you prefer a glossy finish, you can add a clear or wine-colored lip gloss for extra shine.
With wine-colored lips, you’ll be the epitome of sophistication and glamour. This bold finale completes your wine-inspired makeup look, making it truly unforgettable.
The Perfect Pairing: Outfits and Wine-Inspired Makeup
Coordinating Your Makeup with Your Attire
To truly stand out, your makeup should complement your outfit. Mario Dedivanovic emphasizes the importance of coordinating your wine-inspired makeup with your attire. The result is a harmonious and visually appealing look that exudes confidence.
Coordinating Your Makeup with Attire:
- Wine Tones: If you’re wearing an outfit in wine, burgundy, or deep red tones, your wine-inspired makeup can follow the same color palette. This monochromatic look is elegant and striking.
- Contrasting Colors: For outfits in neutral shades or other colors, wine-inspired makeup adds a pop of drama and sophistication. The contrast between your makeup and attire creates a visually stunning effect.
- Occasions: Wine-themed makeup is versatile. It’s suitable for a variety of occasions, from formal events to date nights. Consider the event’s dress code and your personal style when deciding how to pair your makeup with your outfit.
In conclusion, Mario Dedivanovic’s wine-inspired makeup wizardry brings a touch of elegance and allure to your beauty routine. Whether you’re a makeup enthusiast or a professional artist, this article offers you a chance to explore the captivating world of wine-inspired beauty. So, uncork your creativity and let your inner makeup artist shine with Mario’s expert tips and techniques. Cheers to the art of wine-inspired makeup!
Author

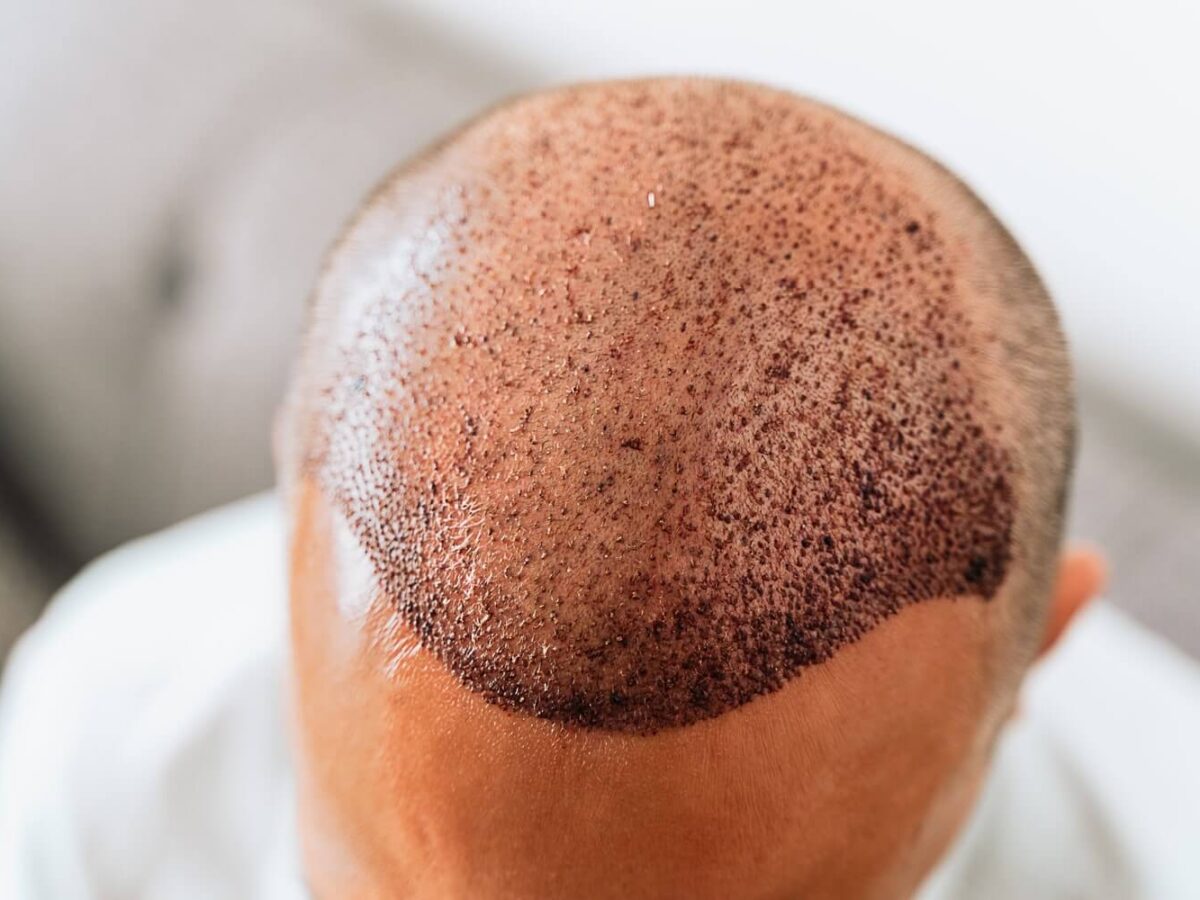
Hair loss is a growing concern among men and women in Pakistan, affecting confidence, appearance, and overall self-esteem. Whether caused by genetics, hormonal imbalance, stress, or medical conditions, hair thinning and baldness can be frustrating. At JJ Aesthetics, we provide advanced and reliable hair transplant solutions to help you achieve natural, long-lasting results.
If you are searching for the best hair transplant clinic in Pakistan, JJ Aesthetics offers a perfect combination of expertise, modern technology, and patient-focused care.
Why Choose JJ Aesthetics for Hair Transplant?
Choosing the right clinic plays a crucial role in the success of your hair restoration journey. At JJ Aesthetics, we are committed to delivering exceptional results through customized treatment plans and advanced techniques.
Here’s why patients trust us:
- Highly experienced hair transplant specialists
- Advanced FUE and FUT techniques
- Modern equipment and sterile environment
- Natural hairline design for realistic results
- Affordable packages tailored to your needs
- High patient satisfaction rate
We understand that every patient is different, which is why we offer personalized consultations to ensure the best outcomes.
What is a Hair Transplant?
A hair transplant is a minimally invasive cosmetic procedure that involves transferring healthy hair follicles from a donor area (usually the back or sides of the scalp) to areas affected by hair loss.
This procedure is considered one of the most effective and permanent solutions for:
- Receding hairline
- Bald patches
- Thinning hair
- Male and female pattern baldness
At JJ Aesthetics, we ensure that each transplant is performed with precision to deliver natural density and long-lasting growth.
Advanced Hair Transplant Techniques at JJ Aesthetics
We offer two of the most popular and effective hair transplant techniques:
FUE (Follicular Unit Extraction)
FUE is a modern and widely preferred technique in which individual hair follicles are extracted and implanted into the target area.
Benefits of FUE:
- No visible linear scars
- Faster healing and recovery
- Minimal discomfort
- Natural-looking hair growth
This method is ideal for patients who want a less invasive procedure with quicker downtime.
FUT (Follicular Unit Transplantation)
FUT involves removing a small strip of scalp from the donor area and extracting hair follicles from it for transplantation.
Benefits of FUT:
- Suitable for advanced hair loss
- Higher graft yield in a single session
- More cost-effective
Our experts will recommend the best technique based on your hair condition, scalp health, and expectations.
Who is an Ideal Candidate for Hair Transplant?
You may be a good candidate for a hair transplant at JJ Aesthetics if:
- You are experiencing gradual hair thinning or baldness
- You have a stable donor area with healthy hair
- You are in good general health
- You have realistic expectations about results
During your consultation, our specialists will evaluate your scalp and guide you toward the most suitable treatment plan.
Hair Transplant Procedure – Step by Step
At JJ Aesthetics, we follow a structured and patient-friendly approach to ensure safety and comfort:
- Initial Consultation & Hair Analysis
- Customized Hairline Design
- Extraction of Hair Follicles
- Precise Implantation in Bald Areas
- Post-Procedure Care & Follow-Up
Recovery and Results
One of the main advantages of choosing JJ Aesthetics is the natural and permanent results we deliver.
- Mild swelling or redness may occur for a few days
- Transplanted hair may shed within 2–3 weeks (normal process)
- New hair growth starts within 3–4 months
- Full results are visible in 8–12 months
Our experts provide complete aftercare instructions to maximize your results and ensure proper healing.
Benefits of Hair Transplant at JJ Aesthetics
Hair transplant is more than just a cosmetic procedure—it’s a life-changing solution. Here are some key benefits:
- Permanent and natural-looking results
- Improved hair density and volume
- Boost in confidence and self-esteem
- Low maintenance compared to temporary treatments
- Safe and minimally invasive procedure
Unlike temporary solutions like medications or hair products, a hair transplant provides a long-term solution to hair loss.
Affordable Hair Transplant in Pakistan
Cost is one of the biggest concerns for patients considering a hair transplant. At JJ Aesthetics, we offer affordable hair transplant packages without compromising on quality.
The cost depends on several factors:
- Number of grafts required
- Type of procedure (FUE or FUT)
- Extent of hair loss
We believe in transparent pricing and provide detailed consultations to help you understand your treatment plan and cost.
Why JJ Aesthetics is the Best Hair Transplant Clinic in Pakistan
JJ Aesthetics has earned a reputation for excellence in hair restoration by combining advanced techniques with patient-centered care. Our focus on quality, safety, and natural results makes us a trusted choice for individuals seeking effective hair loss solutions.
We are dedicated to helping you achieve the best version of yourself with confidence and satisfaction.
Book Your Consultation Today
If you are tired of dealing with hair loss and want a permanent solution, JJ Aesthetics is here to help. Our expert team is ready to guide you through every step of your hair restoration journey.
Author
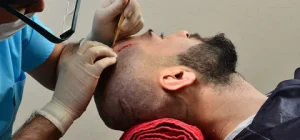
Facial hair plays a vital role in defining your personality. Many men in Pakistan struggle with patchy or sparse beard growth. Beard Hair Transplant in Islamabad offers a permanent solution for those looking to achieve a fuller and natural-looking beard. The procedure is safe, effective, and tailored to individual hair growth patterns.
Understanding Beard Hair Transplant
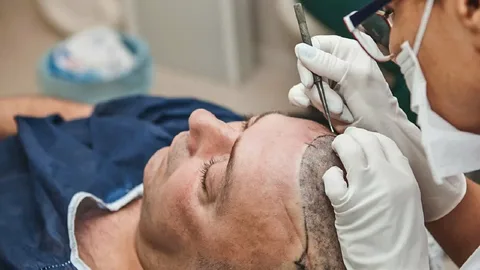
Beard Hair Transplant in Islamabad involves transferring hair follicles from a donor area, usually the scalp, to the beard region. This process ensures natural hair growth and long-lasting results. Experts carefully design the beard shape according to the face structure. It is a minimally invasive procedure, allowing quick recovery and minimal discomfort.
Benefits of Beard Hair Transplant in Islamabad
-
Achieve a fuller and denser beard naturally
-
Correct patchy or uneven beard growth
-
Boost confidence and enhance facial aesthetics
-
Permanent results with proper care
-
Minimal downtime and fast recovery
This treatment is not just about appearance; it improves self-esteem. The results appear gradually, making the beard look completely natural. Choosing an experienced specialist in Islamabad ensures high success rates and safe procedures.
Natural Ways to Support Beard Growth
Growing a healthy and full beard is a goal for many men, but genetics, diet, and lifestyle play major roles. There are several natural ways to support beard growth and improve the thickness and strength of your facial hair.
A balanced diet rich in protein, vitamins, and minerals is essential for healthy hair follicles. Foods like eggs, nuts, fish, and leafy vegetables provide the nutrients needed for optimal beard growth. Staying hydrated also helps maintain hair strength and prevents dryness.
Regular facial massages can stimulate blood circulation to the hair follicles, encouraging new growth. Massaging with natural oils, such as jojoba or coconut oil, nourishes the skin and improves follicle health. Proper skincare is equally important. Keeping the face clean, exfoliating regularly, and moisturizing prevents clogged pores and supports healthy hair growth.
Lifestyle factors significantly impact beard development. Getting enough sleep, reducing stress, and avoiding smoking can improve hormone levels that influence hair growth. Patience is key, as beard hair grows slowly and unevenly at first.
Combining these natural methods with professional treatments, such as a Beard Hair Transplant in Islamabad, can maximize results. Supporting your beard naturally ensures stronger, healthier, and more attractive facial hair over time.
Recovery After Beard Hair Transplant
Recovery after a Beard Hair Transplant in Islamabad is a straightforward process, but following proper care instructions is essential for the best results. Immediately after the procedure, patients may experience mild redness, swelling, or tiny scabs in the transplanted area. These are normal and usually fade within a week. Avoid touching or scratching the transplanted hair to prevent infections and ensure proper healing.
During the first few days, it is recommended to keep the face clean and gently wash it using mild, antiseptic solutions as advised by your doctor. Avoid direct sunlight or excessive heat to protect the sensitive skin. Shaving should be avoided for at least two weeks, allowing the follicles to settle naturally.
Most patients notice initial hair shedding within 2 to 3 weeks, which is part of the normal growth cycle. New hair starts to grow gradually, and visible results appear in about 3 to 4 months. By 6 to 12 months, the beard achieves full density and natural appearance. Maintaining a healthy lifestyle, including proper diet, hydration, and avoiding stress, supports stronger hair growth.
Following these recovery steps ensures a smooth healing process and maximizes the long-term benefits of a Beard Hair Transplant in Islamabad, resulting in a natural and well-defined beard.
Choosing the Right Clinic in Islamabad
Choosing the right clinic in Islamabad is the most important step for a successful Beard Hair Transplant. Not all clinics offer the same quality of service, so research is essential before making a decision. A reputable clinic should have experienced surgeons specializing in hair and beard transplants. Check their portfolio and before-and-after photos to see real results.
The clinic should follow strict hygiene standards and use modern, internationally approved techniques. Facilities with advanced equipment ensure the procedure is safe, minimally invasive, and provides natural-looking results. Personal consultation is crucial. During this consultation, the surgeon should assess your facial structure, beard pattern, and donor hair quality to design a transplant plan tailored for you.
Another important factor is post-procedure support. A good clinic provides clear instructions for recovery, including care for transplanted follicles and follow-up appointments. Transparent pricing without hidden charges is also a sign of a trustworthy clinic.
Many patients also consider reviews and recommendations from previous clients. Word-of-mouth feedback often gives a realistic view of the clinic’s professionalism and results.
Choosing the right clinic ensures your Beard Hair Transplant in Islamabad is effective, safe, and produces natural, lasting beard growth. A reliable clinic guarantees not only successful results but also confidence and peace of mind throughout the process.
FAQs About Beard Hair Transplant in Islamabad
Q: Is the procedure painful?
A: The procedure is performed under local anesthesia, so discomfort is minimal.
Q: How long does it take to see results?
A: Initial growth is visible within 3 months, with full results in 6 to 12 months.
Q: Can anyone get a beard transplant?
A: Most healthy adults with sufficient donor hair are eligible. Consultation is necessary to determine suitability.
Q: Are the results permanent?
A: Yes, transplanted hair is permanent and will continue to grow naturally.
Q: Is there any special post-care required?
A: Following the clinic’s instructions, gentle washing, and avoiding direct sunlight ensures proper recovery.
Beard Hair Transplant in Islamabad is the perfect solution for men seeking natural and long-lasting beard growth. Combining expert techniques with proper care and natural methods ensures the best results. For more information and professional services, you can visit skn cosmetics for detailed guidance and appointments.
Author

Bariatric Surgery in Islamabad is becoming a popular option for individuals struggling with obesity. This procedure not only helps in significant weight loss but also improves overall health. Patients often notice enhanced mobility, better energy levels, and a positive impact on daily activities. The surgery aims to support a healthier lifestyle by reducing excess body weight in a controlled manner.
The first few weeks after Bariatric Surgery in Islamabad are crucial for recovery. Patients are encouraged to follow dietary guidelines strictly and gradually return to normal activities. Most people experience reduced appetite and better portion control naturally. Along with medical supervision, lifestyle adjustments are key to achieving lasting results after the surgery.
Physical Changes and Weight Loss
Bariatric Surgery in Islamabad brings significant physical changes and helps patients achieve sustainable weight loss. One of the first noticeable effects is a reduction in body weight, often visible within weeks after surgery. This initial weight loss boosts energy levels, making daily activities easier and more enjoyable. Many patients report improved mobility, reduced joint pain, and enhanced physical endurance.
Along with weight reduction, changes in body composition occur naturally. Fat stores decrease while muscle mass is preserved through proper diet and light exercise. Clothes fit better, posture improves, and patients often experience a renewed sense of confidence and self-esteem.

The surgery also supports the body in regulating appetite and portion control naturally. Many patients find it easier to follow healthy eating habits without constant cravings or overeating. Cardiovascular health improves as blood pressure and cholesterol levels stabilize, reducing the risk of heart-related complications.
Long-term results depend on lifestyle adjustments. Incorporating regular physical activity and balanced nutrition helps maintain weight loss naturally. With these healthy habits, patients can continue to see gradual improvement in body shape and overall well-being. Bariatric Surgery in Islamabad is not just a medical procedure but a step toward a healthier and more active life.
- Significant reduction in body weight
- Improved mobility and physical activity
- Reduced risk of heart disease and diabetes
- Enhanced mental and emotional well-being
Weight loss continues gradually, and patients must maintain healthy habits to prevent regaining weight. Nutrition, hydration, and exercise are important parts of the post-surgery plan.
Improvement in Health Conditions
Bariatric Surgery in Islamabad not only helps in losing weight but also addresses several health issues. Patients often see a decrease in blood sugar levels, lower blood pressure, and better cholesterol control. Sleep apnea symptoms can also improve naturally after surgery. These health benefits contribute to a better quality of life and longer-term wellness.
The surgery can significantly improve hormonal balance and digestive functions. Many patients notice a reduction in joint pain and fatigue. Regular follow-ups with healthcare providers are recommended to monitor progress and ensure safety.
Recovery Process and Lifestyle Adjustments
Recovery after Bariatric Surgery in Islamabad involves both physical and mental adaptation. Patients are advised to start with light activities and gradually increase movement. Diet plays a critical role during recovery, starting from liquids and soft foods and slowly moving to regular meals. Hydration and protein intake are essential for healing and maintaining muscle mass.
Lifestyle adjustments help maximize results naturally. Incorporating walking, light exercise, and mindful eating are highly recommended. Support groups and counseling can also aid in maintaining motivation and mental wellness during recovery.
Long-Term Maintenance and Natural Ways to Stay Healthy
Maintaining results after Bariatric Surgery in Islamabad requires consistent effort and a focus on natural, healthy habits. Patients who adopt a balanced lifestyle often enjoy lasting weight loss and improved overall wellness. One of the most effective strategies is following a nutrient-rich diet that includes vegetables, lean proteins, whole grains, and healthy fats. Avoiding processed foods and sugary drinks helps control weight naturally and supports better energy levels throughout the day.
Regular physical activity is another key factor for long-term maintenance. Simple exercises like walking, jogging, or yoga can improve metabolism and strengthen muscles while supporting cardiovascular health. Combining cardio with light strength training ensures that the body stays toned and fit.
Hydration is often overlooked but is crucial for maintaining metabolism and supporting digestion. Drinking plenty of water throughout the day helps manage appetite and keeps the body functioning optimally.
Additionally, monitoring weight and health metrics regularly allows patients to make timely adjustments to their routine. Mindful eating, managing stress, and seeking support from healthcare providers or support groups can also enhance long-term success. By following these natural ways, patients of Bariatric Surgery in Islamabad can enjoy a healthier, happier life.
- Eating balanced, nutrient-rich meals
- Staying hydrated throughout the day
- Exercising regularly with a mix of cardio and strength training
- Avoiding processed foods and sugary drinks
- Monitoring weight and health metrics consistently
These natural ways ensure long-term success and prevent complications. A healthy routine helps patients enjoy the full benefits of the surgery.
FAQs About Bariatric Surgery in Islamabad
Q1: How long does it take to see results after surgery?
Most patients notice weight loss within 2–4 weeks, with significant results in the first six months. Full stabilization may take 12–18 months.
Q2: Is the surgery safe for everyone?
Bariatric surgery is safe for eligible patients under medical guidance. Pre-surgery assessments determine suitability based on health conditions and BMI.
Q3: Can I get pregnant after Bariatric Surgery?
It is recommended to wait at least 12–18 months after surgery before planning pregnancy to ensure stable weight and nutrient levels.
Q4: Will I need vitamins after surgery?
Yes, supplementation of vitamins and minerals is often required to prevent deficiencies. Regular blood tests help monitor levels.
Q5: How can I maintain weight loss naturally?
Adopting healthy eating habits, regular exercise, and mindful lifestyle practices are the best natural ways to maintain results.
In conclusion, Bariatric Surgery in Islamabad offers transformative results for individuals struggling with obesity. By following recovery guidelines and adopting natural ways for a healthier lifestyle, patients can achieve sustainable weight loss and improved health. For more information and post-surgery guidance, visit skn cosmetics.
Author


CNC Tools in Modern Manufacturing: Benefits & Future Trends

Avoid Costly Document Mistakes with Professional Notary Services

Mini vs Full Tummy Tuck: Complete Guide Islamabad

Formulation Development in 2026: Drug Delivery Innovations

Luxury RV Resorts Texas vs Standard RV Parks: The Difference?

Best Hair Transplant Clinic in Pakistan – JJ Aesthetics

Essentials Tracksuit UK Guide: Styles, Fits, Colors & Buying Tips

Working Capital Finance: Guide for MSMEs, Types & Benefits

Beard Hair Transplant: Procedure, Benefits And Recovery

Corteiz Cargos Official Store: Streetwear Style & Sustainability

Cybersecurity Consulting Company SequelNet Provides Critical IT Support Services to Medical Billing Firm, Medical Optimum

Team Communication Software Transforms Operations at Finance Innovate

Project Management Tool Transforms Long Island Business

How Alleviate Poverty Utilized IPPBX’s All-in-One Solution to Transform Lives in New York City

Breast Cancer: The Imperative Role of Mammograms in Screening and Early Detection

Unstoppable Collaboration: D.C.’s Citi Open and Silicon Valley Classic Unite to Propel Women’s Tennis to New Heights

Embracing Renewal: Sizdabedar Celebrations Unite Iranians in New York’s Eisenhower Park

The Benefits of Starting a Side Hustle for Financial Freedom

New Blood Donation Screening Questions What You Need to Know

Stylishly Timeless: The 5 Types of Sandals You Need in Your Closet
-

 Business3 years ago
Cybersecurity Consulting Company SequelNet Provides Critical IT Support Services to Medical Billing Firm, Medical Optimum
-
Business3 years ago
Team Communication Software Transforms Operations at Finance Innovate
-
Business3 years ago
Project Management Tool Transforms Long Island Business
-
Business3 years ago
How Alleviate Poverty Utilized IPPBX’s All-in-One Solution to Transform Lives in New York City
-
health3 years ago
Breast Cancer: The Imperative Role of Mammograms in Screening and Early Detection
-
Sports3 years ago
Unstoppable Collaboration: D.C.’s Citi Open and Silicon Valley Classic Unite to Propel Women’s Tennis to New Heights
-
Art /Entertainment3 years ago
Embracing Renewal: Sizdabedar Celebrations Unite Iranians in New York’s Eisenhower Park
-
Finance3 years ago
The Benefits of Starting a Side Hustle for Financial Freedom


