
Internet and Telecom
How Do I Contact AT&T SBCGlobal Support?
By
Reviewed
By Callie Parker

Introduction
If you’re a user of the legacy SBCGlobal (or @sbcglobal.net) email service and need support, here’s a clear, SEO-friendly guide to contacting AT&T Inc. (AT&T) for help including the key phone numbers, what to have ready, and tips to speed things up.
Why you might need SBCGlobal support
Although SBCGlobal.net addresses still exist, they are now handled under AT&T’s email system (via its AT&T Mail platform).
Common issues include:
- Trouble signing in or forgetting the password
- Email sending/receiving problems
- Accessing the account from various devices or email clients
- Wanting to update the account details or migrating away from the address
Primary support phone numbers
When you call AT&T for help with SBCGlobal/AT&T Mail, you should use the following:
- +1 888-634-1444: This is an SBCGlobal phone number dedicated for email support.
- 800-288-2020: This is the official toll-free number for AT&T Internet/Home-Phone.
When you call either of these, have the following information at hand:
- Your full name and account holder name
- The SBCGlobal.net email address in question
- If relevant, the AT&T user ID or account number associated
- A description of the problem (error message, device, time)
- Alternate contact number in case they need to call you back
Step-by-step: How to reach a live SBCGlobal representative
- Dial +1-888-634-1444 or 800-288-2020.
- You’ll likely be greeted by an automated menu. When it asks what you’re calling about, say something like: “Email support (SBCGlobal/AT&T Mail).”
- Provide the email address when prompted (or enter via keypad) to help them locate your account.
- Press 0 (if given the option) to speak to an agent many customers report that pressing 0 or speaking “representative” helps.
- Once connected, explain the issue clearly, answer any security questions the agent may ask, and stay on the line until you receive confirmation of the solution.
Other support methods besides phone
While calling is often fastest, AT&T offers alternative support options:
- Visit the AT&T Support Center online.
- For email-specific help (including for SBCGlobal addresses) you can use the “Email Support” section: Troubleshooting sign-in, settings, etc.
- Use live chat via the AT&T website (sometimes available 24/7 depending on service).
Common issues & how to describe them to support
Here are some typical SBCGlobal/AT&T Mail problems and how to communicate them:
- Unable to sign in: You might receive error code 203.2 (account locked) or message “We can’t find that ID and password combination.” In that case, mention the exact message you saw and when you first noticed the issue.
- Email not sending/receiving: Provide details about the device (computer, phone, mail app), any error codes, when it occurred, and whether you changed your password recently.
- Accessing SBCGlobal/AT&T Mail from third-party client: Mention the client (Outlook, Apple Mail, etc.), whether you set up IMAP/POP, and any recent changes like password or device.
- Account compromised/hacked: Mention unusual activity (emails you didn’t send, password changes you didn’t make). AT&T has fraud resources you can point them to.
Tips to make the call smoother
- Call when you have uninterrupted time avoid busy times such as Monday mornings when hold times tend to be longer.
- Be near the device (computer or phone) that’s having the problem, so you can follow instructions or make changes as needed.
- Make note of the AT&T representative’s name and the reference number they give you — this helps if you need follow-up.
- If you’re dealing with email issues, also check basic things yourself before calling: clear browser cache, try a different browser, check internet connection. These are often listed in AT&T’s troubleshooting guides.
- Have alternative contact information ready (another email or phone number) in case your SBCGlobal account is locked or inaccessible.
- If you have multiple SBCGlobal/AT&T accounts, specify exactly which one is causing the problem (address, user ID) to avoid confusion.
What if you’re no longer an AT&T Internet/phone subscriber?
Even if you’re just using the legacy SBCGlobal.net email but no longer have AT&T Internet or phone service, you can still call 800-288-2020 and mention you are an email-only user of the SBCGlobal/AT&T Mail system. Because the email addresses remain supported under AT&T’s broader “Email Support” umbrella.
Summary
If you need support for your SBCGlobal.net email (now under AT&T Mail), follow the steps above and call either +1-888-634-1444 or 800-288-2020. Have your account info ready, describe your issue clearly, and the AT&T support team should help you get back on track. Use online chat or support articles if you prefer not to wait on hold.
By being prepared and clear when you call, you’ll increase your chance of a smoother, faster resolution.

Frequently Asked Questions (FAQs)
Q1. What is the phone number for AT&T SBCGlobal customer support?
You can reach AT&T SBCGlobal support by calling +1–888–634–1444 or 800.288.2020. These lines are available for email-related issues, account recovery, and technical assistance.
Q2. What kind of issues can AT&T SBCGlobal support help with?
Support can assist with:
- Password recovery and login problems
- Email configuration and setup
- Account security concerns
- Server settings for incoming/outgoing mail
- General troubleshooting
Q3. Is SBCGlobal still supported by AT&T?
Yes, SBCGlobal.net email accounts are now managed by AT&T and Yahoo. You can access your account through the AT&T login portal and contact AT&T support for help.
Q4. Can I chat with AT&T SBCGlobal support online?
AT&T offers live chat support through their official support page. You may need to log in to access personalized help.
Q5. What are the support hours for AT&T SBCGlobal customer care?
Phone support is typically available Monday to Friday, 8 AM to 7 PM local time, but hours may vary. It’s best to call early in the day for shorter wait times.
Author


Indiranagar is one of Bengaluru’s most dynamic commercial and lifestyle destinations. Along with its retail outlets and hospitality spaces, the area is home to startups, corporate offices, creative agencies, consulting firms, and technology companies. In such a fast-moving business environment, dependable and secure connectivity is essential. Broadband Enterprise in Indiranagar plays a crucial role in supporting daily operations, digital communication, and long-term business growth.
Enterprise Broadband in Indiranagar
Organizations in Indiranagar rely heavily on cloud computing, video conferencing, online collaboration tools, CRM platforms, and digital payment systems. A high-performance broadband connection ensures smooth access to these applications without buffering or disruptions. Stable upload and download speeds are particularly important for businesses handling large data transfers, remote team collaboration, and customer support operations.
Enterprise broadband also provides scalability. As companies expand, hire more employees, or introduce new digital services, bandwidth requirements increase. Business-grade broadband allows easy upgrades to accommodate growing demands without significant infrastructure changes.
Another advantage is improved uptime assurance. Enterprise broadband plans typically come with service commitments and priority technical support, reducing the risk of extended downtime. For businesses in Indiranagar’s competitive market, even a short disruption can impact productivity and reputation. Reliable broadband connectivity helps maintain seamless operations and consistent service delivery.
Secure Enterprise Network in Indiranagar
While speed is important, security is equally critical. A secure enterprise network in Indiranagar protects sensitive business data, financial information, and client records from cyber threats. As digital transformation accelerates, organizations face increasing risks such as malware attacks, phishing attempts, ransomware, and unauthorized access.
A secure enterprise network includes multiple layers of protection. Firewalls act as the first line of defense, monitoring and controlling incoming and outgoing traffic. Intrusion detection and prevention systems help identify suspicious activity before it becomes a serious issue. Virtual private networks enable secure remote access for employees working from different locations.
Encryption is another key component of network security. Encrypted connections ensure that data transmitted over the internet remains confidential and cannot be intercepted by unauthorized users. This is particularly important for financial firms, legal consultancies, healthcare providers, and technology companies operating in Indiranagar.
Network segmentation further enhances security by dividing the network into separate sections. This limits the spread of potential threats and protects critical systems. Regular security updates and continuous monitoring also help maintain a strong defense against emerging vulnerabilities.
Integrated Connectivity and Security Solutions
Modern enterprises require a combination of high-speed broadband and robust network security. An integrated approach ensures that businesses enjoy both performance and protection. Enterprise broadband provides the speed and capacity needed for digital operations, while secure networking solutions safeguard valuable information.
In Indiranagar, where businesses often operate in shared office spaces or multi-tenant buildings, secure configurations are especially important. Properly managed routers, secure WiFi access points, and controlled user access policies reduce the risk of unauthorized entry into company systems.
Managed network services can further enhance reliability and security. With professional monitoring and proactive maintenance, potential issues are identified and resolved quickly. This minimizes downtime and ensures uninterrupted connectivity.
Strengthening Business Growth in Indiranagar
As Indiranagar continues to attract innovative companies and established enterprises, strong digital infrastructure remains a cornerstone of success. Enterprise broadband Indiranagar supports efficient communication, cloud adoption, and data-driven decision-making. Secure enterprise networks protect business continuity and maintain client trust.
Investing in reliable broadband and advanced security solutions enables organizations to operate confidently in a connected world. With the right connectivity foundation, businesses in Indiranagar can focus on innovation, productivity, and sustained growth without compromising on performance or safety.
Author
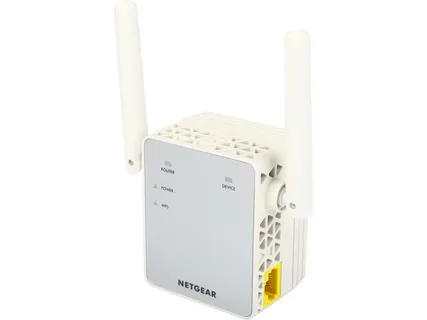
A Netgear Wi-Fi extender is an excellent device for improving wireless coverage in areas where your router’s signal is weak. Whether you are using a Netgear Nighthawk extender, AC series extender, or any other Netgear range extender, accessing the login page is essential for setup, configuration, troubleshooting, and firmware updates. If you are having trouble accessing your Netgear WiFi extender or need assistance with setup and login, you can contact technical support for guidance.
In this guide, we will explain how to log in to a Netgear WiFi extender, common login issues, and troubleshooting steps to ensure a smooth experience.
Need to Log In to Your Netgear Wi-Fi Extender
Logging in to your Netgear Wi-Fi extender allows you to:
- Configure wireless settings
- Change the extender’s network name (SSID)
- Update firmware
- Manage security settings
- Connect the extender to a new router
- Troubleshoot connectivity issues
- Monitor connected devices
Without accessing the extender’s dashboard, many advanced features and settings remain unavailable.
Requirements Before Logging In
Before attempting to log in to your Netgear Wi-Fi extender, make sure you have the following:
- A properly powered-on Netgear Wi-Fi extender
- A computer, laptop, smartphone, or tablet
- Access to the extender’s Wi-Fi network
- A compatible web browser such as Chrome, Firefox, Edge, or Safari
- The extender login credentials
If you encounter any difficulties during the login process, you may call for assistance.
Log In Through MyWiFiExt.net
The easiest and most common method is using the Netgear local web address.
Step 1: Connect to the Extender Network
Turn on your Netgear extender and wait for the power LED to become stable.
Connect your device to the extender’s Wi-Fi network. The network name typically appears as:
- NETGEAR_EXT
- NETGEAR_EXT_5G
- Custom SSID configured during setup
Step 2: Open a Web Browser
Launch your preferred web browser and enter the address in the URL bar.
Step 3: Access the Login Page
The Netgear extender login page should appear. Enter your administrator credentials.
Typically:
- Username: admin
- Password: password
If you changed the credentials during setup, use your customized login information.
Step 4: Access the Dashboard
You will be redirected to the Netgear extender dashboard, where you can manage all settings and configurations.
Log In Using the Extender IP Address
Sometimes, the MyWiFiExt.net page may not load. In such situations, use the extender’s IP address.
Common Netgear Extender IP Addresses
Depending on your model, the default IP address may be:
- 192.168.1.250
- 192.168.0.250
Login Steps
- Connect to the extender network.
- Open a web browser.
- Enter the extender’s IP address in the address bar.
- Press Enter.
- Enter your administrator username and password.
- Access the management dashboard.
How to Log In After Initial Setup
Once your extender has been configured, you can access it at any time.
Follow these steps:
- Connect your device to the extender network.
- Open a browser.
- Visit MyWiFiExt.net or the assigned IP address.
- Enter the admin credentials.
- Click Login.
You can now manage all extender settings.
What to Do If MyWiFiExt.net Is Not Working
Many users encounter issues when trying to access MyWiFiExt.net. Here are some effective solutions.
Verify Network Connection
Ensure your device is connected directly to the Netgear extender and not the primary router.
Restart the Extender
Power off the extender.
Once the LEDs stabilize, try logging in again.
Try Another Browser
Browser-related issues can sometimes prevent access.
Try:
- Google Chrome
- Mozilla Firefox
- Microsoft Edge
- Safari
Clear Browser Cache
Old browser cache and cookies may interfere with the login page.
Clear the browser data and reload the page.
Use the IP Address Instead
If MyWiFiExt.net fails, use the extender’s IP address to access the login page.
How to Reset Login Credentials
If you forgot your administrator password, you may need to reset the extender.
Reset Procedure
- Locate the Reset button on the extender.
- Press and hold it for approximately 10 seconds.
- Release the button when the LEDs begin blinking.
- Wait for the device to reboot.
The extender will return to factory default settings.
You can then log in using:
- Username: admin
- Password: password
After resetting, you must configure the extender again.
Updating Netgear Extender Firmware
Firmware updates help improve security, performance, and stability.
Update Steps
- Log in to the extender dashboard.
- Navigate to Settings.
- Select Firmware Update.
- Check for available updates.
- Install the latest firmware version.
- Wait for the update to complete.
Do not disconnect power during the update process.
Common Login Errors and Solutions
Login Page Not Opening
Possible causes:
- Incorrect network connection
- Browser issues
- Wrong IP address
Solution:
- Verify the connection.
- Try another browser.
- Use the extender IP address.
Incorrect Username or Password
Solution:
- Re-enter credentials carefully.
- Use password recovery options if available.
- Perform a factory reset if necessary.
Slow Dashboard Loading
Solution:
- Restart the extender.
- Improve Wi-Fi signal strength.
- Update firmware.
Extender Keeps Disconnecting
Solution:
- Relocate the extender closer to the router.
- Check for interference from electronic devices.
- Install firmware updates.
Best Practices for Secure Extender Access
To keep your network secure:
- Change the default administrator password.
- Use a strong Wi-Fi password.
- Keep firmware updated.
- Enable WPA2 or WPA3 security.
- Review connected devices regularly.
- Disable unauthorized access.
These steps help protect your network from potential security threats.
Conclusion
Logging in to a Netgear Wi-Fi extender is a straightforward process when you follow the correct steps. Whether you use MyWiFiExt.net or the extender’s IP address, accessing the management dashboard allows you to configure settings, update firmware, improve performance, and troubleshoot connectivity issues.
If you experience problems with login, setup, password recovery, firmware updates, or connectivity, professional assistance is available at +1-872-777-1190 or 1-833-800-3030. With proper configuration and maintenance, your Netgear Wi-Fi extender can provide reliable wireless coverage throughout your home or office.
Author
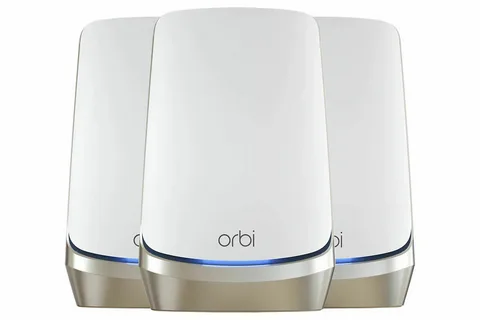
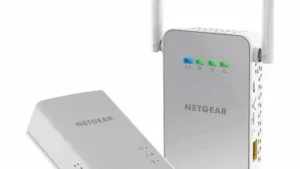
Netgear Orbi router are widely used for delivering fast, reliable, and seamless Wi-Fi coverage throughout homes and offices. Whether you want to change your Wi-Fi password, update firmware, manage connected devices, or adjust security settings, accessing the Orbi router login page is the first step.
This guide explains how to log in to your Netgear Orbi router, troubleshoot common login issues, and manage important router settings with ease.
What Is the Netgear Orbi Router Login?
The Netgear Orbi router login portal is a web-based interface that allows users to configure and manage their network settings. By logging in, you can:
- Change Wi-Fi names (SSIDs)
- Update wireless passwords
- Set up parental controls
- Configure guest networks
- Check connected devices
- Update router firmware
- Optimize security settings
Accessing the router dashboard only takes a few minutes when you follow the correct steps.
Requirements Before Logging In
Before attempting to log in to your Netgear Orbi router, make sure you have:
- An Orbi router connected to power.
- A device such as a computer, smartphone, or tablet.
- A connection to the Orbi network (wired or wireless).
- Your router login credentials.
The default login details are often:
- Username: admin
- Password: password
If you changed these credentials during setup, use your customized login information instead.
Instructions to Log In
Step 1: Connect to the Orbi Network
First, connect your device to the Orbi network.
You can connect using:
- Wi-Fi connection
- Ethernet cable
Ensure your device is connected directly to the Orbi network before proceeding.
Step 2: Open a Web Browser
Launch any modern web browser, including:
- Google Chrome
- Mozilla Firefox
- Microsoft Edge
- Safari
A supported browser helps ensure the login page loads correctly.
Step 3: Enter the Router Address
In the browser’s address bar, type:
- orbilogin.com
- orbilogin.net
You may also use the default IP address:
- 192.168.1.1
- 192.168.0.1
Press Enter to continue.
Step 4: Enter Login Credentials
When the login page appears:
- Enter your username.
- Enter your password.
- Click Log In.
After successful authentication, you will be directed to the Orbi administration dashboard.
Change Your Orbi Wi-Fi Password
Once logged in, changing your Wi-Fi password is straightforward.
- Navigate to Wireless Settings.
- Locate the Wi-Fi password field.
- Enter a new strong password.
- Save the changes.
- Reconnect all devices using the new password.
For better security, create a password that includes:
- Uppercase letters
- Lowercase letters
- Numbers
- Special characters
How to Update Orbi Firmware
Firmware updates help improve security, performance, and stability.
To update firmware:
- Log in to the Orbi dashboard.
- Select Advanced.
- Click Administration.
- Choose Firmware Update.
- Check for available updates.
- Install the latest firmware version.
Do not unplug the router during the update process.
How to View Connected Devices
The Orbi dashboard allows you to monitor devices connected to your network.
To check connected devices:
- Log in to the router.
- Open Attached Devices.
- Review the device list.
You can identify:
- Smartphones
- Computers
- Smart TVs
- Gaming consoles
- IoT devices
Monitoring connected devices helps improve network security and performance.

Orbi Login Problems and Solutions
Login Page Not Loading
If the login page does not open:
- Verify that the router is powered on.
- Confirm you are connected to the Orbi network.
- Try another browser.
- Clear browser cache and cookies.
- Use the router’s IP address instead of the web address.
Incorrect Username or Password
If login credentials are rejected:
- Check for typing errors.
- Ensure Caps Lock is off.
- Use the most recent credentials you created.
If you cannot remember the password, you may need to reset the router.
Router Connection Issues
If your device cannot connect to the Orbi network:
- Restart the router.
- Restart your device.
- Move closer to the router.
- Verify network settings.
A simple reboot often resolves temporary connection issues.
How to Reset a Netgear Orbi Router
If you are locked out of your router, a factory reset may be necessary.
Steps:
- Locate the Reset button on the router.
- Press and hold it for approximately 10 seconds.
- Wait for the router to restart.
- Reconfigure the router using default settings.
After a reset, all customized settings will be erased.
Security Tips for Orbi Users
To keep your network secure:
Change Default Credentials
Never leave the default administrator password unchanged.
Enable Automatic Firmware Updates
Automatic updates help protect against emerging security threats.
Use Strong Passwords
Avoid simple passwords such as:
- 12345678
- password
- admin123
Choose complex and unique credentials.
Enable Guest Networks
Provide visitors with guest network access rather than sharing your primary network credentials.
Regularly Review Connected Devices
Remove unknown devices immediately if they appear on your network.
Benefits of Managing Your Orbi Router
Regularly accessing your Orbi router dashboard provides several benefits:
- Improved network security
- Better Wi-Fi performance
- Faster troubleshooting
- Enhanced parental controls
- Optimized device management
Routine maintenance ensures your network remains stable and secure.
Need Help With Orbi Router Login?
Before contacting support, have the following information ready:
- Router model number
- Firmware version
- Description of the issue
- Login error messages (if any)
This information can help speed up troubleshooting and resolution.
Conclusion
Logging in to your Netgear Orbi router is an essential task for managing your home or office network. By accessing the router dashboard, you can customize Wi-Fi settings, strengthen security, update firmware, and monitor connected devices. Following the steps outlined in this guide will help you access your Orbi router quickly and resolve common login problems efficiently.
Regular router maintenance and security updates will ensure optimal performance and a safer networking experience for all connected devices.
Author


Barbas Hats Caps: Quality Streetwear & Urban Style

Custom Candle Boxes San Antonio: Premium Packaging

ADHD Symptoms and Treatment Guide for Adults and Kids

QuickBooks Tool Hub 1.6.0.8: Download & Error Fix Guide

SEO Atlanta AI Tools: Boost Local Search Rankings Fast

Custom Candle Boxes Baltimore | Premium Brand Packaging

Laboratory Management Software: 20 Essential Lab Features

Buy Business in Dubai: Smart Investment Guide for 2026

Kitchen Remodeling Tips: Efficient Layouts, Storage & Lighting

Streetwear Fashion Brands: Comme des Garçons & Stussy Style

Cybersecurity Consulting Company SequelNet Provides Critical IT Support Services to Medical Billing Firm, Medical Optimum

Meet the Megalodon: The Shark Star of ‘Meg 2’

Reduce Video Game Lag: Level Up Your Gaming Performance
Balancing India’s Entertainment: Cricket vs. Bollywood

Jetsetter’s Secrets: Unveiling Our Favorite Travel Hacks for a Seamless Adventure

The 5 Best Live Sports Streaming Sites: Legal and Exciting!

Hollywood Labor Unrest: The Impact of ‘What About Us?’ Strikes

Unveiling the Magic of Dream Fulfillment at the Late NBA Draft

Illuminate Your Skin: Dr. Axe Unveils Natural Remedies for Lightening Knees and Elbows

Bright Choices: Navigating the Pros and Cons of Skin Whitening Creams with Dr. Axe
-

 Business3 years ago
Cybersecurity Consulting Company SequelNet Provides Critical IT Support Services to Medical Billing Firm, Medical Optimum
-
Entertainment3 years ago
Meet the Megalodon: The Shark Star of ‘Meg 2’
-
Entertainment3 years ago
Reduce Video Game Lag: Level Up Your Gaming Performance
-
 Sports3 years ago
Balancing India’s Entertainment: Cricket vs. Bollywood
-
Entertainment3 years ago
Jetsetter’s Secrets: Unveiling Our Favorite Travel Hacks for a Seamless Adventure
-
Productivity3 years ago
The 5 Best Live Sports Streaming Sites: Legal and Exciting!
-
Art /Entertainment3 years ago
Hollywood Labor Unrest: The Impact of ‘What About Us?’ Strikes
-
Sports3 years ago
Unveiling the Magic of Dream Fulfillment at the Late NBA Draft


