
Internet and Telecom
Find Stations with Gas Near Me: 2025 Fuel App Guide
By
Reviewed
By Seth Alexander

Introduction
Finding a gas station with available fuel can be frustrating. You drive around, only to see “Out of Gas” signs. In 2025, fuel availability remains a challenge for many drivers. Thankfully, fuel apps now help you find stations with gas near you in real time. These mobile tools use live data to show where fuel is in stock. This 2025 fuel app guide explains how these apps work and which ones rank as the best.
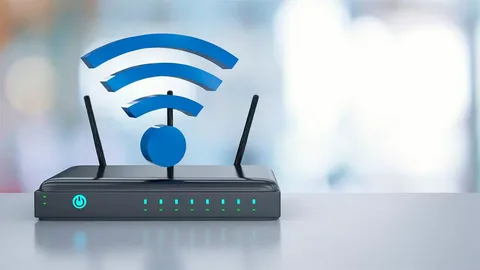
Key Features to Look for in 2025 Fuel Apps

Image by: Yandex.com
When shopping for a fuel app in 2025, certain features set the best apps apart. Here are the crucial elements that make a top fuel app:
Real-Time Fuel Availability
The main feature is knowing which stations have fuel. Accurate, real-time updates prevent wasted trips. Ensure the app shows updated stock levels, ideally via station sensors or verified user reports. An icon legend on the map helps you see availability quickly.
Accurate Price Tracking
While availability matters most, price tracking remains important. Fuel prices can vary widely, even within a few miles. The best apps show current price per gallon for each station. They often pull pricing data from official station feeds or published rates. Look for apps that update prices at least every hour.
Best Fuel Apps of 2025
Based on user reviews, update frequency, and data accuracy, here are the top fuel apps in 2025. This table compares their key features, pricing (if applicable), and platform availability.
| App Name | Real-Time Availability | Price Tracking | Alerts | Route Integration | Free or Paid | iOS/Android |
|---|---|---|---|---|---|---|
| GasFinder Pro | Yes | Yes | Custom Alerts | Yes | Free | iOS, Android |
| FuelScout 2025 | Yes | Yes | Price Alerts | Yes | Freemium | iOS, Android |
| PumpLocator Plus | Yes | Basic | Stock Alerts | No | Free | Android |
| QuickFuel Map | Yes | Yes | Custom Alerts | Yes | Paid ($1.99/m) | iOS, Android |
| RouteFuel Guru | Yes | Yes | Price & Stock | Advanced | Freemium | iOS, Android |
How to Use a Fuel App: Step by Step

Image by: Yandex.com
Using a fuel app is simple once you know the basics. This section walks you through setting up and using a fuel app effectively.
Download and Install
First, open your phone’s app store. Search for the fuel app of your choice—GasFinder Pro or FuelScout 2025, for example. Tap install. Once installed, open the app and grant location permissions. The app needs your location to find nearby stations.

Create or Skip Account
Many apps let you use basic features without an account. If you want to save preferences, set up an account with email and password. This lets you sync preferences across devices and save favorite stations. If you prefer not to share personal data, skip account creation and proceed as a guest.
Set Up Alerts
Most fuel apps prompt you to set alerts after the initial launch. You can choose alerts for price drops or stock updates. For example, set an alert to notify you when your favorite station’s price falls below a set dollar per gallon. Or get notified when a usually crowded station restocks fuel.
Explore the Map
On the main screen, an interactive map appears with station icons. Each icon may be green, yellow, or red to indicate availability. Tap an icon to see station details: address, price, amenities, and last update time. Zoom in to see stations in your immediate area.
Filter Results
Filters help you narrow down choices. Tap the filter icon to show stations within a certain distance, a specific fuel type, or only a particular brand. You might also filter by amenities like car wash or electric charging. Applying filters refines the map view instantly.
Plan a Route
If the app supports route integration, enter your destination address. The app shows a suggested station to stop at along the way. It calculates distance and fuel remaining so you avoid running out. You can adjust your route if a chosen station runs out of fuel before you arrive.
Follow Directions
After selecting a station, tap the “Navigate” button. Your phone’s navigation app opens with directions. If you lose signal, some apps cache the last-known map data so you can find your way. Once you arrive, the app may ask you to confirm stock status so other drivers benefit from up-to-date info.
Update Station Status
After fueling, you can mark station status in the app. If the station ran out or had long lines, report it. If it had ample fuel and service, confirm availability. These user reports help improve data accuracy for everyone. Always be honest and clear when reporting.
Relevant Table: Feature Comparison of Top 2025 Fuel Apps
| Feature | GasFinder Pro | FuelScout 2025 | PumpLocator Plus | QuickFuel Map | RouteFuel Guru |
|---|---|---|---|---|---|
| Real-Time Fuel Availability | Yes | Yes | Yes | Yes | Yes |
| Price Tracking | Yes | Yes | Basic | Yes | Yes |
| Custom Alerts | Yes | Price & Stock | Stock Only | Yes | Price & Stock |
| Route Planning Integration | Basic | Yes | No | Yes | Advanced |
| Offline Mode | Partial | Yes | No | Partial | Yes |
| EV Charging Station Data | Beta | No | No | No | Yes |
| Voice Assistant Compatibility | No | Yes | No | Yes | Yes |
| In-App Payment & Rewards | No | No | No | No | Beta |
| Platform | iOS, Android | iOS, Android | Android | iOS, Android | iOS, Android |
| Price Model | Free | Freemium | Free | Paid ($1.99/m) | Freemium |
This table highlights the top 2025 fuel apps and their standout features. Choose an app that best matches your driving habits. If you drive long distances, RouteFuel Guru’s advanced route planning and EV data may help. For city commuters, GasFinder Pro offers quick stock checks and price tracking at no cost. QuickFuel Map’s paid subscription is ideal if you want deep navigation integration. Review the feature list and pick the app that fits your needs.
Conclusion
Finding stations with gas near me in 2025 is easier with modern fuel apps. These apps combine real-time fuel availability, price tracking, and route planning to help drivers avoid empty stations. We covered what a fuel app is, how to use one, essential features, and tips for choosing the right app. We also compared the best 2025 fuel apps—GasFinder Pro, FuelScout 2025, PumpLocator Plus, QuickFuel Map, and RouteFuel Guru. Each offers unique strengths, from accurate stock updates to EV charging integration.
Author


For many long-time internet users, Roadrunner email remains an important part of their online communication. Many people still use their old @roadrunner.com addresses for personal messages, business communication, subscriptions, and important accounts. Because of this, users often want to know whether their email service still works in 2026 and how they can continue accessing their inbox. The answer is yes. Existing users can still access their accounts. However, the service no longer operates as an independent platform. Spectrum now manages these accounts after the merger between Time Warner Cable and Charter Communications.
Although new users cannot create new addresses, current account holders can continue sending and receiving messages. They can also access their inbox through Spectrum’s email platform and supported email applications.
What Happened to Roadrunner Email?
Roadrunner email was originally introduced by Time Warner Cable as an email service for internet customers. It became popular because subscribers received an email address along with their internet service. Later, Charter Communications acquired Time Warner Cable and launched the Spectrum brand. During this transition, existing accounts moved to Spectrum’s email system. Today, this service is considered a legacy email platform. However, existing accounts continue working normally. Users can still manage their inboxes, send messages, receive emails, and connect their accounts with different devices. Important points to remember including:
- Existing accounts remain active.
- New addresses cannot be created.
- Users now access their accounts through Spectrum’s email system.
- Current users can continue using their old email addresses.
If you experience problems with login, password recovery, or account setup, support options are available to help resolve common issues.
Does Roadrunner Email Still Work in 2026?
Yes, Roadrunner email still works in 2026 for users who already have active accounts. Many people continue using their old addresses because they are connected to years of personal and professional communication. However, because this is an older service, some users may experience occasional technical problems. These issues usually happen because of outdated settings, security updates, or device configuration errors. Common problems include:
- Difficulty signing in
- Forgotten passwords
- Email syncing failures
- Security verification issues
- Problems with third-party email applications
Most of these problems can be solved by updating account details, checking settings, or completing the account recovery process.

How to Access Your Email Account
Accessing your mailbox is simple if you already have your account details. Since Spectrum manages these accounts, users should sign in through the Spectrum email platform. First, open the Spectrum email login page. Enter your complete email address and password. Make sure you enter the correct details. Many login problems happen because of small mistakes, such as typing errors or an active Caps Lock key. If Spectrum requests identity verification, complete the security process. You may need to confirm your account using a recovery email, phone number, or verification code. After verification, you can open your inbox and continue sending and receiving messages.
How to Recover a Forgotten Password
A forgotten password is one of the most common reasons users lose access to their accounts. Spectrum provides recovery options that allow eligible users to reset their login information. Follow these steps:
- Open the Spectrum password recovery page.
- Enter your email address or account username.
- Complete the identity verification process.
- Create a new secure password.
- Sign in again using your updated details.
Choose a strong password with a combination of letters, numbers and special characters. Also, avoid using the same password for multiple online accounts. If you cannot complete the recovery process, additional account assistance may be required.
Roadrunner Email on Mobile Devices?
Yes, Roadrunner email can still be used on smartphones, tablets, and desktop email programs. Many users connect their accounts with applications such as Microsoft Outlook, Apple Mail, and Thunderbird. However, some people may face connection problems during setup. These issues usually happen because of incorrect server settings or outdated email applications. To fix setup problems, try these solutions:
- Update your email application.
- Remove and add the account again.
- Check IMAP and SMTP settings.
- Confirm your username and password.
- Install the latest device updates.
These steps can often resolve syncing and connection problems.
Common Email Problems
Although the service continues to work, users may occasionally experience technical difficulties. Login errors are among the most frequent issues. They often happen because of incorrect passwords, security checks, or browser-related problems. Another common issue is email synchronization failure. This usually affects users who access their accounts through mobile devices or third-party applications. Some users may also receive more spam messages. Older accounts can become targets for phishing attempts because they have been active for many years. To improve account security, users should:
- Create a strong password.
- Update recovery information.
- Avoid suspicious links and attachments.
- Monitor account activity.
- Enable available security features.
Will Roadrunner Email Shut Down?
As of 2026, there has been no official announcement regarding the closure of existing accounts. Users with active accounts can continue accessing their inboxes and managing their messages. However, because Roadrunner email is a legacy service, users should take extra precautions. Signing in regularly helps maintain account activity. Updating passwords and saving important messages can also protect valuable information. It is also recommended to keep a backup email account with another provider. This ensures you can access important communication if service changes happen in the future.
Final Thoughts
Roadrunner email continues to work in 2026 and remains useful for many longtime users. Although it is no longer available as a new email service, existing accounts continue operating through Spectrum’s platform. Users can still send messages, receive emails, recover passwords, and connect their accounts with computers and mobile devices. While occasional login or setup issues may occur, most problems can be resolved through simple troubleshooting. By maintaining updated account information, following strong security practices, and keeping backups of important emails, users can continue enjoying reliable access to their longtime email accounts.
Author
Indiranagar is one of Bengaluru’s most dynamic commercial and lifestyle destinations. Along with its retail outlets and hospitality spaces, the area is home to startups, corporate offices, creative agencies, consulting firms, and technology companies. In such a fast-moving business environment, dependable and secure connectivity is essential. Broadband Enterprise in Indiranagar plays a crucial role in supporting daily operations, digital communication, and long-term business growth.
Enterprise Broadband in Indiranagar
Organizations in Indiranagar rely heavily on cloud computing, video conferencing, online collaboration tools, CRM platforms, and digital payment systems. A high-performance broadband connection ensures smooth access to these applications without buffering or disruptions. Stable upload and download speeds are particularly important for businesses handling large data transfers, remote team collaboration, and customer support operations.
Enterprise broadband also provides scalability. As companies expand, hire more employees, or introduce new digital services, bandwidth requirements increase. Business-grade broadband allows easy upgrades to accommodate growing demands without significant infrastructure changes.
Another advantage is improved uptime assurance. Enterprise broadband plans typically come with service commitments and priority technical support, reducing the risk of extended downtime. For businesses in Indiranagar’s competitive market, even a short disruption can impact productivity and reputation. Reliable broadband connectivity helps maintain seamless operations and consistent service delivery.
Secure Enterprise Network in Indiranagar
While speed is important, security is equally critical. A secure enterprise network in Indiranagar protects sensitive business data, financial information, and client records from cyber threats. As digital transformation accelerates, organizations face increasing risks such as malware attacks, phishing attempts, ransomware, and unauthorized access.
A secure enterprise network includes multiple layers of protection. Firewalls act as the first line of defense, monitoring and controlling incoming and outgoing traffic. Intrusion detection and prevention systems help identify suspicious activity before it becomes a serious issue. Virtual private networks enable secure remote access for employees working from different locations.
Encryption is another key component of network security. Encrypted connections ensure that data transmitted over the internet remains confidential and cannot be intercepted by unauthorized users. This is particularly important for financial firms, legal consultancies, healthcare providers, and technology companies operating in Indiranagar.
Network segmentation further enhances security by dividing the network into separate sections. This limits the spread of potential threats and protects critical systems. Regular security updates and continuous monitoring also help maintain a strong defense against emerging vulnerabilities.

Integrated Connectivity and Security Solutions
Modern enterprises require a combination of high-speed broadband and robust network security. An integrated approach ensures that businesses enjoy both performance and protection. Enterprise broadband provides the speed and capacity needed for digital operations, while secure networking solutions safeguard valuable information.
In Indiranagar, where businesses often operate in shared office spaces or multi-tenant buildings, secure configurations are especially important. Properly managed routers, secure WiFi access points, and controlled user access policies reduce the risk of unauthorized entry into company systems.
Managed network services can further enhance reliability and security. With professional monitoring and proactive maintenance, potential issues are identified and resolved quickly. This minimizes downtime and ensures uninterrupted connectivity.
Strengthening Business Growth in Indiranagar
As Indiranagar continues to attract innovative companies and established enterprises, strong digital infrastructure remains a cornerstone of success. Enterprise broadband Indiranagar supports efficient communication, cloud adoption, and data-driven decision-making. Secure enterprise networks protect business continuity and maintain client trust.
Investing in reliable broadband and advanced security solutions enables organizations to operate confidently in a connected world. With the right connectivity foundation, businesses in Indiranagar can focus on innovation, productivity, and sustained growth without compromising on performance or safety.
Author
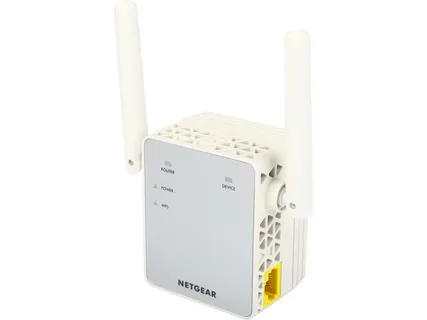
A Netgear Wi-Fi extender is an excellent device for improving wireless coverage in areas where your router’s signal is weak. Whether you are using a Netgear Nighthawk extender, AC series extender, or any other Netgear range extender, accessing the login page is essential for setup, configuration, troubleshooting, and firmware updates. If you are having trouble accessing your Netgear WiFi extender or need assistance with setup and login, you can contact technical support for guidance.
In this guide, we will explain how to log in to a Netgear WiFi extender, common login issues, and troubleshooting steps to ensure a smooth experience.
Need to Log In to Your Netgear Wi-Fi Extender
Logging in to your Netgear Wi-Fi extender allows you to:
- Configure wireless settings
- Change the extender’s network name (SSID)
- Update firmware
- Manage security settings
- Connect the extender to a new router
- Troubleshoot connectivity issues
- Monitor connected devices
Without accessing the extender’s dashboard, many advanced features and settings remain unavailable.
Requirements Before Logging In
Before attempting to log in to your Netgear Wi-Fi extender, make sure you have the following:
- A properly powered-on Netgear Wi-Fi extender
- A computer, laptop, smartphone, or tablet
- Access to the extender’s Wi-Fi network
- A compatible web browser such as Chrome, Firefox, Edge, or Safari
- The extender login credentials
If you encounter any difficulties during the login process, you may call for assistance.
Log In Through MyWiFiExt.net
The easiest and most common method is using the Netgear local web address.
Step 1: Connect to the Extender Network
Turn on your Netgear extender and wait for the power LED to become stable.
Connect your device to the extender’s Wi-Fi network. The network name typically appears as:
- NETGEAR_EXT
- NETGEAR_EXT_5G
- Custom SSID configured during setup
Step 2: Open a Web Browser
Launch your preferred web browser and enter the address in the URL bar.
Step 3: Access the Login Page
The Netgear extender login page should appear. Enter your administrator credentials.
Typically:
- Username: admin
- Password: password
If you changed the credentials during setup, use your customized login information.
Step 4: Access the Dashboard
You will be redirected to the Netgear extender dashboard, where you can manage all settings and configurations.
Log In Using the Extender IP Address
Sometimes, the MyWiFiExt.net page may not load. In such situations, use the extender’s IP address.
Common Netgear Extender IP Addresses
Depending on your model, the default IP address may be:
- 192.168.1.250
- 192.168.0.250
Login Steps
- Connect to the extender network.
- Open a web browser.
- Enter the extender’s IP address in the address bar.
- Press Enter.
- Enter your administrator username and password.
- Access the management dashboard.
How to Log In After Initial Setup
Once your extender has been configured, you can access it at any time.
Follow these steps:
- Connect your device to the extender network.
- Open a browser.
- Visit MyWiFiExt.net or the assigned IP address.
- Enter the admin credentials.
- Click Login.
You can now manage all extender settings.
What to Do If MyWiFiExt.net Is Not Working
Many users encounter issues when trying to access MyWiFiExt.net. Here are some effective solutions.
Verify Network Connection
Ensure your device is connected directly to the Netgear extender and not the primary router.
Restart the Extender
Power off the extender.
Once the LEDs stabilize, try logging in again.
Try Another Browser
Browser-related issues can sometimes prevent access.
Try:
- Google Chrome
- Mozilla Firefox
- Microsoft Edge
- Safari
Clear Browser Cache
Old browser cache and cookies may interfere with the login page.
Clear the browser data and reload the page.
Use the IP Address Instead
If MyWiFiExt.net fails, use the extender’s IP address to access the login page.
How to Reset Login Credentials
If you forgot your administrator password, you may need to reset the extender.
Reset Procedure
- Locate the Reset button on the extender.
- Press and hold it for approximately 10 seconds.
- Release the button when the LEDs begin blinking.
- Wait for the device to reboot.
The extender will return to factory default settings.
You can then log in using:
- Username: admin
- Password: password
After resetting, you must configure the extender again.
Updating Netgear Extender Firmware
Firmware updates help improve security, performance, and stability.
Update Steps
- Log in to the extender dashboard.
- Navigate to Settings.
- Select Firmware Update.
- Check for available updates.
- Install the latest firmware version.
- Wait for the update to complete.
Do not disconnect power during the update process.
Common Login Errors and Solutions
Login Page Not Opening
Possible causes:
- Incorrect network connection
- Browser issues
- Wrong IP address
Solution:
- Verify the connection.
- Try another browser.
- Use the extender IP address.
Incorrect Username or Password
Solution:
- Re-enter credentials carefully.
- Use password recovery options if available.
- Perform a factory reset if necessary.
Slow Dashboard Loading
Solution:
- Restart the extender.
- Improve Wi-Fi signal strength.
- Update firmware.
Extender Keeps Disconnecting
Solution:
- Relocate the extender closer to the router.
- Check for interference from electronic devices.
- Install firmware updates.
Best Practices for Secure Extender Access
To keep your network secure:
- Change the default administrator password.
- Use a strong Wi-Fi password.
- Keep firmware updated.
- Enable WPA2 or WPA3 security.
- Review connected devices regularly.
- Disable unauthorized access.
These steps help protect your network from potential security threats.
Conclusion
Logging in to a Netgear Wi-Fi extender is a straightforward process when you follow the correct steps. Whether you use MyWiFiExt.net or the extender’s IP address, accessing the management dashboard allows you to configure settings, update firmware, improve performance, and troubleshoot connectivity issues.
If you experience problems with login, setup, password recovery, firmware updates, or connectivity, professional assistance is available at +1-872-777-1190 or 1-833-800-3030. With proper configuration and maintenance, your Netgear Wi-Fi extender can provide reliable wireless coverage throughout your home or office.
Author


Roadrunner Email Account Access Explained Today

MyOffiz: Best Coworking Space in Gurgaon for Modern Businesses

Sugar Surgeon in Delhi: Dr. Sanchayan Roy for Diabetes Care

ICO Press Release Distribution Strategies for Crypto Project

QuickBooks Canada ProAdvisor Services for Business Accounting

Chinese Massage Benefits: Restore Balance, Energy and Wellness

QuickBooks Timesheets: Simplify Employee Time Tracking

Affordable SEO San Antonio: Grow Your Business Online

Salesforce Applications for Scalable Business Growth and Success

Surgery Tools for Precision Surgical Procedures: Grey Medical

Cybersecurity Consulting Company SequelNet Provides Critical IT Support Services to Medical Billing Firm, Medical Optimum

Meet the Megalodon: The Shark Star of ‘Meg 2’

Reduce Video Game Lag: Level Up Your Gaming Performance
Balancing India’s Entertainment: Cricket vs. Bollywood

Jetsetter’s Secrets: Unveiling Our Favorite Travel Hacks for a Seamless Adventure

The 5 Best Live Sports Streaming Sites: Legal and Exciting!

Hollywood Labor Unrest: The Impact of ‘What About Us?’ Strikes

Unveiling the Magic of Dream Fulfillment at the Late NBA Draft

Illuminate Your Skin: Dr. Axe Unveils Natural Remedies for Lightening Knees and Elbows

Bright Choices: Navigating the Pros and Cons of Skin Whitening Creams with Dr. Axe
-

 Business3 years ago
Cybersecurity Consulting Company SequelNet Provides Critical IT Support Services to Medical Billing Firm, Medical Optimum
-
Entertainment3 years ago
Meet the Megalodon: The Shark Star of ‘Meg 2’
-
Entertainment3 years ago
Reduce Video Game Lag: Level Up Your Gaming Performance
-
 Sports3 years ago
Balancing India’s Entertainment: Cricket vs. Bollywood
-
Entertainment3 years ago
Jetsetter’s Secrets: Unveiling Our Favorite Travel Hacks for a Seamless Adventure
-
Productivity3 years ago
The 5 Best Live Sports Streaming Sites: Legal and Exciting!
-
Art /Entertainment3 years ago
Hollywood Labor Unrest: The Impact of ‘What About Us?’ Strikes
-
Sports3 years ago
Unveiling the Magic of Dream Fulfillment at the Late NBA Draft


