
Digital Development
Drake Software Installation Errors: Causes & Easy Solutions

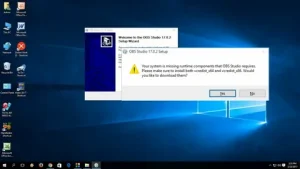
Drake Software is one of the most trusted tax preparation tools used by CPAs, accountants, and tax professionals across the world. It is known for its affordability, speed, and powerful features that help professionals manage tax filings efficiently. However, like any software, users may face installation errors while setting it up on their system—especially during peak tax season.
If you’re struggling to install Drake Software and encountering errors, don’t worry. Most Drake installation issues are common and can be fixed easily once you understand their causes. In this blog, we’ll explain Drake Software installation errors, why they happen, and how you can solve them step by step, all in simple language.
Why Drake Software Installation Errors Occur
Before jumping into solutions, it’s important to understand why installation errors happen in the first place. Most Drake Software installation issues are caused by:
- System compatibility problems
- Lack of administrative permissions
- Antivirus or firewall interference
- Corrupted installation files
- Network or server issues
- Outdated Windows or system components
Knowing the root cause makes troubleshooting faster and less frustrating.
Common Drake Software Installation Errors
Below are some of the most common installation problems users face with Drake Software.
-
System Requirements Not Met
Cause:
Drake Software requires specific system requirements such as:
- Compatible Windows version
- Sufficient RAM and storage
- Updated .NET Framework
If your computer doesn’t meet these requirements, installation may fail or stop midway.
Solution:
- Check Drake Software’s minimum system requirements
- Update your Windows operating system
- Free up disk space before installation
- Install or update Microsoft .NET Framework
A simple system update often solves this issue.
-
Installation Freezes or Stops Midway
Cause:
This usually happens due to:
- Slow internet connection
- Background programs running
- Antivirus blocking the installer
Solution:
- Close all unnecessary programs
- Restart your computer and try again
- Temporarily disable antivirus or firewall (re-enable it after installation)
- Use a stable internet connection
Make sure you download Drake Software only from the official source.
-
Permission or Administrator Errors
Cause:
If you don’t have administrator rights, Windows may block the installation.
Solution:
- Right-click on the installer file
- Select “Run as Administrator”
- Ensure your user account has admin privileges
This is one of the most overlooked but easiest fixes.
-
Antivirus or Firewall Blocking Installation
Cause:
Security software may mistakenly identify Drake files as a threat.
Solution:
- Add Drake Software to antivirus exclusions
- Temporarily disable firewall during installation
- Allow Drake Software through Windows Defender
This issue is very common in office environments with strict security settings.
-
Corrupted or Incomplete Installation File
Cause:
A broken or incomplete download can lead to installation failure.
Solution:
- Delete the existing installer file
- Re-download the setup from the official Drake website
- Avoid using public or unstable networks
Never use third-party or pirated installers.
-
Network Installation Errors (Multi-User Setup)
Cause:
If you’re installing Drake Software on a network or server:
- Network permissions may be incorrect
- Shared folder settings may be misconfigured
Solution:
- Ensure shared folders have full read/write permissions
- Verify network connectivity
- Install Drake Software on the server first, then on workstations
Many firms avoid such issues by switching to Drake Hosting, where the software is already installed and managed on the cloud.
-
Windows Update or Missing Components Error
Cause:
Outdated Windows or missing system files can interfere with installation.
Solution:
- Run Windows Update
- Install pending updates
- Restart your system
- Install required redistributables (C++ or .NET)
Keeping your system updated helps avoid many installation problems.
-
Error Due to Previous Drake Installation
Cause:
Old or incomplete Drake installations can conflict with the new setup.
Solution:
- Uninstall previous versions completely
- Delete leftover Drake folders
- Clean temporary files
- Restart your system before reinstalling
This ensures a clean and smooth installation.
-
Disk Space Errors
Cause:
Insufficient hard drive space may prevent installation.
Solution:
- Free up disk space
- Move large files to external storage
- Install Drake Software on a drive with sufficient space
Always keep extra free space for updates and backups.
10. Installation Errors in Virtual or Remote Environments
Cause:
Installing Drake Software on remote desktops or virtual machines may cause errors due to:

- Limited permissions
- Server restrictions
Solution:
This is where Drake Hosting or UltraTax CS Hosting becomes highly beneficial. With cloud hosting:
- Software comes pre-installed
- No local installation issues
- Access from anywhere
- Professional server management
Hosting removes the headache of manual installations completely.
How Drake Hosting Helps Avoid Installation Errors
Drake Hosting allows tax professionals to access Drake Software through a secure cloud server instead of installing it on local machines. This eliminates most installation-related problems such as:
- Compatibility issues
- Network setup errors
- Permission problems
- Hardware limitations
With hosting, updates, security, and maintenance are handled by experts, allowing you to focus on tax work instead of IT issues.
Drake Software vs UltraTax CS Hosting
Similar to Drake Hosting, UltraTax CS Hosting offers cloud-based access to UltraTax CS software. Both hosting solutions provide:
- Zero installation hassles
- Automatic updates
- Secure data storage
- Remote accessibility
For firms that frequently face installation or technical issues, cloud hosting is a smarter and more reliable solution.
Drake Installation Errors
To avoid future problems, follow these simple tips:
- Always check system requirements
- Keep Windows and drivers updated
- Use antivirus exclusions wisely
- Avoid installing during peak system usage
- Consider cloud hosting for long-term stability
These steps can save time and reduce stress during tax season.
Final Thoughts
Drake Software installation errors can be frustrating, especially when deadlines are tight. However, most issues are caused by common factors like system compatibility, permissions, or security software—and they are easy to fix with the right steps.
For tax professionals who want a hassle-free experience, Drake Hosting and UltraTax CS Hosting offer a reliable alternative by eliminating installation and technical concerns altogether. Cloud hosting not only simplifies access but also improves productivity and data security.
Author
In today’s connected world, online threats are constantly evolving, from malware and ransomware to phishing scams and data breaches. Having a robust cybersecurity solution like Bitdefender Total Security is essential for protecting your devices, data, and privacy across Windows, macOS, Android and iOS. Whether you’re buying your first subscription or renewing an existing one, understanding the process and knowing where to get help can save you time, money, and stress.

What Is Bitdefender Total Security?
Bitdefender Total Security is an all-in-one cybersecurity suite designed for home users and families who want comprehensive protection. It includes advanced antivirus capabilities, anti-ransomware defenses, firewall protection, web filtering, phishing protection, password manager, parental controls, and more — all managed from a single account interface known as Bitdefender Central.
Unlike basic antivirus software, Total Security provides layered protection across multiple devices, ensuring that you can secure your digital life whether you’re on a laptop, smartphone, tablet or desktop. This makes it particularly appealing for households with many connected gadgets.
Why It’s Important to Keep Your Subscription Active
When your Bitdefender Total Security subscription expires, your devices lose access to critical protection updates and security features. These updates are what keep your system safe from the latest threats emerging every day. For this reason, timely renewal — either manually or through automatic renewal — is key to uninterrupted security coverage.
Bitdefender’s subscriptions are usually set to automatically renew by default, helping prevent gaps in your protection. However, you can also choose to manage renewals manually if you prefer more control over billing.
How to Buy Bitdefender Total Security
1. Visit the Official Bitdefender Website
The most straightforward way to purchase Bitdefender Total Security is directly from the official Bitdefender site. Choose the plan that suits your needs — typically differentiated by the number of devices and subscription length. You’ll first create or sign in to your Bitdefender Central account to begin the purchase.
2. Choose a Subscription Plan
Bitdefender offers flexible plans:
-
Individual plans for users with a few devices
-
Family plans that support many more devices at once
Prices vary based on the number of devices and whether you’re signing up for one year or longer term plans. Third-party retailers such as Best Buy also sell Bitdefender Total Security with alternatives on pricing and formats (digital download or physical product key).
3. Complete the Purchase
Once you’ve chosen your plan, complete the purchase with your preferred payment method — usually credit/debit card or PayPal. If you opt into automatic renewal, your subscription will continue to renew at the end of each term unless you choose to cancel.
4. Activate Your Subscription
After purchasing, Bitdefender will send a confirmation email with instructions. Log into Bitdefender Central, go to My Subscriptions, and activate the subscription. After activation, you can install protection on all covered devices.
Tip: If you received an activation code from a retailer (e.g., Amazon or Best Buy), add the code inside Bitdefender Central to activate or extend your subscription.
How to Renew Your Bitdefender Total Security Subscription
1. Automatic Renewal
If automatic renewal was enabled when you purchased your subscription, Bitdefender will automatically charge your payment method before your plan expires, ensuring continuous protection. You will receive an email notification with pricing and renewal details ahead of time.
2. Manual Renewal Through Bitdefender Central
If automatic renewal is turned off (or if you purchased a license code from a third party), you can renew manually:
-
Log into Bitdefender Central.
-
Go to the My Subscriptions section.
-
Select the subscription you want to renew.
-
Click RENEW, which opens a web page where you can complete the renewal purchase.
3. Renew with a Retail Activation Code
If you have purchased a renewal key from a store or authorized retailer, add it inside Bitdefender Central by selecting My Subscriptions → Activation Code and entering the code. This will add the new subscription term to your existing plan without losing any remaining days.
Managing Your Subscription Settings
Bitdefender Central lets you:
-
View your subscription status and expiration date
-
Change payment methods
-
Cancel automatic renewals
-
Request a refund within the allowed 30-day period for most purchases
If you prefer not to be charged automatically, disabling the auto-renew feature from your central account or contacting Bitdefender support can give you peace of mind before the next billing cycle.
Where to Get Support — Including Phone Help
If you encounter issues buying or renewing your Bitdefender Total Security subscription — such as billing problems, activation challenges, or confusion over renewal options — reaching out to Bitdefender Support is a smart step. You may need clarification about your renewal terms, help managing your account settings, or assistance with activation errors. For direct assistance, you can contact support line at 1-833-800-3030. This phone number connects you with support staff who can walk you through purchase or renewal, help you troubleshoot problems, or answer questions about your subscription. Don’t hesitate to use this number if you find the process confusing or run into errors during your purchase or renewal. You can mention this support number again if needed when describing your issue to ensure rapid assistance. Beyond the phone line, Bitdefender support teams also offer online chat and email help options via the support section of the official website.
Final Tips for a Smooth Bitdefender Subscription Experience
-
Start Early: Begin the renewal process at least a few weeks before your subscription expires to avoid lapses in protection.
-
Keep Records: Always save confirmation emails and receipt information for your purchase and renewal.
-
Manage Auto-Renewal Preferences: Decide whether you want automatic renewal turned on or off — Bitdefender provides options to suit your preference.
-
Stay Secure: Never share your Bitdefender Central login with untrusted parties, and beware of fake renewal emails that could be scams.
With this guide, you now have a clear understanding of how to buy or renew your Bitdefender Total Security subscription and where to go for help when needed. Keeping your cybersecurity up to date is essential — don’t wait until it’s too late!
Author
In the digital age, protecting your personal and financial information online isn’t just smart — it’s essential. Webroot SecureAnywhere Internet Security Plus is one of today’s well-known cybersecurity products, designed to safeguard your devices — from PCs and Macs to smartphones and tablets — against malware, phishing attacks, ransomware, and other evolving threats.
Unlike traditional antivirus software that relies on large signature databases, Webroot uses cloud-based threat intelligence and real-time scanning to offer fast, lightweight protection without significantly slowing down your system.
Whether you’re considering this product for the first time or need to renew an existing subscription, it helps to understand how the purchase and renewal process works, what features you get, and where to turn for support if you need assistance.

What Is Webroot SecureAnywhere Internet Security Plus?
Webroot SecureAnywhere Internet Security Plus is a comprehensive cybersecurity solution that extends traditional antivirus protection with additional safeguards such as identity protection, password management powered by LastPass, and broader device coverage. This package is ideal for users who want stronger protection than basic virus scanning — particularly for devices that are used for online banking, shopping, or storing sensitive data.
Key features typically include:
- Cloud-based threat detection: Uses real-time threat intelligence to identify new risks quickly
- Fast scanning: Scans systems in a matter of seconds rather than minutes
- Identity and password protection: Incorporates tools to secure login credentials and help prevent identity theft
- Multi-device coverage: Options to protect several devices under one subscription
This combination of features makes Internet Security Plus a good choice for families or individuals with multiple devices.
How to Buy a New Subscription
Purchasing Webroot SecureAnywhere Internet Security Plus is straightforward — and can be done directly through the official Webroot website or via authorized resellers:
1. Direct Purchase from Webroot
The most direct way to buy a new subscription is by visiting the official Webroot store online. On the product page for Internet Security Plus, you can choose the number of devices you want to protect and the length of the subscription term (usually 1 year). Follow the on-screen prompts to add the product to your cart and complete checkout securely.
- Visit Webroot’s official product page for Internet Security Plus
- Select the plan that fits your needs (e.g., number of devices)
- Complete payment with your preferred method
- After purchase, you’ll receive a keycode — a unique subscription code that activates your software
Most purchases from the official site include access to a 14-day trial or a money-back guarantee — meaning you can test the software risk-free.
2. Buy Through Authorized Retailers
If you prefer, you can purchase Webroot SecureAnywhere Internet Security Plus through authorized retailers like Best Buy, Amazon, or others. These retailers may offer special pricing, bundle deals, or multi-device plans. Once purchased, you’ll get an activation keycode to enter in your Webroot software to start protection.
Some stores also offer automatic renewal options — which means after your subscription expires, it will renew automatically unless you cancel. Always check with the retailer and confirm their renewal terms before you buy.
3. Phone Support for Purchase Assistance
If you need help selecting the right plan, completing your purchase, or have questions about features, calling support can be helpful. You can reach customer support or sales advisors who can guide you step-by-step at 1-833-800-3030 — especially if you’re unsure which plan best fits your needs.
How to Renew Your Subscription
Keeping your Webroot subscription active is crucial, as an expired subscription can leave your devices unprotected.
1. Renew Online Using Your Keycode
If you’ve purchased Webroot before and your subscription is expiring, you can renew online:
- Go to the official Webroot renewal page
- Enter your keycode (the code from your original purchase)
- Follow the on-screen steps to complete the renewal purchase
Renewing this way ensures that your existing protection continues without interruption.
2. Renew Through Your Account Portal
If you already have a Webroot account, you can log in on the official site and manage your subscription from there:
- Go to the Webroot account login page
- Sign in with your email and password
- Under “Subscriptions,” choose the option to renew or modify your current plan
This method is especially useful if you want to update payment information or enroll in automatic renewal.
3. Automatic Renewal Options
Many users find setting up automatic renewal the most convenient way to keep protection current. Automatic renewal charges your subscription card before expiry so there’s no gap in coverage. Check your account settings or contact support if you need to turn this feature on or off.
4. Renewal Through Resellers
If you originally bought your subscription through a reseller (like Best Buy or another store), you may need to renew through that same channel. Some retailers offer direct renewal or customer service support — contact them or check the documentation that came with your purchase.
Getting Support
Whether you’re buying for the first time or renewing an existing subscription, Webroot offers multiple support channels.
Official Support Channels
-
Online Support Center: The official Webroot support website provides articles, FAQs, and “how-to” guides for product setup, renewal, and troubleshooting.
-
Account Login Support: You can manage your subscriptions directly via the Webroot account portal.
Phone Support
For personalized help — especially if you’re stuck or need assistance with activation or renewal — you can call support. This number connects you with agents who can help walk you through purchasing, renewal options, or software configuration.
Tips for a Smooth Experience
- Always use official channels: Be cautious with unsolicited renewal emails that claim your subscription has expired — these can sometimes be scams. Always renew by logging into your account or going through the official Webroot portal
- Keep your keycode handy: Having your activation code makes renewals faster. You’ll find it on your original purchase receipt or in your Webroot account
- Watch for expiration alerts: Webroot often displays reminders in your software ahead of expiry so you can renew early and avoid gaps
Conclusion
Webroot SecureAnywhere Internet Security Plus is a powerful but lightweight cybersecurity solution that keeps your devices safe from evolving threats. Whether you’re buying a new subscription or renewing an existing plan, the process is straightforward — either through the official Webroot website or with support assistance. For help at any stage, support agents are available to assist you with purchasing, renewal questions, or technical issues.
Staying proactive with your cybersecurity not only protects your devices but also safeguards your personal and financial data from online threats. By understanding how the Webroot subscription lifecycle works, you can ensure continuous protection with confidence.
Author


Author


Bitdefender Total Security: Purchase and Renewal Guide

Webroot SecureAnywhere: Purchase and Renewal Guide

Google Sheet Connector for WooCommerce: Optimize Efficienc

Indian Visa Process for Guatemalan and Guinean Citizens

Home and Healthcare Services: Caring Support for Everyday Needs

Online Clothing Shopping in Pakistan: The Future of Fashion Retail

Luxury Pret: Elevating Everyday Fashion with Elegance

Architecture in Karachi: Innovative and Sustainable Spaces

Velvet Dresses in Pakistani Fashion: A Timeless Elegance

Women’s Formal Wear: Perfect Dresses for Every Occasion

Cybersecurity Consulting Company SequelNet Provides Critical IT Support Services to Medical Billing Firm, Medical Optimum

Team Communication Software Transforms Operations at Finance Innovate

Project Management Tool Transforms Long Island Business

How Alleviate Poverty Utilized IPPBX’s All-in-One Solution to Transform Lives in New York City

Breast Cancer: The Imperative Role of Mammograms in Screening and Early Detection

Unstoppable Collaboration: D.C.’s Citi Open and Silicon Valley Classic Unite to Propel Women’s Tennis to New Heights

Embracing Renewal: Sizdabedar Celebrations Unite Iranians in New York’s Eisenhower Park

The Benefits of Starting a Side Hustle for Financial Freedom

New Blood Donation Screening Questions What You Need to Know

Stylishly Timeless: The 5 Types of Sandals You Need in Your Closet
-

 Business2 years ago
Cybersecurity Consulting Company SequelNet Provides Critical IT Support Services to Medical Billing Firm, Medical Optimum
-
Business3 years ago
Team Communication Software Transforms Operations at Finance Innovate
-
Business3 years ago
Project Management Tool Transforms Long Island Business
-
Business2 years ago
How Alleviate Poverty Utilized IPPBX’s All-in-One Solution to Transform Lives in New York City
-
health3 years ago
Breast Cancer: The Imperative Role of Mammograms in Screening and Early Detection
-
Sports3 years ago
Unstoppable Collaboration: D.C.’s Citi Open and Silicon Valley Classic Unite to Propel Women’s Tennis to New Heights
-
Art /Entertainment3 years ago
Embracing Renewal: Sizdabedar Celebrations Unite Iranians in New York’s Eisenhower Park
-
Finance3 years ago
The Benefits of Starting a Side Hustle for Financial Freedom


