
Food Drink
Discover the Perfect Pairing for Your Afternoon Tea: Earl Grey Tea Cake

Tea lovers, rejoice! If you’re looking for a new way to enjoy your afternoon tea, we’ve got just the thing for you. Meet Earl Grey Tea Cake – the perfect pairing for your favorite cup of tea. This delicious cake is infused with the aromatic flavor of Earl Grey Tea and is sure to take your tea-drinking experience to a whole new level. In this blog post, we’ll tell you everything you need to know about this delightful treat – from brewing Earl Grey Tea to pairing it with various foods. So put on your apron and get ready to impress your friends and family with this mouth-watering recipe!
What is Earl Grey Tea?
Earl Grey Tea is a black tea blend that gets its distinctive flavor from the addition of oil extracted from the rind of bergamot oranges. The tea has been popular for over two centuries and was named after Earl Charles Grey, a British Prime Minister in the 1830s.
The exact origins of this beloved tea are unknown, but there are several theories about how it came to be. Some say that it was first created by accident when bergamot oil accidentally spilled onto some tea leaves during transit. Others believe that it was invented deliberately as a way to mask the taste of low-quality teas.
Regardless of its origins, Earl Grey Tea has become one of the most popular blends in the world due to its unique flavor profile. The combination of bold black tea and citrusy bergamot creates an aromatic brew with hints of orange and floral notes.
If you’ve never tried Earl Grey Tea before, now’s your chance! Brew up a cup (or pot) and savor its complex flavors – you won’t be disappointed.

How to Brew Earl Grey Tea
Brewing a perfect cup of Earl Grey tea requires some attention to detail, but it’s worth the effort. Here are some tips on how to brew Earl Grey tea:
1. Start with fresh cold water: Use freshly drawn, cold water for the best flavor.
2. Heat the water: Bring the water to a rolling boil and then let it cool slightly before steeping your tea.
3. Measure your loose-leaf tea: The recommended amount is one teaspoon per cup of water.
4. Steep time: Depending on how strong you like your tea, steep for 3-5 minutes.
5. Add milk and sweetener if desired: Traditionalists would say that adding milk or sweeteners would overpower the delicate flavors of Earl Grey tea, but ultimately it comes down to personal preference.
6. Enjoy! Sit back, relax and savor every sip of this deliciously fragrant and flavorful beverage.
By following these simple steps, you can enjoy a perfectly brewed cup of Earl Grey Tea anytime during the day!
The Different Types of Earl Grey Tea
Earl Grey tea is a beloved beverage that has become a staple in many households around the world. While black tea and bergamot oil are the main ingredients, there are actually several different types of Earl Grey tea available.
One popular variation is Lady Grey, which includes additional citrus flavors like lemon and orange peel. The result is a lighter and more fragrant brew with subtle hints of fruitiness.
Another type of Earl Grey is Russian Earl Grey, which contains ingredients like smoky Chinese Lapsang Souchong tea and sweet vanilla flavoring. This blend creates a bold yet smooth taste that pairs well with rich desserts or dark chocolate.
For those who prefer green tea, there’s also Green Earl Grey, which uses green tea leaves instead of black ones. It has less caffeine but still delivers the classic bergamot aroma along with floral undertones.
There’s Cream Earl Grey, which adds creamy notes to the traditional mix by including real cream or milk flavoring alongside the bergamot oil infusion. This variation brings out an indulgent sweetness that lingers on your tongue after each sip.
With so many different types of Earl Grey teas available today, it’s easy to find one that suits your personal preferences and tastes!
How to Pair Earl Grey Tea with various Foods
Earl Grey tea is a classic and versatile tea that pairs well with various foods. Whether you prefer sweet or savory snacks, there’s always an Earl Grey combination for everyone.
For a light snack, try pairing your Earl Grey tea with scones and clotted cream. The creamy texture of the clotted cream complements the floral notes of the Earl Grey, while the crumbly texture of the scone provides a good contrast.
If you’re in for something more substantial, cheese sandwiches make an excellent pair for your cup of Earl Grey tea. The saltiness from the cheese will balance out the bold flavors of black tea while still allowing its bergamot essence to shine through.
For those who have a sweet tooth, macarons are perfect companions for your afternoon cuppa. Their sugary sweetness blends harmoniously with fruity notes found in some types of Earl grey teas such as lavender or blueberry-infused ones.
If you want to step things up and indulge yourself in luxury treats, why not pair your earl grey tea with chocolate truffles? The rich flavor profile present in dark chocolate will mingle perfectly with this elegant beverage – making it an ideal option when treating yourself!
There’s no doubt that Earl grey Tea has become one staple drink among many households worldwide – especially during teatime! So go ahead and experiment different food combinations until you find what works best for you. Happy Tasting!
Conclusion
Earl Grey tea is a versatile and flavorful beverage that can be enjoyed on its own or paired with a variety of foods. Whether you prefer the classic blend or one of the many variations available today, there’s an Earl Grey tea out there to suit your taste.
And if you’re looking for the perfect pairing for your afternoon tea, look no further than an Earl Grey tea cake. This delicious treat combines the delicate aroma and flavor of Earl Grey with buttery cake goodness – it’s sure to become a favorite!
So why not brew up a pot of Earl Grey tea today and see what new flavor combinations you can come up with? Cheers!
Author
South Indian food is much more than just a cuisine; it is a sensory experience defined by rich flavors, aromatic spices, and time-honored traditions. Known for its impeccable balance of taste and nutrition, South Indian cooking has gained immense popularity across Australia. If you enjoy wholesome meals with bold, complex flavors, exploring a South Indian restaurant in Cairns can be a truly delightful journey.
In this guide, we will walk you through the essential South Indian dishes you simply cannot miss. We will also provide insights into why this ancient cuisine is celebrated worldwide.
What Makes South Indian Food So Special?
South Indian cuisine stands out due to its unique cooking techniques and locally sourced ingredients. Unlike North Indian food, which often relies on rich creams and heavy butter, South Indian dishes are typically lighter and easier to digest.
Key Characteristics:
-
Rice as a Staple: Most meals center around rice or rice-based flours.
-
The Power of Fermentation: Dishes like dosa and idli use fermented batters, which improve gut health.
-
Coconut Foundations: Many gravies and chutneys use fresh coconut for a creamy, tropical finish.
-
Signature Tempering: A generous use of mustard seeds, curry leaves, and tangy tamarind defines the flavor profile.
These elements create a perfect harmony of nutrition, comfort, and vibrant taste.
Must-Try South Indian Dishes
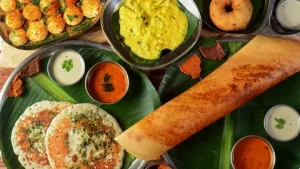
1. Dosa – The Crispy Classic
The dosa is perhaps the most iconic South Indian export. Crafted from a fermented rice and lentil batter, this thin, savory crepe is crispy on the outside and satisfyingly soft on the inside.
-
Masala Dosa: Stuffed with a fragrant, spiced potato filling.
-
Paper Dosa: An extra-thin, large version for those who love a crunch.
-
Cheese Dosa: A modern fusion twist that appeals to all ages.
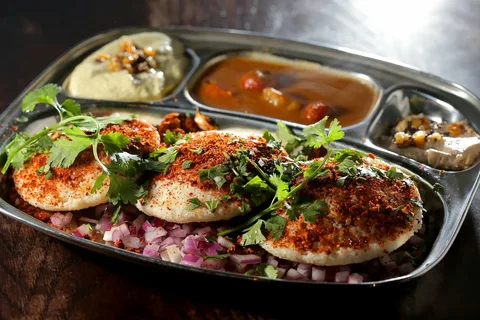
2. Idli – The Healthy Delight
Idlis are soft, pillowy steamed rice cakes. Because they are steamed rather than fried, they are incredibly low in calories and rich in natural probiotics. They serve as the perfect light breakfast or a gentle meal for those with sensitive stomachs.
3. Vada – Savory and Crunchy
Vada is a deep-fried savory donut made from lentil flour. It offers a delightful contrast of a crispy exterior and a fluffy interior. It is best enjoyed when dunked in hot sambar or paired with cool coconut chutney.
4. Uttapam – The South Indian “Pizza”
Thicker than a dosa, Uttapam is a savory pancake topped with a variety of fresh vegetables like onions, tomatoes, and green chilies. It is a fantastic option for those who prefer a softer, doughier texture over a crispy one.
The Essential Accompaniments
No South Indian meal is complete without its traditional side dishes. These provide the tangy and spicy notes that tie the entire experience together.
-
Sambar: A hearty, lentil-based vegetable stew cooked with tamarind and a special spice blend. It is the “soul” of the cuisine.
-
Rasam: A thin, spicy soup known for its medicinal and digestive benefits. It is particularly comforting during cold weather.
-
The Thali Experience: For the ultimate journey, try a South Indian Thali. This is a complete meal featuring rice, sambar, rasam, various vegetable curries, pickles, and desserts served on a single platter.
Why the World Has Fallen in Love with South India’s Flavors
The global rise of South Indian food is no accident. Its popularity stems from several key health and lifestyle benefits:
-
Vegetarian-Friendly: It offers one of the widest ranges of plant-based meals in the world.
-
Gut-Health Focused: The fermentation process makes the food naturally rich in probiotics.
-
Balanced Nutrition: Most meals provide a healthy mix of proteins, carbohydrates, and essential minerals.
-
Distinctive Spicing: The flavors are bold and complex without always being overwhelmingly “hot.”
Where to Find an Authentic South Indian Restaurant in Cairns
When searching for an authentic dining experience in Cairns, look for a place that prioritizes traditional recipes and fresh, high-quality ingredients. A true South Indian kitchen uses time-tested techniques to ensure the dosa is perfectly crisp and the sambar is properly balanced.
One popular destination for enthusiasts is Spicy Bite. Known for its welcoming atmosphere and commitment to genuine flavors, Spicy Bite offers everything from soft idlis to hearty thali meals. Their dedication to traditional tastes makes them a go-to spot for anyone seeking the real flavors of the South. You can explore their full menu and offerings at Spicy Bite.
Tips for First-Time Explorers
If you are new to this cuisine, here is how to enjoy it like a local:
-
Start Simple: Begin with a classic masala dosa or a plate of idli.
-
Use the Chutneys: Don’t ignore the side dips; they are designed to balance the spices of the main dish.
-
Try the Thali: If you can’t decide, the thali gives you a little bit of everything.
-
Eat with Your Hands: For a truly authentic experience, many locals believe eating with your hands enhances the connection to the food.
Final Thoughts
South Indian food represents a perfect marriage of taste, tradition, and health. Whether you are craving a comforting bowl of sambar or a crispy, golden dosa, every bite tells a story of a vibrant culture. If you haven’t yet explored these flavors, now is the perfect time to start. Visiting a quality South Indian restaurant in Cairns will provide an unforgettable taste experience that will leave you coming back for more.
Author

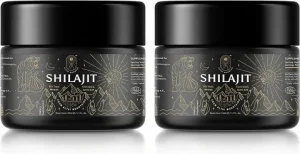
Shilajit has officially become one of the most discussed natural supplements in India. Many people are adding it to their daily routines to improve energy levels and support overall wellness. However, finding pure shilajit that actually works is not easy. There are countless products available online today.
One of the most important factors for quality is the fulvic acid content. This natural compound determines how effective the product truly is. Many brands claim high purity. Not all of them deliver the same results. This guide will help you understand what to look for. We have listed the top 6 pure shilajit brands with high fulvic acid in India for 2026.
What is Fulvic Acid in Shilajit?
Fulvic acid is a natural compound found within shilajit. It forms over hundreds of years as plant matter breaks down in the mountains. This slow process makes real shilajit rare and valuable.
In simple terms, fulvic acid is the “active part” of the supplement. It helps the body absorb nutrients better. It also supports energy production at a cellular level. Furthermore, it plays a role in removing toxins and boosting stamina. High-quality fulvic acid leads to better results for the user.
Why the Percentage Matters
The fulvic acid percentage is the first thing you should check. It gives you a clear idea of the product’s strength and purity. A higher percentage generally means better potency. Conversely, a low percentage suggests a weak or diluted product.
Be careful of brands that make extreme claims. Some may claim 90% purity without providing proof. Realistic numbers combined with lab testing are a better sign of a trustworthy brand.
How We Selected the Best Brands
To make this list reliable, we followed a practical approach. We evaluated each brand based on several factors:
-
Purity and Sourcing: We looked for shilajit from trusted regions like the Himalayas.
-
Fulvic Acid Levels: We prioritized brands with higher, realistic percentages.
-
Form of Shilajit: Resin was preferred over capsules or powders for its purity.
-
Lab Testing: Transparency is key for safety.
-
Customer Feedback: We analyzed real reviews from consistent users.
Top 6 Pure Shilajit Brands in India (2026)
1. Wellness County Shilajit
Wellness County offers a premium product that stands out in the market. They combine pure Himalayan shilajit resin with cordyceps. This unique formulation is designed for high performance.
-
Key Highlights: It features a high fulvic acid content and minimal processing.
-
Pros: It has strong potency. It is ideal for people with active lifestyles.
-
Cons: The price is slightly higher than basic options.
2. Rasayanam Shilajit Resin
Rasayanam focuses on traditional preparation methods. It is often preferred by users who want a clean and simple product without additives.
-
Key Highlights: This brand is lab-tested and focuses on authentic mountain sourcing.
-
Pros: It maintains excellent purity standards.
-
Cons: Availability can sometimes be limited compared to larger mass-market brands.
3. Upakarma Ayurveda Shilajit Resin
Upakarma is a well-known name for affordable Ayurvedic products. Their resin is a solid choice for those just starting their supplement journey.
-
Key Highlights: It is budget-friendly and offers decent fulvic acid levels.
-
Pros: It is easy to find online. It is great for first-time users.
-
Cons: The potency is lower than premium-tier brands.
4. Kapiva Shilajit Resin
Kapiva is a household name in modern Ayurveda. They source their shilajit from high altitudes in the Himalayas for daily wellness use.
-
Key Highlights: It is a trusted brand with consistent quality control.
-
Pros: It has a strong reputation. It is suitable for everyday use.
-
Cons: It may not be as potent as specialized high-end resins.
5. Satthwa Shilajit Resin
Satthwa focuses on natural products with very little processing. Their resin is known for having a very clean and simple formulation.
-
Key Highlights: The focus is entirely on natural sourcing.
-
Pros: It is a safe and clean option. It is suitable for long-term use.
-
Cons: Some users find the effectiveness to be moderate.
6. Vedikroots Shilajit Resin
Vedikroots is an emerging brand in India. They offer budget-friendly options that are gaining a following among new users.
-
Key Highlights: They provide affordable pricing for the mass market.
-
Pros: This is a good entry-level option.
-
Cons: It lacks the long-term brand trust held by established names.
How to Check the Quality Yourself
Checking the content is not difficult if you know what to look for. Always check the product label for the fulvic acid percentage. Look for third-party lab reports on the brand’s website. If a brand is transparent about its testing, it is usually a good sign.
A high-quality product typically contains between 60% and 80% fulvic acid. Anything below 50% may not be very effective. Anything claiming over 80% without a certificate is likely misleading.
Tips for Choosing Pure Shilajit
-
Choose Resin: Always prioritize the resin form over pills.
-
Avoid “Too Cheap”: Real shilajit is expensive to source. If the price is very low, it might be fake.
-
The Water Test: Pure shilajit should dissolve completely in warm water. It should not leave any sandy residue behind.
-
Read Reviews: Look for feedback regarding energy levels and overall feeling.
The Benefits of High-Quality Shilajit
Choosing a product with high fulvic acid leads to better results. Users often report improved energy and better stamina. It also supports faster recovery after intense workouts. Results will vary from person to person. However, consistency is the most important factor for success.
Final Verdict
Your choice depends on your specific needs. If you want a high-performance option, Wellness County is the top pick. For those focused strictly on purity, Rasayanam is a reliable choice. If you are on a budget, Upakarma or Vedikroots are great starting points. For balanced daily use, Kapiva and Satthwa are excellent options. Always ensure your choice is properly sourced and in its natural resin form.
Author

Vietnam has firmly established itself as a powerhouse in the global coffee trade, consistently ranking as the world’s second-largest exporter. Over the past decade, the country has transformed its agricultural landscape, investing heavily in coffee cultivation, processing, and global trade networks. As a result, Vietnam coffee exports have reached unprecedented levels, reflecting both rising global demand and strong pricing trends.
In 2024, Vietnam recorded coffee export revenues of $5.62 billion, marking a significant milestone for the industry. Despite fluctuations in volume due to weather conditions and production challenges, export value surged due to higher global coffee prices. Moving into 2025, the sector continues to expand rapidly, reinforcing Vietnam’s critical role in the international coffee market.
Vietnam Coffee Exports: A Record-Breaking Journey
The growth of Vietnam coffee exports has been nothing short of remarkable. Between January and December 2024, the country exported approximately 1.26 million tons of coffee. While this represented a decline in volume compared to the previous year, the export value increased sharply by over 32%, driven by rising global prices.
In early 2025, the momentum continued. During the first quarter alone, export value exceeded $2.8 billion, reflecting a nearly 74% increase year-over-year. This surge highlights how vietnam coffee exports are increasingly driven by value rather than volume.
By mid-2025, exports had already reached $4.7 billion, and projections indicate that total export revenue could surpass $7 billion by the end of the year. These figures demonstrate the resilience and adaptability of vietnam coffee exporters in a rapidly changing global market.
Key Drivers Behind Export Growth
Several factors are contributing to the impressive performance of vietnam coffee exports:
1. Rising Global Coffee Prices
One of the most significant drivers has been the sharp increase in coffee prices. Average export prices rose above $5,600 per metric ton in 2025, compared to around $3,700 in previous years. This price surge has allowed exporters to generate higher revenues even with reduced volumes.
2. Strong Demand from International Markets
Demand from major markets such as the European Union and the United States has remained robust. Consumers are increasingly appreciating Vietnamese coffee for its strong flavor, affordability, and versatility.
3. Strategic Market Diversification
To mitigate risks such as tariffs and geopolitical uncertainties, vietnam coffee exporters are diversifying into emerging markets in Asia, including China, the Philippines, and South Korea.
Vietnam Coffee Production Landscape
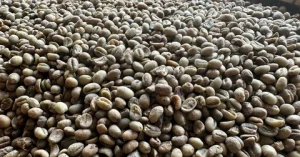
The success of vietnam coffee exports is closely tied to the country’s strong agricultural foundation. Vietnam coffee production is concentrated in regions like Dak Lak, Lam Dong, and Gia Lai, where favorable climate and soil conditions support high yields.
Vietnam produces approximately 1.74 million tons of coffee annually, with Robusta beans accounting for around 95% of total output. This makes Vietnam the world’s leading producer of Robusta coffee.
However, the 2023–2024 season saw a decline in production due to drought conditions, reducing output by nearly 20%. Fortunately, improved weather patterns in early 2025 have supported crop recovery, and production is expected to increase significantly in the 2025–2026 season.
Top Export Markets for Vietnamese Coffee
The global reach of vietnam coffee exports continues to expand, with key markets driving demand:
- Germany remains the largest importer, accounting for nearly 15% of exports.
- United States follows closely, showing strong growth in both volume and value.
- Italy, Spain, and Belgium are major European buyers.
- Japan and South Korea represent important Asian markets.
The European Union collectively accounts for a significant share of total exports, importing hundreds of thousands of tons annually. At the same time, Asian markets are emerging as high-value destinations, offering premium pricing opportunities.
Leading Vietnam Coffee Exporters
The success of vietnam coffee exporters is driven by a strong network of companies that have built global reputations for quality and reliability. Some of the leading players include:
- Intimex Group
- Vinh Hiep Co., Ltd
- Louis Dreyfus Vietnam
- Nestlé Vietnam
- Olam Vietnam
- Simexco Daklak
These companies play a crucial role in expanding vietnam coffee exports, ensuring consistent supply to international markets while maintaining quality standards.
Historical Growth of Vietnam Coffee Exports
Over the past decade, vietnam exports of coffee have shown steady growth, with occasional fluctuations due to market and environmental factors:
- 2014: $3.31 billion
- 2018: $2.89 billion
- 2020: $1.97 billion
- 2023: $3.18 billion
- 2024: $5.62 billion
This upward trajectory highlights the resilience of the industry and the increasing importance of coffee in vietnam exports.
Pricing Trends and Market Dynamics
The pricing environment has significantly influenced vietnam coffee exports in recent years. Export prices have surged due to global supply shortages and increased demand.
At the domestic level, farmgate prices have reached record highs, with Robusta beans selling for over $5 per kilogram. This has led farmers to hold back stock in anticipation of further price increases, creating supply constraints in the short term.
Additionally, there is a growing shift toward value-added products such as roasted and soluble coffee. These products now account for an increasing share of total exports, enhancing profitability for vietnam coffee exporters.
Challenges Facing the Industry
Despite strong growth, the industry faces several challenges:
1. Tariffs and Trade Barriers
Recent tariffs imposed by the United States on Vietnamese coffee have created uncertainty for exporters. This has prompted a shift toward alternative markets in Asia and Europe.
2. Climate Change
Weather variability continues to impact vietnam coffee production, affecting both yield and quality.
3. Supply Chain Constraints
Delays in shipments and logistical challenges can disrupt export flows, particularly during peak seasons.
Role of Vietnam Customs Data in Trade Insights
Access to accurate vietnam customs data is essential for understanding trade trends and making informed business decisions. This data provides valuable insights into export volumes, pricing, and market demand.
Businesses can leverage vietnam customs data to identify emerging opportunities, track competitors, and optimize their supply chains. It also helps stakeholders analyze the performance of vietnam coffee exports across different markets.
Future Outlook for Vietnam Coffee Industry
The future of vietnam coffee exports looks highly promising. With projected export values reaching $7 billion in 2025, the industry is poised for continued growth.
Key trends shaping the future include:
- Expansion into high-value markets
- Increased focus on sustainable farming practices
- Growth in processed coffee exports
- Adoption of advanced technologies in production and logistics
As global demand for coffee continues to rise, vietnam coffee exporters are well-positioned to capitalize on new opportunities.
Key Takeaways
- Vietnam coffee exports are experiencing strong growth driven by high prices and global demand.
- The country remains the world’s leading producer of Robusta coffee.
- Major markets include the EU, the US, and emerging Asian economies.
- Vietnam coffee exporters are focusing on diversification and value-added products.
- Insights from vietnam customs data play a crucial role in strategic decision-making.
Conclusion
Vietnam’s coffee industry has evolved into a global leader, supported by strong production capabilities and expanding export networks. Despite challenges such as climate change and trade barriers, the country continues to demonstrate resilience and adaptability.
With rising demand, premium pricing, and strategic market expansion, vietnam coffee exports are set to achieve new milestones in the coming years. Backed by reliable vietnam coffee production and data-driven insights from vietnam customs data, the industry is well-equipped to maintain its upward trajectory.
As the global coffee market continues to evolve, Vietnam remains at the forefront—delivering quality, consistency, and value to coffee lovers worldwide.
Author


CNC Tools in Modern Manufacturing: Benefits & Future Trends

Avoid Costly Document Mistakes with Professional Notary Services

Mini vs Full Tummy Tuck: Complete Guide Islamabad

Formulation Development in 2026: Drug Delivery Innovations

Luxury RV Resorts Texas vs Standard RV Parks: The Difference?

Best Hair Transplant Clinic in Pakistan – JJ Aesthetics

Essentials Tracksuit UK Guide: Styles, Fits, Colors & Buying Tips

Working Capital Finance: Guide for MSMEs, Types & Benefits

Beard Hair Transplant: Procedure, Benefits And Recovery

Corteiz Cargos Official Store: Streetwear Style & Sustainability

Cybersecurity Consulting Company SequelNet Provides Critical IT Support Services to Medical Billing Firm, Medical Optimum

Team Communication Software Transforms Operations at Finance Innovate

Project Management Tool Transforms Long Island Business

How Alleviate Poverty Utilized IPPBX’s All-in-One Solution to Transform Lives in New York City

Breast Cancer: The Imperative Role of Mammograms in Screening and Early Detection

Unstoppable Collaboration: D.C.’s Citi Open and Silicon Valley Classic Unite to Propel Women’s Tennis to New Heights

Embracing Renewal: Sizdabedar Celebrations Unite Iranians in New York’s Eisenhower Park

The Benefits of Starting a Side Hustle for Financial Freedom

New Blood Donation Screening Questions What You Need to Know

Stylishly Timeless: The 5 Types of Sandals You Need in Your Closet
-

 Business3 years ago
Cybersecurity Consulting Company SequelNet Provides Critical IT Support Services to Medical Billing Firm, Medical Optimum
-
Business3 years ago
Team Communication Software Transforms Operations at Finance Innovate
-
Business3 years ago
Project Management Tool Transforms Long Island Business
-
Business3 years ago
How Alleviate Poverty Utilized IPPBX’s All-in-One Solution to Transform Lives in New York City
-
health3 years ago
Breast Cancer: The Imperative Role of Mammograms in Screening and Early Detection
-
Sports3 years ago
Unstoppable Collaboration: D.C.’s Citi Open and Silicon Valley Classic Unite to Propel Women’s Tennis to New Heights
-
Art /Entertainment3 years ago
Embracing Renewal: Sizdabedar Celebrations Unite Iranians in New York’s Eisenhower Park
-
Finance3 years ago
The Benefits of Starting a Side Hustle for Financial Freedom


