
Beauty Fitness
Elevate Your Makeup Game: Tips for Using a Beauty Blender Like a Pro
Elevate Your Makeup Game: Tips for Using a Beauty Blender Like a Pro
In the world of makeup artistry, one name stands out – Mario Dedivanovic. Renowned for his expertise in enhancing the beauty of Hollywood’s elite, Mario is a master of his craft. In this exclusive article, he takes us on a journey to uncover the magic behind a beauty blender, sharing his pro tips and techniques for achieving flawless makeup application. Get ready to elevate your makeup game and achieve a professional look from the comfort of your own vanity.
The Beauty Blender Revolution
Understanding the Beauty Blender and its Role in Makeup Application
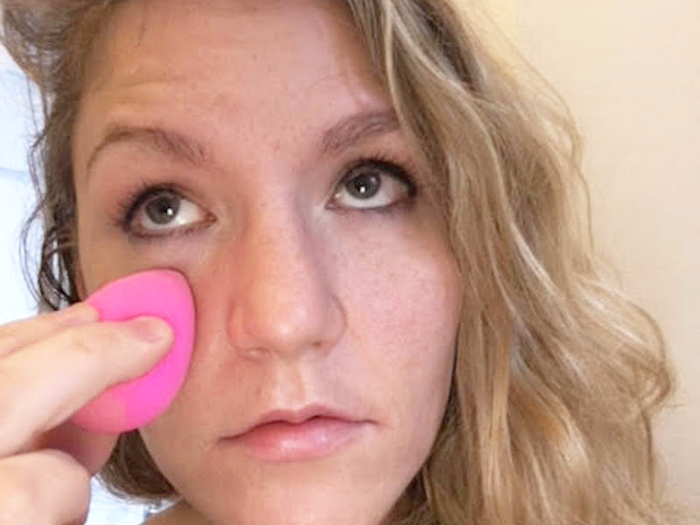
The beauty blender, a small, egg-shaped sponge, has become a game-changer in the world of makeup. It’s hailed as a versatile tool that revolutionizes the way makeup is applied. But why is it such a sensation?
Mario Dedivanovic explains that the beauty blender’s unique design and material allow for flawless makeup blending and an airbrushed finish. It’s an essential tool for both makeup artists and beauty enthusiasts. Whether you’re a beginner or a pro, the beauty blender is a must-have in your kit.
Its innovative design allows for even application, and the material is perfect for blending foundation, concealer, blush, and more. As makeup trends evolve, the beauty blender has kept pace, proving its worth time and time again.


Image by: https://www.thelist.com/394046/are-beautyblenders-really-worth-the-money/
Selecting the Perfect Beauty Blender
Different Types of Beauty Blenders and Their Specific Uses
Choosing the right beauty blender can make a world of difference in your makeup application. Beauty blenders come in various shapes, sizes, and materials, each designed for specific purposes. Mario shares his insights on how to select the perfect beauty blender for your makeup needs.
- Original Beauty Blender: The iconic pink sponge is designed for all-around application. It’s great for foundation, concealer, and blending.
- Beauty Blender Pro: This black sponge is ideal for makeup artists and professionals. It’s designed for use with long-wear makeup and darker pigments.
- Beauty Blender Micro Mini: These tiny blenders are perfect for precise concealer application and touch-ups.
- Beauty Blender Swirl: The swirl pattern adds a touch of luxury and is perfect for blending cream and powder products.
Preparing the Beauty Blender: Hydration and Cleansing
The Importance of Dampening the Beauty Blender
Before you start blending, it’s crucial to prepare your beauty blender. Dampening the sponge is a key step that many overlook. Mario emphasizes that a damp beauty blender is essential for achieving a flawless, streak-free finish. Here’s how to do it:
- Hydration: Run your beauty blender under water and squeeze out the excess. It should be damp, not dripping wet. The dampness prevents the sponge from absorbing too much product.
- Cleansing: Regularly clean your beauty blender to ensure it remains in excellent condition. There are specialized cleansers available, or you can use mild soap. Gently wash the sponge and rinse thoroughly, allowing it to air dry.
A well-hydrated and clean beauty blender is your secret to achieving a professional-looking makeup application.
Flawless Foundation Application
Achieving Seamless and Airbrushed Foundation with a Beauty Blender
Foundation is the canvas of your makeup, and the beauty blender can help you achieve a smooth, airbrushed look. Mario Dedivanovic shares his techniques for flawless foundation application:
- Dot and Blend: Apply small dots of foundation to your face, concentrating on areas that need coverage. Use your damp beauty blender to gently blend the foundation, starting from the center of your face and working outward. The bouncing technique is the key to an even, streak-free finish.
- Build as Needed: If you need more coverage in certain areas, such as blemishes or redness, you can layer foundation using the same bouncing motion. The beauty blender helps avoid a cakey appearance.
- Blending Down the Neck: Ensure that your foundation blends seamlessly into your neck to avoid any visible lines.
- Setting with Powder: For a matte finish, you can set your foundation with translucent powder using the same damp beauty blender.
Concealing with Precision
Covering Imperfections, Dark Circles, and Blemishes Like a Pro
Concealer is a magic wand that hides imperfections and brightens your under-eye area. Using a beauty blender for concealer application can make a significant difference in achieving a natural and flawless look. Here’s how to do it like a pro:
- Under-Eye Concealer: Apply a small amount of concealer in an inverted triangle shape under your eyes. Use the pointed end of your beauty blender to blend it out. This technique brightens your eyes and conceals any dark circles.
- Spot Concealing: For blemishes and imperfections, apply a small amount of concealer and use the precision of the beauty blender to blend and soften the edges.
- Setting with Powder: After concealer application, set it with a light layer of translucent powder to prevent creasing. Use your beauty blender for a flawless finish.
Blush and Bronzer: Effortless Contouring
How to Contour and Add a Healthy Flush to Your Cheeks
Contouring and adding a healthy flush of color to your cheeks can transform your look. A beauty blender is an excellent tool for achieving a seamless, natural contour and blush application. Mario’s tips for using a beauty blender for this purpose include:
- Contouring: Use a cream or powder contour product. Apply it in the hollows of your cheeks, along your jawline, and on the sides of your nose. Blend it out using your beauty blender, ensuring there are no harsh lines.
- Blush: Dab a cream or powder blush onto the apples of your cheeks. Use the beauty blender to blend it out for a natural flush.
The Art of Baking and Setting
Mario’s Tips for Setting Makeup and Baking with a Beauty Blender
“Baking” is a technique that involves applying a generous amount of translucent powder to set your makeup. This helps to prevent creasing and ensures your makeup stays in place. Mario Dedivanovic provides his expert tips for baking with a beauty blender:
- Setting the Under-Eye: After applying concealer, use the pointed end of your beauty blender to press a generous amount of translucent powder under your eyes. Allow it to sit for a few minutes before brushing off the excess powder.
- Setting the T-Zone: To control shine, apply powder to your T-zone, including your forehead, nose, and chin, using the broad side of your beauty blender. This technique helps set your makeup and reduce oiliness.
Professional Finishing Touches
Perfecting Your Makeup with a Beauty Blender
As you near the final steps of your makeup routine, Mario Dedivanovic encourages you to use your beauty blender for professional finishing touches. Here are a few ways to ensure your makeup is red carpet-ready:
- Misting with Setting Spray: After completing your makeup, lightly mist your face with setting spray. You can use your beauty blender to gently press the setting spray into your skin for a long-lasting finish.
- Blending and Smoothing: If you’ve applied any makeup that needs further blending, such as eyeshadow or contour, use your beauty blender to gently smooth out any edges.
- Touch-Ups: Throughout the day or night, your beauty blender can be a handy tool for touch-ups. Carry a damp beauty blender in a protective case and use it to refresh your makeup as needed.
Conclusion
Mario Dedivanovic’s expert tips and techniques for using a beauty blender like a pro can elevate your makeup game to new heights. The beauty blender isn’t just a tool; it’s a game-changer that offers flawless and professional results.
Whether you’re a makeup enthusiast or a professional artist, Mario’s insights are invaluable. With the right beauty blender and the knowledge to use it effectively, you can achieve a flawless makeup look that’s ready for the red carpet. It’s time to transform your beauty routine and create stunning makeup artistry with confidence.
Author

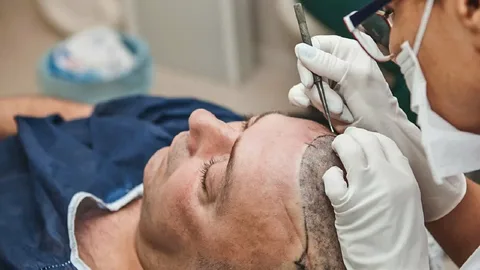
Facial hair plays a vital role in defining your personality. Many men in Pakistan struggle with patchy or sparse beard growth. Beard Hair Transplant in Islamabad offers a permanent solution for those looking to achieve a fuller and natural-looking beard. The procedure is safe, effective, and tailored to individual hair growth patterns.
Understanding Beard Hair Transplant
Beard Hair Transplant in Islamabad involves transferring hair follicles from a donor area, usually the scalp, to the beard region. This process ensures natural hair growth and long-lasting results. Experts carefully design the beard shape according to the face structure. It is a minimally invasive procedure, allowing quick recovery and minimal discomfort.
Benefits of Beard Hair Transplant in Islamabad
-
Achieve a fuller and denser beard naturally
-
Correct patchy or uneven beard growth
-
Boost confidence and enhance facial aesthetics
-
Permanent results with proper care
-
Minimal downtime and fast recovery
This treatment is not just about appearance; it improves self-esteem. The results appear gradually, making the beard look completely natural. Choosing an experienced specialist in Islamabad ensures high success rates and safe procedures.
Natural Ways to Support Beard Growth
Growing a healthy and full beard is a goal for many men, but genetics, diet, and lifestyle play major roles. There are several natural ways to support beard growth and improve the thickness and strength of your facial hair.
A balanced diet rich in protein, vitamins, and minerals is essential for healthy hair follicles. Foods like eggs, nuts, fish, and leafy vegetables provide the nutrients needed for optimal beard growth. Staying hydrated also helps maintain hair strength and prevents dryness.
Regular facial massages can stimulate blood circulation to the hair follicles, encouraging new growth. Massaging with natural oils, such as jojoba or coconut oil, nourishes the skin and improves follicle health. Proper skincare is equally important. Keeping the face clean, exfoliating regularly, and moisturizing prevents clogged pores and supports healthy hair growth.
Lifestyle factors significantly impact beard development. Getting enough sleep, reducing stress, and avoiding smoking can improve hormone levels that influence hair growth. Patience is key, as beard hair grows slowly and unevenly at first.
Combining these natural methods with professional treatments, such as a Beard Hair Transplant in Islamabad, can maximize results. Supporting your beard naturally ensures stronger, healthier, and more attractive facial hair over time.
Recovery After Beard Hair Transplant
Recovery after a Beard Hair Transplant in Islamabad is a straightforward process, but following proper care instructions is essential for the best results. Immediately after the procedure, patients may experience mild redness, swelling, or tiny scabs in the transplanted area. These are normal and usually fade within a week. Avoid touching or scratching the transplanted hair to prevent infections and ensure proper healing.
During the first few days, it is recommended to keep the face clean and gently wash it using mild, antiseptic solutions as advised by your doctor. Avoid direct sunlight or excessive heat to protect the sensitive skin. Shaving should be avoided for at least two weeks, allowing the follicles to settle naturally.
Most patients notice initial hair shedding within 2 to 3 weeks, which is part of the normal growth cycle. New hair starts to grow gradually, and visible results appear in about 3 to 4 months. By 6 to 12 months, the beard achieves full density and natural appearance. Maintaining a healthy lifestyle, including proper diet, hydration, and avoiding stress, supports stronger hair growth.
Following these recovery steps ensures a smooth healing process and maximizes the long-term benefits of a Beard Hair Transplant in Islamabad, resulting in a natural and well-defined beard.
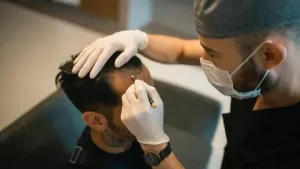
Choosing the Right Clinic in Islamabad
Choosing the right clinic in Islamabad is the most important step for a successful Beard Hair Transplant. Not all clinics offer the same quality of service, so research is essential before making a decision. A reputable clinic should have experienced surgeons specializing in hair and beard transplants. Check their portfolio and before-and-after photos to see real results.
The clinic should follow strict hygiene standards and use modern, internationally approved techniques. Facilities with advanced equipment ensure the procedure is safe, minimally invasive, and provides natural-looking results. Personal consultation is crucial. During this consultation, the surgeon should assess your facial structure, beard pattern, and donor hair quality to design a transplant plan tailored for you.
Another important factor is post-procedure support. A good clinic provides clear instructions for recovery, including care for transplanted follicles and follow-up appointments. Transparent pricing without hidden charges is also a sign of a trustworthy clinic.
Many patients also consider reviews and recommendations from previous clients. Word-of-mouth feedback often gives a realistic view of the clinic’s professionalism and results.
Choosing the right clinic ensures your Beard Hair Transplant in Islamabad is effective, safe, and produces natural, lasting beard growth. A reliable clinic guarantees not only successful results but also confidence and peace of mind throughout the process.
FAQs About Beard Hair Transplant in Islamabad
Q: Is the procedure painful?
A: The procedure is performed under local anesthesia, so discomfort is minimal.
Q: How long does it take to see results?
A: Initial growth is visible within 3 months, with full results in 6 to 12 months.
Q: Can anyone get a beard transplant?
A: Most healthy adults with sufficient donor hair are eligible. Consultation is necessary to determine suitability.
Q: Are the results permanent?
A: Yes, transplanted hair is permanent and will continue to grow naturally.
Q: Is there any special post-care required?
A: Following the clinic’s instructions, gentle washing, and avoiding direct sunlight ensures proper recovery.
Beard Hair Transplant in Islamabad is the perfect solution for men seeking natural and long-lasting beard growth. Combining expert techniques with proper care and natural methods ensures the best results. For more information and professional services, you can visit skn cosmetics for detailed guidance and appointments.
Author

Bariatric Surgery in Islamabad is becoming a popular option for individuals struggling with obesity. This procedure not only helps in significant weight loss but also improves overall health. Patients often notice enhanced mobility, better energy levels, and a positive impact on daily activities. The surgery aims to support a healthier lifestyle by reducing excess body weight in a controlled manner.
The first few weeks after Bariatric Surgery in Islamabad are crucial for recovery. Patients are encouraged to follow dietary guidelines strictly and gradually return to normal activities. Most people experience reduced appetite and better portion control naturally. Along with medical supervision, lifestyle adjustments are key to achieving lasting results after the surgery.
Physical Changes and Weight Loss
Bariatric Surgery in Islamabad brings significant physical changes and helps patients achieve sustainable weight loss. One of the first noticeable effects is a reduction in body weight, often visible within weeks after surgery. This initial weight loss boosts energy levels, making daily activities easier and more enjoyable. Many patients report improved mobility, reduced joint pain, and enhanced physical endurance.
Along with weight reduction, changes in body composition occur naturally. Fat stores decrease while muscle mass is preserved through proper diet and light exercise. Clothes fit better, posture improves, and patients often experience a renewed sense of confidence and self-esteem.

The surgery also supports the body in regulating appetite and portion control naturally. Many patients find it easier to follow healthy eating habits without constant cravings or overeating. Cardiovascular health improves as blood pressure and cholesterol levels stabilize, reducing the risk of heart-related complications.
Long-term results depend on lifestyle adjustments. Incorporating regular physical activity and balanced nutrition helps maintain weight loss naturally. With these healthy habits, patients can continue to see gradual improvement in body shape and overall well-being. Bariatric Surgery in Islamabad is not just a medical procedure but a step toward a healthier and more active life.
- Significant reduction in body weight
- Improved mobility and physical activity
- Reduced risk of heart disease and diabetes
- Enhanced mental and emotional well-being
Weight loss continues gradually, and patients must maintain healthy habits to prevent regaining weight. Nutrition, hydration, and exercise are important parts of the post-surgery plan.
Improvement in Health Conditions
Bariatric Surgery in Islamabad not only helps in losing weight but also addresses several health issues. Patients often see a decrease in blood sugar levels, lower blood pressure, and better cholesterol control. Sleep apnea symptoms can also improve naturally after surgery. These health benefits contribute to a better quality of life and longer-term wellness.
The surgery can significantly improve hormonal balance and digestive functions. Many patients notice a reduction in joint pain and fatigue. Regular follow-ups with healthcare providers are recommended to monitor progress and ensure safety.
Recovery Process and Lifestyle Adjustments
Recovery after Bariatric Surgery in Islamabad involves both physical and mental adaptation. Patients are advised to start with light activities and gradually increase movement. Diet plays a critical role during recovery, starting from liquids and soft foods and slowly moving to regular meals. Hydration and protein intake are essential for healing and maintaining muscle mass.
Lifestyle adjustments help maximize results naturally. Incorporating walking, light exercise, and mindful eating are highly recommended. Support groups and counseling can also aid in maintaining motivation and mental wellness during recovery.
Long-Term Maintenance and Natural Ways to Stay Healthy
Maintaining results after Bariatric Surgery in Islamabad requires consistent effort and a focus on natural, healthy habits. Patients who adopt a balanced lifestyle often enjoy lasting weight loss and improved overall wellness. One of the most effective strategies is following a nutrient-rich diet that includes vegetables, lean proteins, whole grains, and healthy fats. Avoiding processed foods and sugary drinks helps control weight naturally and supports better energy levels throughout the day.
Regular physical activity is another key factor for long-term maintenance. Simple exercises like walking, jogging, or yoga can improve metabolism and strengthen muscles while supporting cardiovascular health. Combining cardio with light strength training ensures that the body stays toned and fit.
Hydration is often overlooked but is crucial for maintaining metabolism and supporting digestion. Drinking plenty of water throughout the day helps manage appetite and keeps the body functioning optimally.
Additionally, monitoring weight and health metrics regularly allows patients to make timely adjustments to their routine. Mindful eating, managing stress, and seeking support from healthcare providers or support groups can also enhance long-term success. By following these natural ways, patients of Bariatric Surgery in Islamabad can enjoy a healthier, happier life.
- Eating balanced, nutrient-rich meals
- Staying hydrated throughout the day
- Exercising regularly with a mix of cardio and strength training
- Avoiding processed foods and sugary drinks
- Monitoring weight and health metrics consistently
These natural ways ensure long-term success and prevent complications. A healthy routine helps patients enjoy the full benefits of the surgery.
FAQs About Bariatric Surgery in Islamabad
Q1: How long does it take to see results after surgery?
Most patients notice weight loss within 2–4 weeks, with significant results in the first six months. Full stabilization may take 12–18 months.
Q2: Is the surgery safe for everyone?
Bariatric surgery is safe for eligible patients under medical guidance. Pre-surgery assessments determine suitability based on health conditions and BMI.
Q3: Can I get pregnant after Bariatric Surgery?
It is recommended to wait at least 12–18 months after surgery before planning pregnancy to ensure stable weight and nutrient levels.
Q4: Will I need vitamins after surgery?
Yes, supplementation of vitamins and minerals is often required to prevent deficiencies. Regular blood tests help monitor levels.
Q5: How can I maintain weight loss naturally?
Adopting healthy eating habits, regular exercise, and mindful lifestyle practices are the best natural ways to maintain results.
In conclusion, Bariatric Surgery in Islamabad offers transformative results for individuals struggling with obesity. By following recovery guidelines and adopting natural ways for a healthier lifestyle, patients can achieve sustainable weight loss and improved health. For more information and post-surgery guidance, visit skn cosmetics.
Author
Are you considering eyelid surgery in Islamabad to refresh your appearance or fix heavy, droopy eyelids? Whether you want to look younger or need to resolve a medical issue, choosing the right clinic is the most important decision you will make. Islamabad has become a hub for high-end aesthetic medicine. It is home to some of the finest surgeons who specialize in both cosmetic and functional eyelid procedures. These experts use modern techniques to deliver safe, natural, and life-changing results.
In today’s world, patients in Islamabad prioritize safety, surgical experience, and artistic expertise. The leading clinics in the capital now blend cutting-edge technology with deeply personalized care. This ensures that every patient feels confident and informed from the initial consultation to the final follow-up. This guide explores the top-rated clinics, explains the surgical process, and highlights why this procedure is growing in popularity across Pakistan.

Why Eyelid Surgery is Gaining Popularity in Islamabad
Eyelid surgery, professionally known as blepharoplasty, is a versatile procedure. It can correct sagging upper lids, remove excess skin, and eliminate stubborn puffiness under the eyes. For many people in Islamabad, the benefits go far beyond simple vanity.
Improved Visual Clarity
Sometimes, upper eyelid skin becomes so heavy that it physically hangs over the eyelashes. This can block your peripheral vision or make it difficult to drive at night. Surgery removes this obstruction. It literally opens up your field of view.
Total Facial Rejuvenation
The eyes are the first thing people notice. Droopy lids can make you look tired, angry, or much older than you actually feel. Blepharoplasty restores the youthful contours of your eyes. It gives your entire face a more alert and energetic expression.
A Lasting Confidence Boost
When you look better, you feel better. Many patients report a significant increase in self-esteem after their recovery. They feel more confident in professional meetings and social gatherings.
Minimal Downtime
One of the biggest draws of eyelid surgery in 2026 is the rapid recovery time. Most patients are back to their normal routines within a week or two. The results, however, can last for a decade or more.
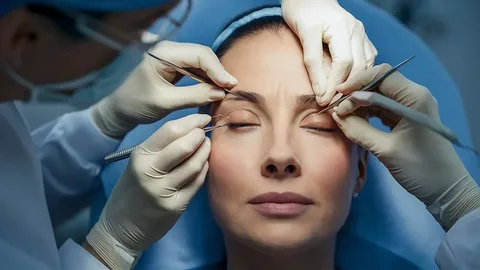
Understanding the Surgical Process
Knowing what happens during the procedure can significantly reduce pre-surgery anxiety. Most eyelid surgeries in Islamabad follow a clear, professional protocol.
The Anesthesia Phase
Surgeons usually perform the procedure under local anesthesia with sedation. This means you are relaxed and pain-free, but not fully “under” like in major hospital surgeries. However, general anesthesia is available for those who prefer it.
The Upper Eyelid Procedure
The surgeon makes a tiny incision along the natural crease of the upper lid. They remove excess skin and reposition small amounts of fat. Because the incision sits in the fold, the resulting scar is invisible when your eyes are open.
The Lower Eyelid Procedure
For lower lids, the incision is often made just below the lash line or even inside the eyelid. This targets “bags” and puffiness. The surgeon smooths the area to create a seamless transition between the eye and the cheek.
Closing and Recovery
The incisions are closed with incredibly fine sutures. The entire process usually takes between one and three hours, depending on whether you are treating both the upper and lower lids.
Top Clinics for Eyelid Surgery in Islamabad
Selecting the right facility is crucial for a successful outcome. Here are the top-rated clinics in Islamabad known for their excellence in blepharoplasty:
-
SKN Cosmetics: This clinic is widely recognized for its expert surgeons and high safety standards. They use the latest international techniques to ensure minimal scarring.
-
Islamabad Aesthetic Clinic: They offer comprehensive packages that cover everything from the first consultation to post-operative medication.
-
CosmoCare Islamabad: This facility focuses on “rapid-recovery” methods. They are a favorite for busy professionals who cannot afford long absences from work.
-
Enhance Beauty Clinic: They excel at combining cosmetic improvements with functional corrections for patients with obstructed vision.
-
Elite Skin & Laser Centre: Here, you can find highly personalized care plans. Their surgeons take extra time to align the surgery with your unique facial structure.
Choosing the Right Surgeon: What to Look For
Don’t settle for the first clinic you find. Your face deserves an expert. When researching providers in Islamabad, keep these key factors in mind:
-
Board Certification: Ensure your surgeon has the proper credentials and specialized training in plastic or oculoplastic surgery.
-
A Solid Portfolio: Ask to see “before and after” photos of previous patients. This helps you gauge the surgeon’s aesthetic style.
-
Transparent Communication: A good surgeon will explain the risks as clearly as the benefits. They should never pressure you into a decision.
-
Patient Reviews: Look for testimonials on independent platforms. Genuine feedback from residents in Islamabad is incredibly valuable.
Tips for a Smooth and Fast Recovery
A successful surgery is only half the battle; the other half is how you handle your recovery. To ensure the best results, follow these professional tips:
Keep the Area Clean Your clinic will provide specific eye drops or ointments. Use them exactly as prescribed to prevent any risk of infection.
Manage Swelling with Elevation For the first three to five days, sleep with your head elevated on extra pillows. This uses gravity to move fluid away from the face and significantly reduces morning puffiness.
Protect Your Eyes from the Sun Your skin will be extra sensitive during the healing phase. Wear high-quality, dark sunglasses whenever you go outside. This protects the incision sites from UV damage and prevents dark spots.
Avoid Physical Strain Skip the gym for at least ten days. Heavy lifting or intense cardio can increase blood pressure in the face. This might cause unnecessary bruising or even open a fresh incision.
Final Thoughts on Your Journey
If you are tired of looking “worn out” or if sagging skin is affecting your vision, eyelid surgery in Islamabad is a safe and effective solution. By choosing an established clinic like SKN Cosmetics, you gain access to the best medical talent in the country.
The eyes are the window to the soul, but they are also the primary indicator of aging. Modern blepharoplasty allows you to turn back the clock with precision and grace. Whether your goals are purely cosmetic or functionally necessary, the right surgical team will ensure you walk away with a brighter, clearer, and more confident outlook on life.
Ready to take the next step? Schedule a consultation with a specialist today. Most top-rated clinics offer initial evaluations where you can ask questions and visualize your potential results. Your journey toward a refreshed and rejuvenated appearance starts with a single conversation. Take that step today and see the difference a professional eye-lift can make.
Author


Essentials Tracksuit UK Guide: Styles, Fits, Colors & Buying Tips

Working Capital Finance: Guide for MSMEs, Types & Benefits

Beard Hair Transplant: Procedure, Benefits And Recovery

Corteiz Cargos Official Store: Streetwear Style & Sustainability

Greedy Unit Streetwear: Brooklyn Fashion, Style & Collections

Standardized Reporting: Improve Workplace Safety & Compliance

Luxury Car Rental in Surat: Cars for Weddings, Events & Travel

Bariatric Surgery in Islamabad: Recovery & Long-Term Benefits

Application Modernization Services: For Legacy Systems

Chrome Hearts Hats: Iconic Trucker Caps & Luxury Streetwear

Cybersecurity Consulting Company SequelNet Provides Critical IT Support Services to Medical Billing Firm, Medical Optimum

Team Communication Software Transforms Operations at Finance Innovate

Project Management Tool Transforms Long Island Business

How Alleviate Poverty Utilized IPPBX’s All-in-One Solution to Transform Lives in New York City

Breast Cancer: The Imperative Role of Mammograms in Screening and Early Detection

Unstoppable Collaboration: D.C.’s Citi Open and Silicon Valley Classic Unite to Propel Women’s Tennis to New Heights

Embracing Renewal: Sizdabedar Celebrations Unite Iranians in New York’s Eisenhower Park

The Benefits of Starting a Side Hustle for Financial Freedom

New Blood Donation Screening Questions What You Need to Know

Stylishly Timeless: The 5 Types of Sandals You Need in Your Closet
-

 Business3 years ago
Cybersecurity Consulting Company SequelNet Provides Critical IT Support Services to Medical Billing Firm, Medical Optimum
-
Business3 years ago
Team Communication Software Transforms Operations at Finance Innovate
-
Business3 years ago
Project Management Tool Transforms Long Island Business
-
Business3 years ago
How Alleviate Poverty Utilized IPPBX’s All-in-One Solution to Transform Lives in New York City
-
health3 years ago
Breast Cancer: The Imperative Role of Mammograms in Screening and Early Detection
-
Sports3 years ago
Unstoppable Collaboration: D.C.’s Citi Open and Silicon Valley Classic Unite to Propel Women’s Tennis to New Heights
-
Art /Entertainment3 years ago
Embracing Renewal: Sizdabedar Celebrations Unite Iranians in New York’s Eisenhower Park
-
Finance3 years ago
The Benefits of Starting a Side Hustle for Financial Freedom


