
Beauty Fitness
Unlock Lustrous Tresses: Natural Home Remedies for Dry Hair
Unlock Lustrous Tresses: Natural Home Remedies for Dry Hair
Dry, lifeless hair can be a constant source of frustration for many of us. It can feel like an uphill battle trying to restore moisture and shine to your locks. But fear not, because in this article, we’re about to unravel the secrets to lustrous hair, and we have a very special guide on this journey – celebrity colorist Tracey Cunningham. So, for all you lifestyle enthusiasts dreaming of silky, lustrous locks, get ready to discover a treasure trove of natural home remedies that will rescue your dry hair and leave you with a radiant mane.
Understanding the Struggles of Dry Hair
What Causes Dry Hair?
Dry hair isn’t just a cosmetic concern; it often indicates an underlying issue. To tackle it effectively, we must first understand what causes it. Several factors can lead to dryness:
- Excessive Styling: Frequent use of heat styling tools like straighteners and curling irons can strip your hair of its natural moisture, leaving it parched and brittle.
- Environmental Factors: Exposure to harsh weather conditions, such as extreme heat or cold, can damage your hair’s protective outer layer, making it more prone to dryness.
- Chemical Treatments: Coloring, perming, and chemical straightening can weaken your hair’s structure, making it lose moisture more easily.
- Over-Shampooing: Washing your hair too frequently can wash away its natural oils, leading to dryness.
- Genetics: Sometimes, dry hair can be hereditary. If your parents or grandparents had dry hair, you might be predisposed to it.

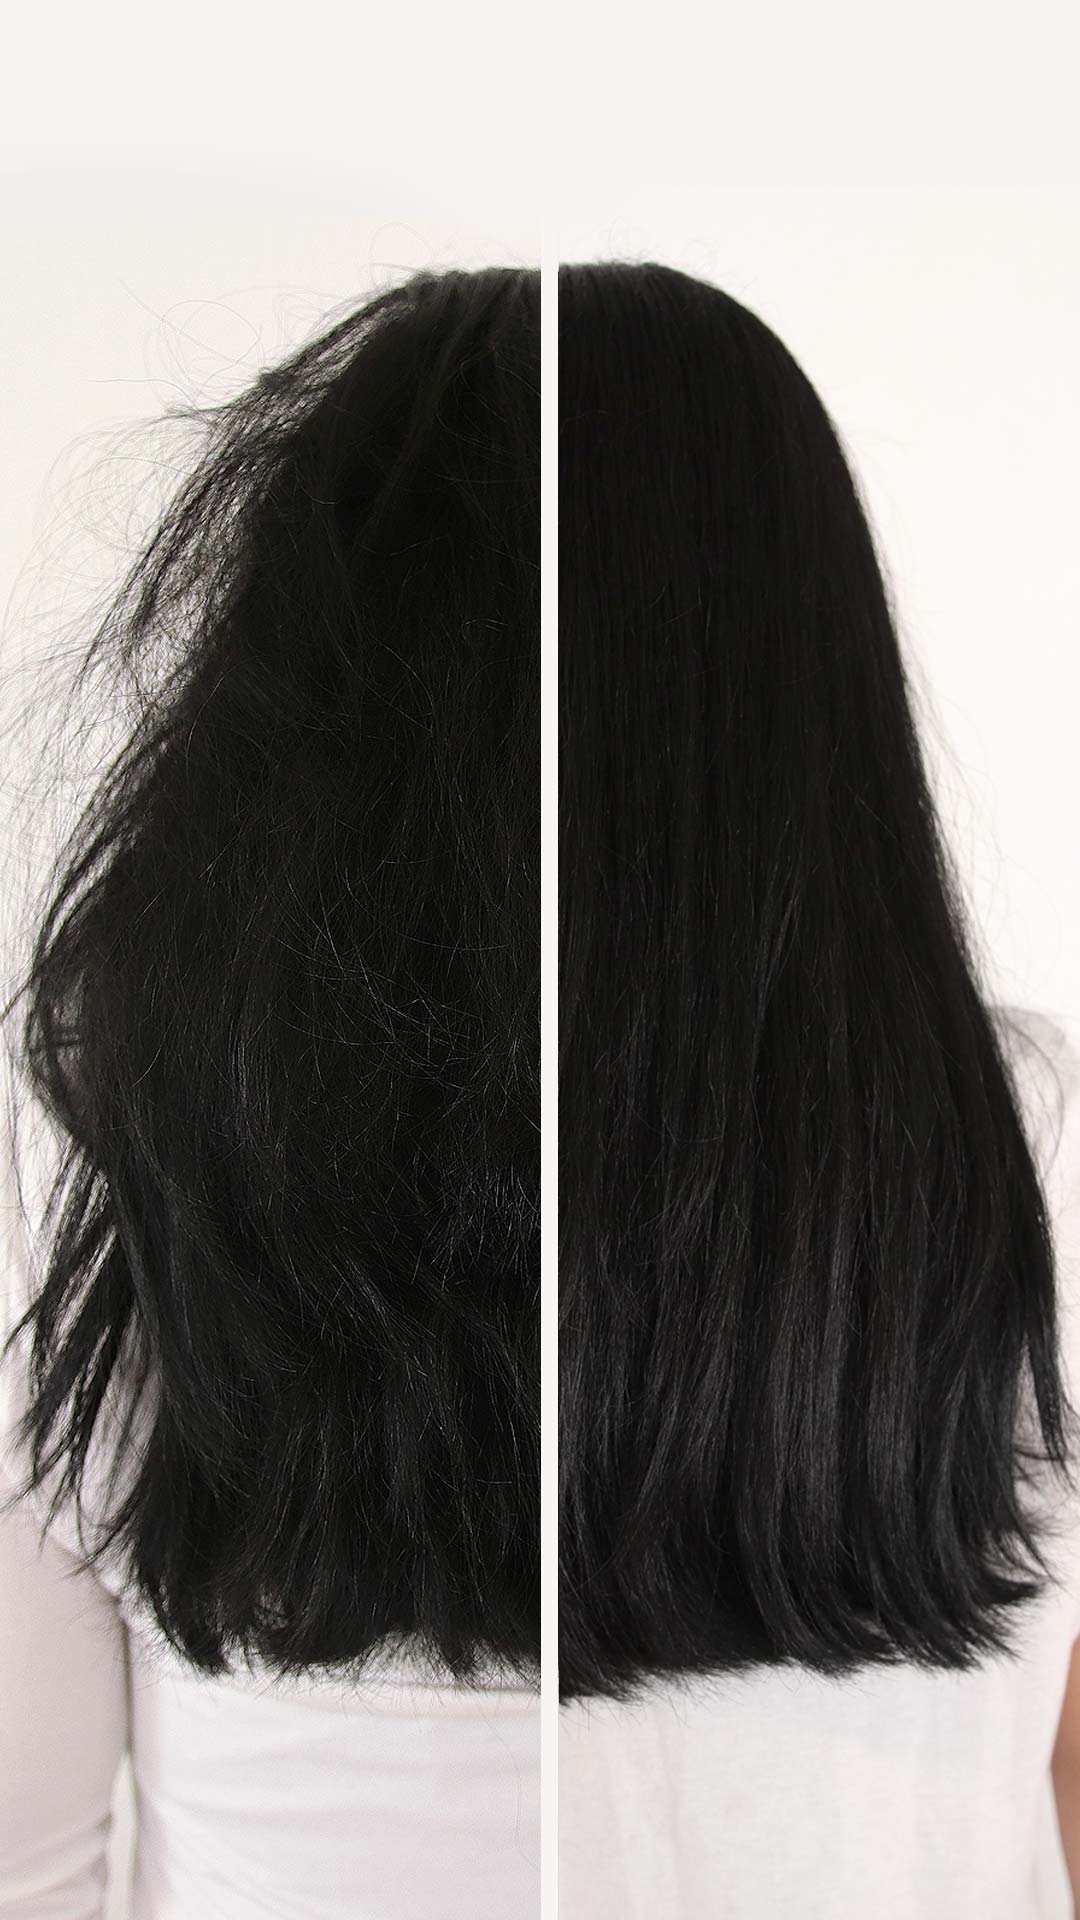
Image by: https://in.sugarcosmetics.com/blog/tips-to-manage-frizzy-hair
Signs Your Hair Needs Extra Love
Before we jump into the solutions, let’s identify if your hair is truly in need of some TLC. Here are some telltale signs that your locks are thirsty for moisture:
- Brittleness: Does your hair snap easily when stretched? This is a sign of extreme dryness.
- Split Ends: Split ends are a common issue with dry hair, as the lack of moisture weakens the hair shaft.
- Frizz: If your hair resembles a frizzy mess, it’s likely lacking moisture to keep it smooth and manageable.
- Dullness: Dry hair often lacks the natural shine and luster that healthy hair possesses.
Now that we’ve identified the culprits and signs of dry hair, let’s introduce you to our trusted source, Tracey Cunningham, who’s here to guide us on the path to hair restoration.
Tracey Cunningham: A Trusted Source
Meet Tracey Cunningham
Before we get into the nitty-gritty of remedies, it’s essential to know our expert. Tracey Cunningham is not just any colorist; she’s a celebrity colorist with a stellar track record. Her client list reads like a who’s who of Hollywood, including A-list stars like Jennifer Lopez and Charlize Theron. With her expertise in the realm of hair care, you can rest assured that you’re in capable hands.
Why Tracey’s Insights Matter
Celebrity hairdressers like Tracey Cunningham aren’t just trendsetters; they understand the essence of hair health. They work with high-profile clients who rely on them to maintain their hair’s beauty and strength in the spotlight. Tracey’s insights into hair care are invaluable because she combines professional knowledge with real-world, high-stress testing. What works for Hollywood’s elite can certainly work wonders for you too.
The Magic of Natural Home Remedies
Kitchen Ingredients for Hair Health
Now, let’s dive into the heart of the matter – natural home remedies. The magic of restoring moisture to dry hair often lies in your kitchen. Tracey Cunningham’s secret weapon for luxurious hair? Everyday ingredients from your pantry! Here are some key ingredients you’ll find useful:

- Coconut Oil: This powerhouse of moisture is rich in fatty acids that penetrate the hair shaft, providing deep hydration.
- Honey: A natural humectant, honey locks in moisture and adds a natural shine to your hair.
- Avocado: Packed with vitamins and healthy fats, avocado nourishes and softens dry, brittle hair.
- Aloe Vera: Known for its soothing properties, aloe vera can hydrate your scalp and promote healthier hair growth.
DIY Hair Masks for Dryness
Now that you know what ingredients to look for, let’s explore some easy-to-make DIY hair masks crafted by Tracey Cunningham herself. These masks are tailored to combat dryness and infuse your hair with much-needed moisture.
- Coconut Oil and Honey Mask: Mix equal parts coconut oil and honey, warm it slightly, and apply it to your hair. Leave it on for 30 minutes before shampooing.
- Avocado and Banana Mask: Blend a ripe avocado and banana, apply it to your hair, and leave it on for 20-30 minutes. Rinse thoroughly.
- Aloe Vera and Yogurt Mask: Combine aloe vera gel with plain yogurt, apply it to your hair, and let it sit for 20-30 minutes. Rinse and shampoo as usual.
- Egg Yolk and Olive Oil Mask: Whisk an egg yolk with a tablespoon of olive oil, apply it to your hair, and leave it on for 20 minutes before rinsing.
These masks are not only easy to make but also incredibly effective at restoring moisture and vitality to your hair. Plus, they’re all-natural, so you can bid farewell to harsh chemicals.
Pro Tips for Optimal Results
Tracey’s Expert Advice
Now, you might be wondering how to make the most of these remedies. Tracey Cunningham shares her professional tips on applying these remedies effectively. Here are some nuggets of wisdom from the expert herself:
- Timing Matters: Apply the masks when you have some downtime, so you can leave them on for the recommended duration.
- Even Distribution: Ensure even distribution of the mask from root to tip for uniform results.
- Cover Up: After applying the mask, cover your hair with a shower cap or warm towel to lock in moisture.
- Rinse Thoroughly: When it’s time to rinse, use lukewarm water and be thorough to avoid residue.
Building a Consistent Hair Care Routine
Consistency is key in achieving lustrous tresses. We’ll outline a simple yet effective hair care routine that incorporates these remedies into your daily life:
- Weekly Treatment: Use one of the DIY masks once a week, rotating between them for variety.
- Gentle Shampoo and Conditioner: Opt for sulfate-free, moisturizing shampoos and conditioners to maintain your hair’s health.
- Reduce Heat Styling: Minimize the use of heat styling tools, or use them on the lowest heat setting.
- Protect Your Hair: Wear a hat or scarf in harsh weather to shield your hair from environmental damage.
Unlock Lustrous Tresses: Your Action Plan
Now that you have all the tools you need, it’s time to create your action plan for achieving lustrous hair. Follow these steps to transform your hair:
Step-by-Step Guide to Revitalize Your Hair
- Identify Your Hair Type: Determine your hair type (e.g., curly, straight, wavy) to tailor your care routine.
- Select Your Remedy: Choose the DIY mask that aligns with your hair’s specific needs.
- Weekly Application: Apply the mask once a week as recommended, following Tracey’s pro tips.
Maintaining Radiance
Once you’ve unlocked the secrets to lustrous hair, it’s crucial to maintain that radiance. Here are some maintenance tips to keep your hair looking fabulous day after day:
- Trim Regularly: Schedule regular hair trims to prevent split ends and maintain your hair’s health.
- Stay Hydrated: Drink plenty of water to keep your hair and scalp hydrated from the inside out.
- Healthy Diet: Incorporate foods rich in vitamins and minerals, like fruits, vegetables, and nuts, into your diet for hair health.
- Protect from Sun: Shield your hair from harmful UV rays by using products with UV protection or wearing a hat when outdoors.
Conclusion: Embrace Your Gorgeous Hair
In this concluding section, let’s recap the key takeaways from our journey to beautiful, healthy hair:
- Dry hair can result from various factors, including excessive styling and environmental conditions.
- Recognizing the signs of dry hair is crucial to addressing the issue effectively.
- Tracey Cunningham’s expertise as a celebrity colorist makes her insights invaluable for your hair care journey.
- Natural home remedies, using kitchen ingredients, can restore moisture and vitality to your hair.
- DIY hair masks are easy to make and highly effective.
- Tracey’s pro tips enhance the effectiveness of these remedies.
- Maintaining a consistent hair care routine is key to long-term success.
With these insights and remedies, you’re now equipped to unlock the lustrous tresses you’ve always dreamed of. Say goodbye to dryness and hello to radiant locks that turn heads wherever you go. Your journey to hair transformation starts now, so embrace your gorgeous hair with confidence!
Author


Gained popularity among individuals seeking to enhance their looks without having surgery. One common concern among many individuals is excess fullness beneath the chin, often referred to as a double chin. This area can affect facial balance and make the jawline appear less defined. As non-surgical aesthetic treatments continue to gain attention, many people are exploring options that can help create a more sculpted facial profile. One treatment that has gained popularity is Kybella for Double Chin. However, many individuals have questions about whether this treatment works for all skin types and facial structures.
The answer depends on several factors. Skin type is only one part of the evaluation process. A professional assessment considers facial anatomy, the amount of under-chin fullness, personal goals, and overall facial harmony before recommending a treatment approach.
Skin Type and Facial Contouring
Every person has unique skin characteristics. Skin texture, elasticity, thickness, and overall condition can vary significantly from one individual to another. These differences can influence how facial features appear and how treatments are planned. However, skin type alone does not determine whether someone is suitable for Kybella. Modern aesthetic treatments focus on the complete appearance of the face rather than one individual feature.
For example, two people may have similar concerns about a double chin but require different approaches because their facial structures and goals are different. One person may want a subtle improvement, while another may hope for a more noticeable jawline definition. Because of this, personalized evaluation plays an important role in creating an effective treatment plan.
Why Individual Assessment Matters
No two faces are exactly alike. Facial proportions, chin projection, jawline shape, and the distribution of fullness beneath the chin all affect treatment decisions. During an assessment, professionals usually examine the chin area and consider how it fits with the rest of the face. The goal is not simply to reduce fullness. Instead, the focus is on improving overall facial balance. For many individuals, the ideal outcome is a natural-looking enhancement. They want their features to appear more refined while still maintaining their unique identity. Clinics such as Dynamic Life Clinic provide consultations where individuals can discuss their concerns, understand available options, and receive guidance based on their facial structure and appearance goals.
Factors That Influence Kybella Suitability
Although people often ask whether their skin type affects treatment eligibility, several other factors usually play a major role. A proper evaluation considers the amount of under-chin fullness, facial structure, skin condition, and overall facial balance. These elements help determine whether Kybella Treatment aligns with an individual’s needs and aesthetic goals.
Additionally, personal expectations and desired results are important parts of the assessment process. Some individuals may want a slight improvement in jawline definition, while others may seek a more noticeable contour enhancement. A personalized approach helps create treatment recommendations that support natural-looking and balanced outcomes.
Amount of Under-Chin Fullness
The level of fullness beneath the chin is one of the main considerations during evaluation. Some individuals have mild fullness, while others may have more noticeable fat accumulation in this area. Understanding the amount of fullness helps determine whether Kybella may align with the person’s goals.
Facial Structure and Proportions
The shape of the jawline, chin position, and overall facial proportions also influence treatment planning. A strong understanding of facial structure helps create results that look balanced. Enhancing one area of the face can affect how other features appear. Therefore, professionals consider the entire facial profile rather than focusing only on the chin.
Personal Expectations
Each person has different aesthetic goals. Some individuals want a slightly sharper jawline, while others want a more defined lower facial contour. Clear communication about expectations helps create a treatment plan that matches the individual’s desired outcome.

The Importance of Inclusive Aesthetic Treatment Planning
People naturally have different skin tones, textures, and facial characteristics. Modern aesthetic care recognizes these differences and focuses on creating personalized solutions. A successful treatment approach does not rely on assumptions based only on appearance. Instead, it considers each person’s unique needs and goals. This individualized approach allows professionals to support a wide range of people who are interested in improving facial contours.
Maintaining Natural-Looking Facial Results
Many individuals seek facial contouring because they want improvement without changing their overall appearance. The goal is usually to enhance existing features rather than create an unnatural transformation. A carefully planned approach helps preserve facial identity. It also reduces the risk of overcorrection by focusing on balance and proportion.
For example, improving jawline visibility should complement the rest of the face. The best results often appear when enhancements look subtle and harmonious.
How Kybella Can Support Facial Goals
For many people, Kybella for Double Chin represents an opportunity to improve the appearance of the lower face. By addressing unwanted fullness beneath the chin, the treatment may help create a more defined profile. However, achieving satisfying results requires more than choosing a treatment. Understanding individual facial characteristics and having realistic expectations are important parts of the process. A personalized approach allows individuals to explore whether Kybella matches their appearance goals and facial features.
The Role of Professional Guidance
Consultation is an essential step for anyone considering facial contouring treatments. It provides an opportunity to discuss concerns, understand possible options, and learn how suitability is determined. Professional guidance helps individuals make informed decisions based on their specific circumstances. Instead of relying on general information alone, a personal evaluation provides a clearer understanding of available options. This process also helps ensure that treatment goals remain realistic and focused on achieving balanced results.
Conclusion
Kybella suitability is not determined by skin type alone. While skin characteristics are considered during evaluation, professionals also look at facial anatomy, under-chin fullness, personal expectations, and overall facial balance. Every individual has different features and aesthetic goals. Therefore, personalized assessment remains one of the most important parts of treatment planning. For people interested in improving jawline definition and reducing the appearance of a double chin, Kybella may be an option worth exploring through professional consultation. A customized approach helps support natural-looking results that complement each person’s unique facial structure.
Author

Healthy and glowing skin plays an important role in how we look and feel. However, daily exposure to pollution, harsh sunlight, changing weather conditions, and the natural aging process can affect the skin’s appearance. Over time, dead skin cells build up on the surface and make the complexion look tired, uneven, and rough. A Microdermabrasion facial North York is a professional skin resurfacing treatment that removes these unwanted dead skin cells. It reveals fresher, smoother and brighter skin underneath. The procedure does not involve surgery and requires very little recovery time. Because of this, many people choose microdermabrasion as a convenient way to improve their skin without aggressive treatments.
This treatment helps address several common skin concerns, including uneven texture, enlarged pores, fine lines, dullness, and mild acne scars. It also supports natural skin renewal and allows skincare products to work more effectively.
What Is a Microdermabrasion Facial?
Microdermabrasion is a professional exfoliation treatment designed to refresh the outer layer of the skin. During the procedure, a trained skincare specialist uses a specialized device with a diamond tip or fine exfoliating crystals. The device gently removes dead skin cells from the surface. At the same time, a vacuum system collects removed skin cells, dirt, and excess oil.
Unlike stronger treatments such as chemical peels or laser resurfacing, microdermabrasion focuses only on the outermost skin layer. As a result, most people experience little discomfort and can return to their regular activities after the session. The treatment encourages the body’s natural renewal process. New skin cells replace older damaged cells, which helps create a smoother texture, brighter appearance, and healthier complexion.
How Does Microdermabrasion Work?
A professional microdermabrasion session uses a gentle and controlled exfoliation process to refresh the skin. The treatment removes dead skin cells, excess oil, and surface impurities while supporting natural skin renewal. Each step is carefully performed by a skincare professional to ensure safe, comfortable, and effective results. It helps reveal smoother, brighter, and healthier-looking skin without the need for invasive procedures.
Skin Consultation and Assessment
The treatment begins with a detailed skin evaluation. A skincare professional examines your skin type and discusses your concerns. They also review your skincare routine and determine whether microdermabrasion matches your specific needs. This personalized approach helps create a treatment plan that supports better results.
Deep Skin Cleansing
Before exfoliation begins, the skin receives a thorough cleanse. This step removes makeup, sunscreen, oil, and surface impurities. Clean skin allows the microdermabrasion device to work more effectively.
Gentle Exfoliation Process
The specialist moves the microdermabrasion device across the treatment area with controlled movements. The diamond tip or crystal system removes dead skin cells while the suction feature clears away debris. Most clients describe the sensation as comfortable. It usually feels like gentle scratching combined with light suction.
Skin Hydration and Protection
After exfoliation, the skin receives calming products such as moisturizers, serums, and sunscreen. These products help restore hydration and protect the freshly treated skin from environmental damage. A typical appointment usually takes around 30 to 60 minutes.
Benefits of a Microdermabrasion Facial North York
A Microdermabrasion facial North York offers multiple benefits for individuals who want to achieve smoother, healthier, and more radiant skin. The treatment gently removes dead skin cells while encouraging natural skin renewal. It helps improve skin texture, enhance brightness, and address common concerns such as dullness, fine lines, uneven tone, and enlarged pores. With regular sessions, many people experience a fresher complexion and a more youthful-looking appearance.
Creates Smoother Skin Texture
Dead skin cells can make the skin feel rough and uneven. Microdermabrasion removes this buildup and improves softness. With regular treatments, the skin surface becomes smoother and more refined. Many people also notice that makeup applies more evenly after improving their skin texture.
Improves Skin Brightness
A layer of dead cells can prevent the skin from reflecting light naturally. By removing these cells, microdermabrasion reveals fresher skin underneath. This process helps create a brighter and more refreshed appearance.
Reduces the Appearance of Fine Lines
Microdermabrasion supports healthy collagen activity by encouraging skin renewal. As the skin becomes healthier, fine lines may appear softer. Regular treatments can help maintain a smoother and more youthful complexion.
Minimizes Enlarged Pores
Oil, dirt, and dead skin cells can make pores appear larger. Microdermabrasion removes surface buildup and helps keep pores cleaner. As a result, pores may appear smaller and the skin can look more balanced.
Helps Improve Uneven Skin Tone
Sun exposure and previous breakouts can create uneven pigmentation. Microdermabrasion gradually improves surface-level discoloration by promoting fresh skin growth. Over time, the complexion may appear more even and healthier.
Supports Better Skincare Absorption
Dead skin buildup can prevent skincare products from absorbing properly. After exfoliation, products such as serums, moisturizers, and antioxidants can penetrate more effectively. This allows your skincare routine to deliver better results.

Skin Concerns Microdermabrasion Can Address
Microdermabrasion can improve several common skin concerns, including:
- Dull and tired-looking skin caused by dead cell buildup
- Rough texture that affects skin softness and smoothness
- Mild sun damage and surface pigmentation
- Congested pores, blackheads, and excess oil buildup
- Uneven complexion caused by environmental factors
- Early signs of aging, including fine lines and reduced skin freshness
- Mild acne scars that appear on the surface of the skin
However, people with severe acne, active infections, open wounds, or certain skin conditions should consult a skincare professional before treatment.
Who Can Benefit from Microdermabrasion?
Many adults choose microdermabrasion because it suits different skin goals. You may be a good candidate if you want to improve:
- Uneven skin texture and rough areas
- Dull complexion and lack of natural glow
- Mild acne marks and surface scars
- Enlarged pores and clogged skin
- Fine lines and early aging signs
- Mild pigmentation caused by sun exposure
A professional consultation helps determine whether the treatment is appropriate for your skin.
What Happens After Treatment?
One major advantage of microdermabrasion is the minimal recovery period. Immediately after the session, your skin may appear slightly pink or feel tighter than usual. These effects usually fade within a short time. Many people notice smoother and brighter skin after their first treatment. However, consistent sessions often provide more noticeable improvements. Most clients can return to their normal schedule immediately after leaving the clinic.
Aftercare Tips for Better Results
Proper aftercare helps protect the skin and maintain long-lasting results.
Apply Sunscreen Daily
Freshly exfoliated skin becomes more sensitive to sunlight. Using sunscreen every day helps prevent irritation and protects the skin from UV damage.
Keep Skin Hydrated
Moisturizing supports the skin barrier and helps maintain softness. Hydrated skin also recovers more comfortably after treatment.
Avoid Strong Skincare Products
Strong exfoliants, retinoids, and chemical-based products may irritate freshly treated skin. It is better to follow your provider’s instructions before restarting these products.
Protect Your Skin from Heat
Avoid saunas, steam rooms and very hot showers shortly after treatment. Excess heat can increase sensitivity and discomfort.
Choosing the Right Microdermabrasion Provider in North York
Selecting an experienced skincare professional is essential for safe and effective results. Look for providers who offer:
- Qualified and experienced skincare specialists
- Modern treatment equipment
- Personalized skincare recommendations
- Clean and professional treatment environments
- Positive client feedback and reviews
A trusted provider can understand your skin concerns and create a treatment approach that matches your goals.
Final Thoughts
A Microdermabrasion facial North York is a safe and effective way to refresh your skin without invasive procedures. The treatment removes dead skin cells, improves texture, enhances brightness, and supports natural skin renewal. It can help reduce mild skin concerns such as roughness, uneven tone, enlarged pores, and early signs of aging. With proper aftercare and a consistent skincare routine, microdermabrasion can help maintain smoother, healthier, and more radiant skin. Choosing a qualified professional and following recommended skincare practices will allow you to enjoy better and longer-lasting results.
Author
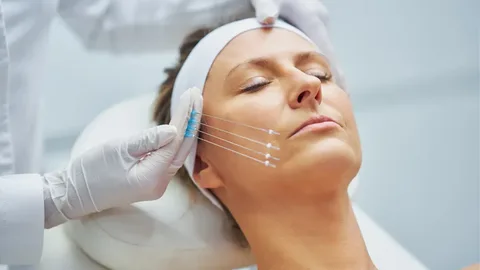
As people age, their skin gradually loses collagen and elastin. These proteins help keep the skin firm, smooth, and youthful. As their levels decrease, the skin starts to sag. The cheeks, jawline, neck and brows often show the earliest signs of aging. Many people once relied on surgical facelifts to correct these changes. Although surgery can produce noticeable improvements, it often involves a longer recovery period and a more invasive approach. Today, advanced cosmetic treatments offer effective alternatives that require much less downtime.
A Thread Lift in Dubai has become a popular choice for people who want to refresh their appearance without undergoing surgery. The treatment gently lifts sagging skin while encouraging the body to produce new collagen. As a result, patients enjoy a firmer and more youthful look while maintaining their natural facial expressions.
What Is a Thread Lift?
A Thread Lift in Dubai is a minimally invasive cosmetic procedure that lifts and supports loose facial tissues using absorbable medical-grade threads. During the treatment, a qualified specialist carefully inserts these threads beneath the skin with the help of fine needles. The threads are made from safe materials that have been used in medical procedures for many years. Once they are in place, they anchor the surrounding tissue and create gentle support. This process allows the doctor to reposition sagging skin without making large incisions. The treatment also triggers the body’s natural healing response. As the skin heals, it begins producing fresh collagen around the threads. This additional collagen improves skin firmness, texture, and elasticity over time.
How It Works
A Thread Lift in Dubai delivers results through two important processes. The first is the immediate lifting effect. The second is long-term collagen stimulation. During the procedure, the threads create an internal support system beneath the skin. They gently lift loose tissues and improve facial contours. Patients often notice a visible improvement as soon as the treatment is complete.
Over the following months, the body naturally produces new collagen around the threads. At the same time, the threads slowly dissolve without harming the surrounding tissue. The newly formed collagen continues to support the skin, helping maintain firmer and more natural-looking results.

Why Choose This Treatment?
Many people choose a Thread Lift in Dubai when creams, serums, and other non-invasive treatments no longer provide the desired improvement. Instead of tightening only the skin’s surface, this procedure addresses the deeper layers that contribute to facial sagging. Another major advantage is the shorter recovery period. Patients do not require general anesthesia or extensive surgery. Most people return to their normal routine much sooner than they would after a traditional facelift.
The treatment also preserves natural facial expressions. Rather than creating an overly tight appearance, it enhances facial contours while allowing patients to look refreshed and confident.
Main Benefits
A Thread Lift in Dubai offers several cosmetic benefits for people looking to reduce early signs of aging. One of the biggest advantages is the immediate lifting effect, which improves facial definition right after the procedure. The treatment also supports long-term skin health by stimulating collagen production. As collagen levels increase, the skin becomes firmer, smoother, and more elastic. Because the procedure requires only tiny entry points, it does not leave noticeable scars. Patients can achieve a refreshed appearance while maintaining their natural facial features.
Who Is a Good Candidate?
A Thread Lift in Dubai is suitable for individuals with mild to moderate skin laxity who want a non-surgical solution for facial rejuvenation. Many patients seek treatment after noticing loose skin around the cheeks, jawline or neck. Although people in their late thirties through their sixties commonly choose this procedure, age alone does not determine eligibility. Skin quality, overall health, and personal goals are equally important. Individuals with severe skin sagging may benefit more from surgical options, making a professional consultation essential before treatment.
Conclusion
Choosing the right facial rejuvenation treatment is an important decision, especially for those who want natural-looking results without undergoing surgery. A Thread Lift in Dubai offers an effective solution for lifting sagging skin, improving facial contours, and stimulating collagen production. The procedure delivers noticeable improvements while preserving natural facial expressions, making it an excellent option for individuals with mild to moderate signs of aging.
One of the biggest advantages of this treatment is its ability to combine immediate lifting effects with long-term skin renewal. Since the procedure requires minimal downtime, most patients can quickly return to their daily routines while enjoying gradual improvements in skin firmness and elasticity. With proper aftercare and a healthy lifestyle, the results can last for many months and help maintain a refreshed appearance.
Before choosing any cosmetic procedure, it is essential to consult an experienced specialist who can evaluate your skin condition and recommend the most suitable treatment plan. A personalized approach ensures safe treatment and results that complement your unique facial features. If you are looking for a reliable way to achieve a youthful and refreshed appearance, a Thread Lift in Dubai can be an excellent investment in your confidence and long-term skin health.
Author


Surgery Tools for Precision Surgical Procedures: Grey Medical

VLONE Hoodie: The Origins, Meaning and Streetwear Legacy

Kybella Treatment: Understanding Skin Type and Suitability

Autonomous Agents Examples 2026: Uses, Benefits & AI Future

Digital Fabric Printing: Process, Benefits, Types and Applications

Microdermabrasion Facial North York for Smooth and Glowing Skin

NAD+ IV Drip in Dubai: Boost Energy & Cellular Wellness

Divorce Lawyer Mississauga: Complete Divorce Process

Heavy Duty Truck Shop Management Software for Repair Shops

Beckman Adson Retractor for Precision Surgical Procedures

Cybersecurity Consulting Company SequelNet Provides Critical IT Support Services to Medical Billing Firm, Medical Optimum

Meet the Megalodon: The Shark Star of ‘Meg 2’

Reduce Video Game Lag: Level Up Your Gaming Performance
Balancing India’s Entertainment: Cricket vs. Bollywood

Jetsetter’s Secrets: Unveiling Our Favorite Travel Hacks for a Seamless Adventure

The 5 Best Live Sports Streaming Sites: Legal and Exciting!

Hollywood Labor Unrest: The Impact of ‘What About Us?’ Strikes

Unveiling the Magic of Dream Fulfillment at the Late NBA Draft

Illuminate Your Skin: Dr. Axe Unveils Natural Remedies for Lightening Knees and Elbows

Bright Choices: Navigating the Pros and Cons of Skin Whitening Creams with Dr. Axe
-

 Business3 years ago
Cybersecurity Consulting Company SequelNet Provides Critical IT Support Services to Medical Billing Firm, Medical Optimum
-
Entertainment3 years ago
Meet the Megalodon: The Shark Star of ‘Meg 2’
-
Entertainment3 years ago
Reduce Video Game Lag: Level Up Your Gaming Performance
-
 Sports3 years ago
Balancing India’s Entertainment: Cricket vs. Bollywood
-
Entertainment3 years ago
Jetsetter’s Secrets: Unveiling Our Favorite Travel Hacks for a Seamless Adventure
-
Productivity3 years ago
The 5 Best Live Sports Streaming Sites: Legal and Exciting!
-
Art /Entertainment3 years ago
Hollywood Labor Unrest: The Impact of ‘What About Us?’ Strikes
-
Sports3 years ago
Unveiling the Magic of Dream Fulfillment at the Late NBA Draft


