
Beauty Fitness
Achieving Clear and Healthy Skin: Our Favorite Products for Acne-Prone Skin

Are you tired of trying countless skincare products only to have them worsen your acne-prone skin? Look no further! We’ve compiled a list of our favorite products for achieving clear and healthy skin. Say goodbye to breakouts and hello to a glowing complexion with these game-changing skincare staples. Get ready to love the skin you’re in!
Introducing our Favorite Products for Acne-Prone Skin
Introducing our Favorite Products for Acne-Prone Skin:
We all know that feeling of waking up to a new blemish. Or, worse, looking in the mirror and seeing a pimple that’s been hanging out for weeks. If you’re struggling with acne, you’re not alone—acne is the most common skin condition in the US. But don’t worry, we’re here to help!
Below, we’ve rounded up our favorite products for acne-prone skin. From cleansers to spot treatments, these products will help you achieve clear and healthy skin.
Cleanser: A good cleanser is critical for anyone with acne-prone skin. Look for a cleanser that contains salicylic acid or benzoyl peroxide, two ingredients that are known to fight acne. Also, be sure to choose a cleanser that’s non-comedogenic, meaning it won’t clog your pores. We recommend La Roche-Posay Effaclar Medicated Gel Cleanser or Neutrogena Oil-Free Acne Wash Pink Grapefruit Facial Cleanser.

Spot Treatment: When you have a blemish, you want to get rid of it fast! A spot treatment containing benzoyl peroxide or salicylic acid can help shrink the pimple quickly. We like Clean & Clear Advantage Acne Spot Treatment and Kiehl’s Breakout Control Targeted Blemish Spot Treatment.
The Benefits of These Products
If you’re acne-prone, you know the drill: You wake up with a new zit, and you’re desperately trying to find a way to make it go away. You might buy every new product that promises clear skin, but sometimes it feels like nothing works. And even when you do find a product that seems to help, the results are only temporary.
We feel your pain, and we’re here to help. We’ve rounded up our favorite products for acne-prone skin, and we’re sharing the reasons why they work so well. Trust us, these products are worth the investment.
Our top pick is the La Roche-Posay Effaclar Medicated Gel Cleanser. This cleanser is specifically designed for people with oily and acne-prone skin, and it’s gentle enough for everyday use. The gel formula contains salicylic acid, which helps to unclog pores and prevent breakouts.
We also love the CeraVe Renewing SA Lotion. This lotion contains salicylic acid and hyaluronic acid, which work together to exfoliate dead skin cells and hydrate the skin. The light, refreshing scent is an added bonus.
For a spot treatment that really works, try the Mario Badescu Drying Lotion. This award-winning product is made with sulfur and calamine, which work together to dry out pimples overnight. Just apply a small amount directly to the
How to Use These Products
Assuming you have already cleansed your face, our first step is to use a toner. This will help to restore your skin’s pH balance and remove any lingering dirt or makeup. We like the Klairs Supple Preparation Facial Toner as it is alcohol-free and gentle enough for everyday use.
Next, apply a serum or essence. This step is key in boosting hydration and delivering nutrients deep into the skin. For acne-prone skin, we recommend the COSRX Centella Blemish Ampoule. This product contains centella asiatica extract, which helps to soothe inflamed skin and speed up healing.
Now it’s time to moisturize! A light gel or lotion is often best for acne-prone skin as heavier creams can clog pores and cause breakouts. We love the Laneige Water Bank Gel Cream as it provides long-lasting hydration without being too heavy.
Finish up with SPF, even if you’re staying indoors! Ultraviolet rays can penetrate window glass and damage skin, so it’s important to protect your face every day. We recommend the Etude House Sunprise Mild Airy Finish sunscreen as it has a light texture that won’t clog pores.
Precautions to Take
If you have acne-prone skin, it is important to take extra care when choosing products to use on your skin. Here are our favorite products for keeping acne at bay:
Salicylic Acid Cleanser: This cleanser contains salicylic acid, which helps to exfoliate the skin and unclog pores.
Benzoyl Peroxide Spot Treatment: This spot treatment helps to reduce bacteria on the skin and dries up pimples.
Retinoid Cream: This cream helps to speed up cell turnover and can be used as a preventative measure against breakouts.
Make sure to follow these tips when using these products:
Conclusion
Acne-prone skin can be difficult to manage, but with the right products and a consistent skincare routine you can achieve clear and healthy looking skin. We’ve gathered some of our favorite acne-fighting products that will help keep your skin looking beautiful while helping reduce breakouts. Be sure to consult with your dermatologist before trying any new product to make sure it is suitable for your skin type and condition. Remember, taking care of your skin starts from within – so take good care of yourself!
Author
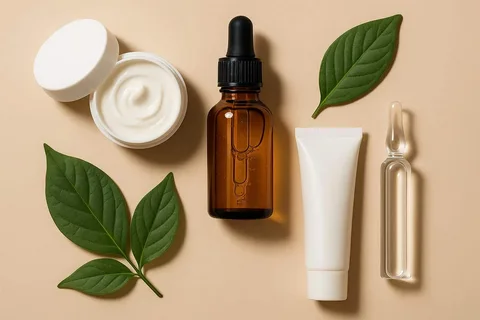
Cosmetic Peptides have become one of the most popular ingredients in modern skincare. You can now find them in serums, creams, masks, and anti-aging products. Their growing popularity comes from their ability to target different skin concerns while remaining gentle on the skin.
This is where cosmetic peptides play an important role. Different types of peptides support the skin in different ways. Some stimulate collagen production, while others help reduce wrinkles, improve hydration, or repair damaged skin. Understanding how these peptides work can help you choose the right skincare products for your needs.
What Are Cosmetic Peptides?
Cosmetic peptides are bioactive ingredients used in skincare products to improve skin health and appearance. Because peptides are small molecules, they can penetrate the outer layer of the skin more effectively than larger proteins.
Once absorbed, peptides send signals to skin cells and encourage specific biological activities. Depending on the peptide type, they may help repair the skin barrier, stimulate collagen production, reduce muscle contractions, or improve skin tone.
Peptides are popular because they provide visible benefits without being overly harsh. Unlike some active ingredients that may irritate sensitive skin, peptides are generally suitable for most skin types.
Signal Peptides
Signal peptides are among the most commonly used peptides in anti-aging skincare. These peptides send messages to skin cells, encouraging them to produce more collagen, elastin, and other important structural proteins.
As collagen levels increase, the skin appears firmer and smoother. Fine lines and wrinkles become less noticeable over time.
Main Benefits of Signal Peptides
- Stimulate collagen and elastin production
- Improve skin firmness and elasticity
- Support skin repair
- Reduce the appearance of fine lines
Common Examples
- Palmitoyl Pentapeptide
- Palmitoyl Tripeptide
Signal peptides work gradually, which makes them ideal for long-term skincare routines. Consistent use can improve skin texture and help maintain a youthful appearance.

Carrier Peptides
Carrier peptides help transport essential minerals and trace elements into the skin. These minerals, such as copper and magnesium, support important enzymatic functions involved in healing and collagen production.
One of the most well-known carrier peptides is Copper Tripeptide-1, often called GHK-Cu. This peptide is widely used in products designed for skin repair and rejuvenation.
Main Benefits of Carrier Peptides
- Deliver essential minerals to skin cells
- Promote skin regeneration
- Improve wound healing
- Support collagen production
Common Example
- Copper Tripeptide-1 (GHK-Cu)
Carrier peptides are especially useful for mature or damaged skin. They help strengthen the skin barrier while improving overall skin health.
Neurotransmitter Inhibitory Peptides
Neurotransmitter inhibitory peptides are often called “Botox-like peptides.” These peptides work by reducing muscle contractions in the face. As facial muscles relax, expression lines and dynamic wrinkles become less visible.
Unlike injectables, these peptides offer a non-invasive way to soften wrinkles gradually.
Main Benefits of Neurotransmitter Inhibitory Peptides
- Relax facial tension
- Reduce dynamic wrinkles
- Smooth fine lines
- Improve skin appearance without invasive procedures
Common Examples
- Argireline (Acetyl Hexapeptide-3)
- SNAP-8 (Acetyl Octapeptide-3)
These peptides work particularly well around the forehead, eyes, and mouth because these areas experience constant facial movement.
Enzyme Inhibitor Peptides
Enzyme inhibitor peptides protect the skin by blocking enzymes that contribute to aging and pigmentation. Some enzymes break down collagen and elastin, while others increase melanin production.
By slowing these processes, enzyme inhibitor peptides help maintain smoother, firmer, and more even-toned skin.
Main Benefits of Enzyme Inhibitor Peptides
- Reduce collagen breakdown
- Minimize pigmentation
- Support skin firmness
- Improve overall skin tone
Common Examples
- Tripeptide-1
- Pentapeptide Derivatives
These peptides are commonly included in anti-aging and brightening formulations because they help preserve the skin’s natural structure.
How to Choose the Right Peptide
Choosing the right peptide depends on your skincare goals. Different peptides target different concerns, so understanding your skin’s needs is important.
For example:
- If your goal is anti-aging, signal peptides are an excellent option.
- If you want skin repair and regeneration, carrier peptides work well.
- If you want to reduce expression lines, neurotransmitter inhibitory peptides are ideal.
- If uneven skin tone is your concern, enzyme inhibitor peptides can help.
Many skincare brands combine multiple peptides in one formula to provide broader benefits. This combination approach often delivers better overall results.
Factors That Affect Peptide Effectiveness
Even the best peptides may not work properly if the formulation is poor. Several factors influence how effective peptides are in skincare products.
Concentration
Peptides must be present in effective amounts. Very low concentrations may not provide visible results.
Stability
Some peptides are sensitive to heat, air, and pH changes. Proper formulation and packaging help maintain their stability.
Skin Penetration
Smaller peptides usually penetrate the skin more effectively. Some products also use delivery systems to improve absorption.
Combination with Other Ingredients
Peptides often work better when combined with ingredients like:
- Hyaluronic acid
- Antioxidants
- Niacinamide
- Vitamins C and E
These ingredients support hydration and improve the overall performance of peptide-based skincare products.
Why Peptides Are Popular in Modern Skincare
Peptides have become increasingly popular because they offer targeted skincare benefits without causing excessive irritation. Many people prefer peptides because they support the skin naturally rather than forcing rapid exfoliation or aggressive renewal.
Additionally, peptides work well in both preventive and corrective skincare routines. Younger individuals use them to maintain collagen levels, while mature users rely on them to improve firmness and reduce visible aging signs.
Another major advantage is versatility. Peptides can address multiple concerns at once, including wrinkles, dullness, dehydration, and skin damage.
Conclusion
Cosmetic peptides have transformed the skincare industry by offering scientifically supported solutions for healthier and younger-looking skin. Signal peptides, carrier peptides, neurotransmitter inhibitory peptides, and enzyme inhibitor peptides each play unique roles in improving skin function and appearance.
These peptides can boost collagen production, reduce wrinkles, improve skin texture, support healing, and protect the skin from damage. However, choosing the right peptide depends on your skincare goals and the quality of the formulation.
When combined with proper skincare habits and consistent use, peptide-based products can deliver noticeable and long-lasting improvements. As skincare technology continues to evolve, peptides will likely remain one of the most trusted and effective ingredients in modern cosmetic formulations.
Author
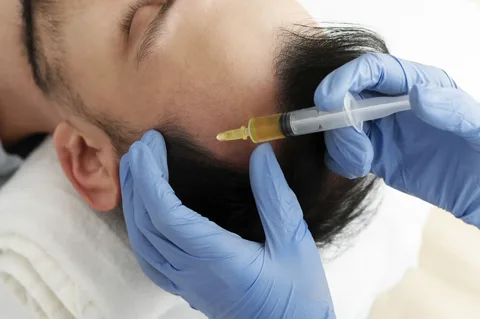
PRP (Platelet-Rich Plasma) therapy has quickly become one of the most sought-after treatments for skin rejuvenation and hair restoration. It is natural, minimally invasive, and delivers long-lasting results. However, one of the most common questions people ask is: How often should you get PRP therapy? If you are considering PRP in Islamabad, understanding the ideal treatment frequency is essential to achieve the best possible results.
This guide will explain how often PRP sessions are needed, factors that influence frequency, and how to maintain long-term benefits.
What is PRP Therapy?
PRP therapy involves extracting a small amount of your blood, processing it to isolate platelet-rich plasma, and applying it to the skin or scalp. The growth factors in PRP stimulate collagen production, tissue repair, and hair follicle regeneration.
Key Benefits:
- Improves skin texture and tone
- Reduces wrinkles and fine lines
- Promotes hair growth
- Enhances overall skin health
Because PRP works gradually, multiple sessions are required for optimal results.
Why Multiple PRP Sessions Are Necessary
Unlike instant cosmetic treatments, PRP relies on your body’s natural healing process. This means results develop over time.
Reasons for Multiple Sessions:
- Gradual collagen production
- Progressive tissue repair
- Long-term improvement
- Enhanced effectiveness with repetition
Each session builds upon the previous one, leading to better and longer-lasting results.
Recommended PRP Treatment Frequency
The frequency of PRP therapy depends on your goals and treatment area.
General Guidelines:
| Treatment Phase | Frequency |
|---|---|
| Initial Phase | 3–4 sessions |
| Interval Between Sessions | Every 4–6 weeks |
| Maintenance Phase | Every 6–12 months |
This schedule is widely recommended for both skin and hair treatments.
PRP Frequency for Skin Rejuvenation
If you are using PRP for facial treatments, the schedule may vary slightly.
Typical Plan:
- 3 sessions initially
- Sessions spaced 4–6 weeks apart
- Maintenance every 6–12 months
Expected Results:
- Improved skin texture
- Reduced fine lines
- Brighter complexion
Regular sessions help maintain youthful skin.
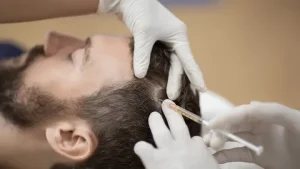
PRP Frequency for Hair Restoration
Hair growth requires consistent stimulation of hair follicles.
Recommended Plan:
- 3–4 sessions initially
- Sessions every 4 weeks
- Maintenance every 4–6 months
Results Include:
- Reduced hair shedding
- Stronger hair roots
- Gradual hair regrowth
Consistency is key for achieving noticeable hair improvement.
Factors That Affect PRP Frequency
Not everyone requires the same number of sessions.
Key Factors:
- Age and skin condition
- Severity of hair loss
- Treatment goals
- Lifestyle habits
- Overall health
A personalized treatment plan ensures the best results.
Signs You May Need More PRP Sessions
Some individuals may require additional sessions beyond the standard plan.
Indicators:
- Slow improvement
- Severe hair loss
- Deep wrinkles or scars
- Lack of maintenance
Your practitioner will adjust your schedule accordingly
Can You Get PRP Too Often?
While PRP is safe, excessive treatments are not necessary.
Why Over-Treatment Isn’t Recommended:
- The body needs time to heal and regenerate
- Too frequent sessions may not enhance results
- Proper intervals ensure maximum effectiveness
Following a professional schedule is essential.
How Long Do PRP Results Last?
PRP results are not permanent but can last for several months.
Duration:
- Skin results: 6–12 months
- Hair results: 4–6 months (with maintenance)
Regular sessions help sustain the benefits.
Tips to Maintain PRP Results
To extend the effects of PRP therapy, follow these tips:
Do’s:
- Maintain a healthy diet
- Stay hydrated
- Follow a good skincare routine
- Use recommended hair care products
Don’ts:
- Avoid smoking
- Limit alcohol consumption
- Avoid excessive sun exposure
These habits enhance and prolong PRP results.
Benefits of Regular PRP Therapy
Sticking to a consistent schedule offers multiple advantages.
Key Benefits:
- Long-lasting results
- Improved skin and hair health
- Prevents aging signs
- Boosts confidence
PRP works best when done regularly and correctly.
Cost of PRP in Islamabad
The cost depends on the number of sessions and treatment area.
Estimated Cost:
- Per session: 15,000 – 35,000 PKR
- Full package: 40,000 – 120,000 PKR
Investing in multiple sessions ensures better outcomes.
FAQs About PRP Frequency
1. How often should I get PRP therapy?
Typically every 4–6 weeks during the initial phase.
2. How many sessions are needed?
Usually 3–4 sessions for best results.
3. Can I stop PRP after one session?
One session may not provide noticeable results.
4. How often is maintenance required?
Every 6–12 months for skin and 4–6 months for hair.
5. Is PRP safe for frequent use?
Yes, but it should follow a proper schedule.
6. Can PRP be combined with other treatments?
Yes, it is often combined with micro needling or laser treatments.
Final Thoughts
PRP therapy is a powerful and natural treatment that delivers gradual yet long-lasting results for both skin and hair. However, consistency is the key to success. Following the recommended schedule ensures optimal outcomes and helps maintain your results over time. Whether you are targeting skin rejuvenation or hair restoration, understanding how often to get PRP therapy allows you to make informed decisions and achieve the best results.
If you are planning to start your PRP journey, choosing a trusted clinic is essential. For expert guidance and advanced treatments, visit SKN Cosmetic Clinic. Their experienced professionals create personalized PRP plans tailored to your needs, ensuring safe, effective, and long-lasting results.
Author
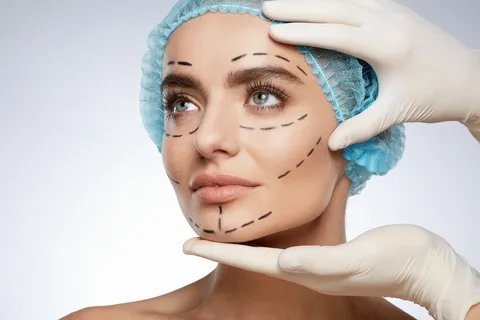
Accidents can have a profound impact on a person’s life, especially when facial structures are affected. Injuries involving the jaw can disrupt not only appearance but also essential functions like eating, speaking, and breathing. Reconstructive procedures are often necessary to restore both form and function. Today, advanced solutions such as Jaw Surgery in Islamabad are helping patients recover from traumatic injuries and regain confidence. This specialized approach combines medical expertise with modern technology to deliver life-changing results.
Understanding Jaw Trauma After Accidents
Facial injuries caused by road accidents, sports incidents, or falls often involve fractures or dislocations of the jaw. These injuries can lead to severe pain, swelling, and difficulty in performing everyday tasks.
In some cases, the jaw may heal improperly if not treated correctly, resulting in long-term complications such as misalignment, chronic pain, or difficulty chewing. This is where reconstructive jaw surgery becomes essential.
What Is Reconstructive Jaw Surgery?
Reconstructive jaw surgery focuses on repairing damage caused by trauma. Unlike cosmetic procedures, the primary goal is to restore normal function and structure.
Surgeons carefully realign fractured bones, repair damaged tissues, and ensure that the jaw functions properly. The procedure may involve the use of plates, screws, or bone grafts to achieve stability and support healing.
Why Jaw Surgery Is Crucial After Accidents
Timely intervention is critical after a jaw injury. Without proper treatment, complications can worsen over time, affecting both physical health and quality of life.
Jaw surgery not only corrects structural damage but also prevents future issues such as uneven bite, speech difficulties, and breathing problems. It provides a comprehensive solution that addresses both immediate and long-term concerns.
Restoring Functionality
One of the main objectives of reconstructive jaw surgery is to restore normal function. Patients who have suffered jaw injuries often struggle with basic activities like eating and speaking.
By realigning the jaw, the surgery helps restore proper bite function, making it easier to chew food and communicate effectively. This improvement significantly enhances daily life.
Improving Facial Appearance
Accidents can alter facial symmetry, leading to visible deformities. Reconstructive jaw surgery plays a key role in restoring the natural appearance of the face.
Surgeons work to achieve balance and symmetry, ensuring that the results look as natural as possible. This not only improves physical appearance but also boosts self-confidence.

The Surgical Process
The procedure begins with a detailed evaluation, including imaging and diagnostic tests. This helps the surgeon understand the extent of the damage and plan the surgery accordingly.
During the operation, the jawbones are repositioned and secured using medical-grade materials. The process is performed under general anesthesia to ensure patient comfort. Advanced techniques and technology allow for precise adjustments, leading to better outcomes and faster recovery.
Recovery After Reconstructive Jaw Surgery
Recovery is a gradual process that requires patience and proper care. Patients may experience swelling, discomfort, and limited jaw movement in the initial stages.
A soft or liquid diet is usually recommended, along with prescribed medications to manage pain and prevent infection. Follow-up visits are essential to monitor progress and ensure proper healing. Over time, patients regain normal function and begin to see the full benefits of the surgery.
Key Benefits of Reconstructive Jaw Surgery
| Benefit | Description |
|---|---|
| Functional Restoration | Improves chewing, speaking, and breathing |
| Structural Repair | Fixes fractures and misalignment |
| Facial Symmetry | Restores natural appearance |
| Long-Term Stability | Prevents future complications |
| Confidence Boost | Enhances self-esteem |
Emotional and Psychological Recovery
Recovering from an accident is not just a physical journey—it is also emotional. Facial injuries can affect self-image and confidence, making it difficult for patients to return to normal life.
Reconstructive jaw surgery helps restore not only physical appearance but also emotional well-being. Patients often feel more confident and comfortable after the procedure, which plays a significant role in overall recovery.
Importance of Choosing the Right Clinic
The success of reconstructive jaw surgery depends on the expertise of the medical team and the quality of care provided. Choosing a reputable clinic ensures that the procedure is performed safely and effectively.
Experienced surgeons use advanced techniques to deliver precise results while minimizing risks. Personalized treatment plans further enhance the success of the surgery.
Long-Term Outcomes
The results of reconstructive jaw surgery are typically long-lasting. Once the jaw heals properly, patients can enjoy improved function and appearance for years to come.
Maintaining good oral hygiene and attending follow-up appointments are important for preserving the results. With proper care, the benefits of the surgery can be life-changing.
Modern Advancements in Jaw Surgery
Technological advancements have significantly improved the outcomes of jaw surgery. Tools like 3D imaging and digital planning allow surgeons to visualize the procedure in detail before it begins.
These innovations enhance accuracy, reduce surgical risks, and improve recovery times. Patients benefit from more predictable and successful results.
Conclusion
Jaw surgery for reconstructive purposes after accidents is a vital procedure that restores both function and appearance. It addresses the physical damage caused by trauma while also supporting emotional recovery. With the help of advanced techniques and skilled professionals, patients can regain their confidence and return to a normal life.
For those seeking expert care and reliable solutions, SKN Cosmetic Clinic offers advanced reconstructive jaw surgery tailored to individual needs. To learn more and take the first step toward recovery, visit SKN Cosmetic Clinic.
FAQs
Is jaw surgery necessary after every accident?
Not always, but it is required in cases of severe fractures or misalignment.
How long does recovery take?
Initial recovery may take a few weeks, while complete healing can take several months.
Will there be visible scars?
Most procedures involve internal incisions, so visible scarring is minimal.
Can jaw surgery restore normal function completely?
In most cases, patients regain normal function with proper treatment and care.
Is reconstructive jaw surgery safe?
Yes, when performed by experienced surgeons, it is a safe and effective procedure.
Author


Turkish Airlines Check-In: Mobile, Airport & Self-Service Options

Raspberry Hills Clothing: Streetwear Hoodies, Shirts & Shorts

AI Products for Business: Trends, Tools & Future Innovations

Korean Co Ord Sets for Clean Girl Aesthetic: Outfit Ideas

Tool Coatings for Endmills: Types, Benefits & Improve Tool Life

Endmills Break in CNC Machining & How to Prevent Tool Failure

ER 25 Collet: Sizes, Uses, Benefits & Buying Tips

New Apartments in CITY, ACT 2601: Urban Living in Canberra

Feeler Gauge for Valve Adjustment: Guide for Engine Precision

Rhinoplasty for Men: Trends, Techniques, and Masculine Results

Cybersecurity Consulting Company SequelNet Provides Critical IT Support Services to Medical Billing Firm, Medical Optimum

Team Communication Software Transforms Operations at Finance Innovate

Project Management Tool Transforms Long Island Business

How Alleviate Poverty Utilized IPPBX’s All-in-One Solution to Transform Lives in New York City

Breast Cancer: The Imperative Role of Mammograms in Screening and Early Detection

Unstoppable Collaboration: D.C.’s Citi Open and Silicon Valley Classic Unite to Propel Women’s Tennis to New Heights

Embracing Renewal: Sizdabedar Celebrations Unite Iranians in New York’s Eisenhower Park

The Benefits of Starting a Side Hustle for Financial Freedom

New Blood Donation Screening Questions What You Need to Know

Stylishly Timeless: The 5 Types of Sandals You Need in Your Closet
-

 Business3 years ago
Cybersecurity Consulting Company SequelNet Provides Critical IT Support Services to Medical Billing Firm, Medical Optimum
-
Business3 years ago
Team Communication Software Transforms Operations at Finance Innovate
-
Business3 years ago
Project Management Tool Transforms Long Island Business
-
Business3 years ago
How Alleviate Poverty Utilized IPPBX’s All-in-One Solution to Transform Lives in New York City
-
health3 years ago
Breast Cancer: The Imperative Role of Mammograms in Screening and Early Detection
-
Sports3 years ago
Unstoppable Collaboration: D.C.’s Citi Open and Silicon Valley Classic Unite to Propel Women’s Tennis to New Heights
-
Art /Entertainment3 years ago
Embracing Renewal: Sizdabedar Celebrations Unite Iranians in New York’s Eisenhower Park
-
Finance3 years ago
The Benefits of Starting a Side Hustle for Financial Freedom


