
Food Drink
Step-by-Step Instructions for Cooking Soft-Boiled Eggs with Steam

Are you tired of overcooked or undercooked eggs ruining your breakfast? Look no further than soft-boiled eggs! This classic dish is a delicious and healthy addition to any meal, but it can be tricky to get just right. Fortunately, with the help of steam and our step-by-step instructions, cooking perfect soft-boiled eggs has never been easier. Follow along as we guide you through the process from preparation to serving – your taste buds will thank you!
Getting ready
Before you start cooking, it’s important to make sure you have all the necessary tools and ingredients. First, grab a pot with a lid that’s large enough to hold your eggs in a single layer. A steamer basket or colander that fits inside the pot is also crucial – this will keep the eggs from touching the water directly and prevent them from cracking.
Next up: eggs! Any size works for soft-boiled eggs, but be sure they’re at room temperature before cooking – cold eggs are more likely to crack when added to hot water. You’ll also need some salt and pepper for seasoning once the eggs are cooked.
Fill your pot with about an inch of water and bring it to a boil over high heat. While waiting for the water to boil, use this time wisely by preparing any toast or bread you plan on serving alongside your soft-boiled egg dish.
With everything set up and ready to go, let’s move onto preparation!

Preparation
Preparing your eggs is essential to ensuring that they come out perfectly. Here are the steps you need to follow for preparation:
Choose fresh eggs – Fresh eggs will have a firmer white and less visible air pocket, which makes them easier to peel.
Room temperature – Allow your eggs to sit at room temperature for about 15 minutes before cooking. This helps prevent cracking of the shells during boiling.
Gently wash – Gently wash the eggs under running water before placing them in the pot. This helps remove any dirt or bacteria on the surface of the eggshell.
Use a steamer basket – Place a steamer basket in a pot with enough water so it doesn’t touch the bottom of the basket. Bring water to boil over medium heat, then reduce heat slightly.
Add your eggs gently – Using tongs, place your prepped eggs into the steamer basket making sure not to overcrowd them. Cover with lid and set timer according to how runny or firm you want your yolks.
By following these simple steps for preparation, you can ensure that every soft-boiled egg you make has perfect whites and creamy yolks!
Boiling eggs
Boiling eggs may seem like a simple task, but it’s important to get it right in order to achieve the perfect soft-boiled egg. To start, fill a pot with about an inch of water and place it on medium heat.
Next, use a steaming basket or strainer to hold the eggs above the water level. Once the water is boiling, gently place each egg into the steamer basket or strainer.
Set your timer for 6 minutes if you want a runny yolk and slightly firmer white, or for 7 minutes if you prefer a less runny yolk and more set white.
It’s important not to overcook your eggs as this can lead to tough whites and dry yolks. When your timer goes off, remove the pot from heat immediately and transfer the eggs to an ice bath for at least one minute.
The ice bath will help stop the cooking process and make them easier to handle when removing their shells.
Once cooled down enough that you can touch them without burning yourself, gently crack each shell against a hard surface before peeling under cold running water. And voila! Perfectly cooked soft-boiled eggs ready for serving.
Removing the egg from the pot
Once the eggs have been cooked, it’s time to remove them from the pot. Be careful when handling hot water and use tongs or a slotted spoon to lift the eggs out of the pot.
If you prefer your soft-boiled eggs with runny yolks and firm whites, then remove them after about 5-6 minutes of cooking. For firmer yolks and whites cook for an additional minute or two before removing from heat.
Once you have removed the egg from the boiling water, transfer it to a bowl filled with cold water to stop it from cooking further. This will also make peeling easier since it helps loosen up the shell.
When removing multiple eggs at once, be sure not to overcrowd in one utensil as this could cause cracking during handling. Instead, take one egg at a time using your utensil carefully.
After each egg has cooled down slightly in cold water for about 30 seconds -1 minute peel off its shell gently by tapping on hard surface until cracks appear all over . Then gently roll between fingers while running under cold tap water .
Removing soft-boiled eggs properly requires some patience and care but is worth it in order to enjoy that perfect combination of creamy yolk and tender white flesh!
Serving soft-boiled eggs
And there you have it, soft-boiled eggs cooked to perfection using steam! Now that your eggs are ready, it’s time to serve them.
To eat the egg, use an egg cup or carefully tap the top of the shell with a knife and remove the lid. Use a small spoon to scoop out the deliciously runny yolk and enjoy with some toast or just as is.
Soft-boiled eggs are not only tasty but also nutritious. They contain high-quality protein and essential vitamins and minerals like vitamin D, calcium, iron, and choline. Plus, they make for a quick and easy breakfast or snack that will keep you fueled throughout your day.
In conclusion (just kidding!), mastering how to cook soft-boiled eggs can take some practice but once you get the hang of it – thanks to this step-by-step guide – it becomes super simple. So go ahead and give it try! Your taste buds will thank you.
Author
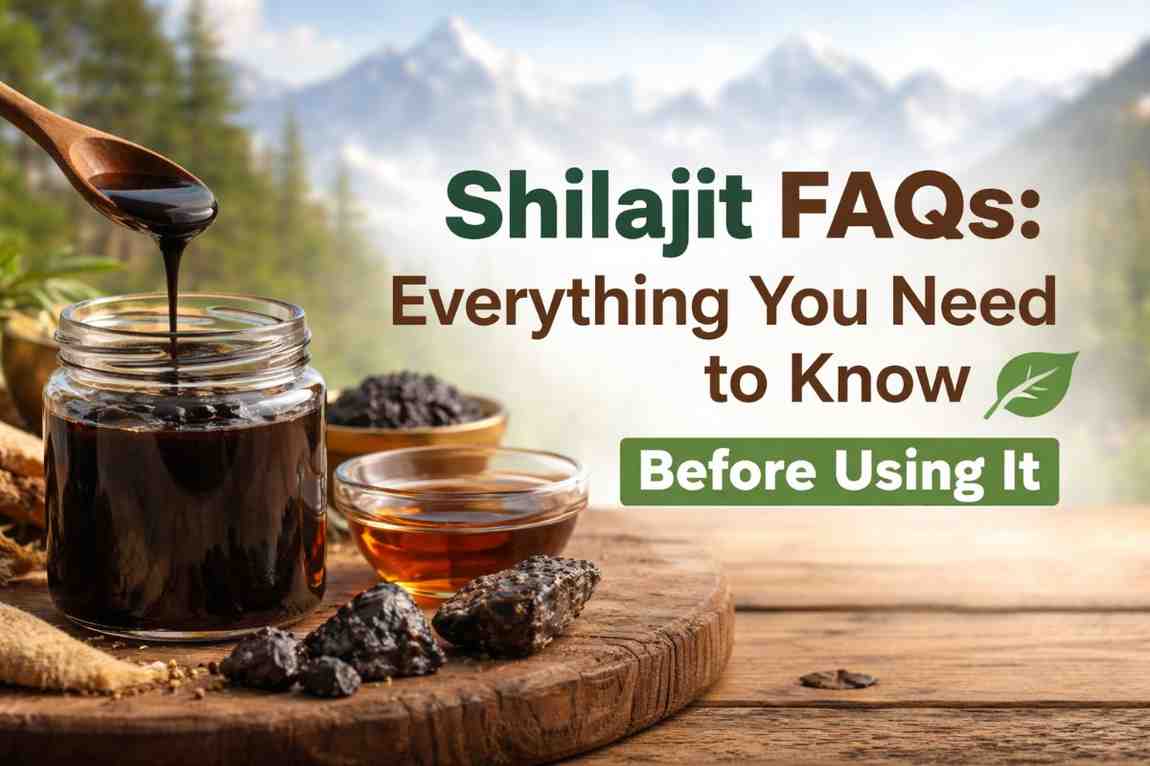
Shilajit has served as a cornerstone of Ayurvedic medicine for thousands of years, and modern science is finally catching up to its potential. This powerful natural resin, harvested from the rocky crevices of the Himalayas, contains over 80 minerals and bioactive compounds. In 2026, Shilajit has surged in popularity across India. Fitness enthusiasts use it for a competitive edge, while professionals rely on it for sustained daily energy. However, this popularity brings confusion regarding its safety and authenticity. This comprehensive guide answers your most pressing questions so you can choose a high-quality supplement with confidence.
What Exactly is Shilajit?
Shilajit is a thick, tar-like resin that seeps from mountain rocks during warmer months. It forms over centuries as plant and microbial matter slowly decompose under extreme pressure and altitude. In Sanskrit, the name means “conqueror of mountains” or “destroyer of weakness.” Ayurveda classifies it as a Rasayana, a substance that promotes longevity and total rejuvenation.
The primary active component is Fulvic Acid. This compound works alongside Humic Acid and trace minerals to support cellular energy and natural detoxification.
Where is it Sourced in India?
Genuine Shilajit comes from the Himalayan range at altitudes between 1,000 and 5,000 meters. Key regions include:
-
Uttarakhand: The Garhwal and Kumaon ranges.
-
Himachal Pradesh: The high-altitude Spiti Valley.
-
Jammu & Kashmir: Remote, rocky highland zones.
At these heights, intense UV exposure and geological pressure create the ideal conditions for mineral accumulation. Himalayan Shilajit typically contains higher Fulvic Acid levels than Altai or Afghan varieties.
Proven Health Benefits and Uses
People use Shilajit today for a variety of wellness goals. Because it supports the mitochondria—the “power plants” of your cells—it provides benefits across several areas:
-
Energy and Stamina: Regular use reduces fatigue and provides sustained mental and physical energy.
-
Physical Recovery: Athletes use it to reduce exercise-induced inflammation and support muscle repair.
-
Hormonal Balance: It is well-known for supporting healthy testosterone levels and reproductive health in men.
-
Cognitive Clarity: The minerals support memory, focus, and overall brain health.
-
Nutrient Absorption: Fulvic acid acts as a “transporter,” helping your body absorb other vitamins and minerals more effectively.
Who Should (and Shouldn’t) Take Shilajit?
Shilajit is suitable for a wide range of adults, but specific groups should exercise caution.
-
Recommended For: Men and women (18+) seeking energy, working professionals managing stress, and athletes focusing on endurance. It is especially beneficial for adults over 40 looking for healthy aging support.
-
Consult a Doctor If: You are pregnant or breastfeeding. Children under 18 should avoid it.
-
Strict Avoidance: Individuals with gout, sickle cell anemia, or thalassemia should stay away. Furthermore, if you take blood-thinners or have kidney conditions, seek medical advice first.
How to Consume Shilajit for Maximum Results
You can find Shilajit in three primary formats. Each requires a different approach to ensure you don’t degrade the active compounds.
| Form | Potency | How to Use |
| Resin | Highest | Dissolve a pea-sized amount (300–500 mg) in warm milk or water. |
| Capsules | Convenient | Take with water; ideal for travel or those who dislike the earthy taste. |
| Powder | Versatile | Mix into smoothies or warm beverages for a measured dose. |
Pro Tip: Take Shilajit in the morning on an empty stomach to maximize absorption. If you have a sensitive stomach, a light meal will not significantly hinder its effectiveness. Consistency is the most important factor; you will likely see the best results after 2–3 weeks of daily use.
How to Identify Authentic vs. Fake Shilajit
The market currently contains many adulterated or synthetic products. Use these four tests to verify your purchase:
-
The Solubility Test: Genuine resin dissolves completely in warm water. It should turn the liquid a rich golden-brown without leaving any sandy residue or sediment at the bottom.
-
The Flame Test: Authentic Shilajit will not catch fire. When exposed to a flame, it may bubble or expand, but it should never burn like plastic or wax.
-
Texture Check: At room temperature, the resin is firm. If you warm it between your fingers, it becomes pliable and sticky. In the fridge, it becomes hard and brittle.
-
The Aroma: Real Shilajit has a distinct, earthy, and slightly bitter smell. It often reminds people of bitumen or wet soil. If it smells like chocolate or has no scent, it is likely a counterfeit.
The Gold Standard: Only buy from brands that provide Third-Party Lab Reports. Ensure the report verifies low heavy metal levels (Lead, Arsenic, Mercury) and confirms a high Fulvic Acid percentage.
Choosing the Best Brand in India
When evaluating Indian brands in 2026, prioritize transparency over a low price. A cheap, low-potency product provides no benefit and may contain harmful contaminants.
-
Source Transparency: The brand should specify the exact Himalayan region and altitude of harvest.
-
Cold-Processing: Look for “low-heat” or “cold-processed” purification. High heat destroys the delicate bioactive compounds.
-
Verified Reviews: Look for authentic feedback and clear return policies. Trustworthy brands stand behind their purity.
Shilajit vs. Ashwagandha: Which is Better?
These two are often compared, but they serve different roles. Ashwagandha is an adaptogen that primarily manages stress and cortisol. Shilajit is a mineralizer that primarily boosts energy and physical performance. Interestingly, many practitioners recommend taking them together. Ashwagandha calms the nervous system while Shilajit nourishes the cells.
Final Thoughts
Shilajit is not a “magic pill,” but it is a powerful lifestyle ally. When you pair it with quality sleep, a balanced diet, and regular movement, it provides a strong foundation for health. Always prioritize quality. Authentic, purity-verified Himalayan Shilajit is a worthwhile investment in your long-term vitality.
Author

Personalized custom printed fast food boxes are the key ingredient of any food enterprise that wants to make a permanent impact. Properly developed packaging has the ability to enhance brand awareness and keep food safe and fresh. The fast food restaurants are now requiring new and viable packaging designs that are aesthetically pleasing and effective.
Companies in Canada and all over the world are moving towards custom-made and recyclable products to provide their customers with a better experience. Due to the emergence of takeout and delivery services, more than ever it has become more essential to invest in Custom Printed Fast Food Boxes, Fast Food Boxes Wholesale, and innovative packaging designs. Packaging can no longer be only functional; it is a marketing instrument.
Branding With Logo
Brand identity is built immediately when you add your logo to the fast food boxes. Fast Food Boxes with Logo help the companies to speak in a business way, and memorably impress people. Custom branding will provide a differentiation in the products and their counterparts to give awareness and loyalty to the customers.

Printed Custom Options
Custom Printed Fast Food Boxes can be customized to your design, colors, and message that will appeal to your audience. Customised Fast Food Packaging assists companies to advertise specials, seasonal offers,s or brand narratives. Flexibility is also available on printing flexibility in terms of size and shape, which offers flexibility in burgers, fries, wraps, and combo meals.
Good printing quality will make logos and graphics stay bright even during heat or wet weather. This strategy will add value to the general attitude about your brand and give the packaging an immediate identity. By discussing custom printing, your shop will be more than just another takeout store.
Wholesale Solutions
Fast Food Boxes Wholesale needs are ideal when dealing with large operations and restaurants that prefer saving money. Bulk purchases lower the unit prices and provide uniformity in the packaging process. Custom boxes Canada has wholesale services that are available to businesses to find good materials in the area and dependable suppliers.
Eco-Friendly Packaging
Fast Food Recyclable Packaging is a trend in the modern food service industry. Human beings are turning out to be conscious of the impact on the environment, and the most desired products are those that are environmentally friendly. The Paper Fast Food Packaging and biodegradable options reduce the waste and save on durability and hygiene requirements.
Creative Packaging Design
The motivation behind Fast Food Packaging Design can very well improve customer experience and brand perception. Mezzo shapes, compartments, and colors of the meals render them appealing to the sight as well as to maintain the safety of the contents. Custom Fast Food Packaging allows restaurants to be creative in design when it comes to burgers, sandwiches, fries, and dessert products.
Functional Features
Convenience is the most important when selecting fast food boxes. Ease of opening tops, locking systems and heat resistance are features that enhance usability. Paper Fast Food Packaging has provided lightweight and durable products, which are app-applier menu items.
The functional designs make the food fresh, hot, and intact during transits. The provision of sauce, cutlery, or napkin portions also has the benefit of convenience to the customers. Functionality and attractive visuals are mixed together so as to form an overall solution to the packaging that would boost customer satisfaction.
Personalization Options
Customized Fast Food Packaging enables organisations to be competitive in the market. On the boxes, custom messages, seasonal graphics, or promotional messages can be imprinted. The strategy will enhance the level of engagement and improve the relationship with consumers.
fast food boxes.
Industry Applications
Maximizing Brand Impact with Professional Fast Food Packaging
Companies that use Custom Fast Food Packaging and Paper Fast Food Packaging show their brand in every location. This constant visibility helps build strong market recognition. High-quality and durable packaging materials assist businesses in satisfying complex operational needs. Furthermore, these materials ensure that every customer enjoys a smooth and professional dining process. Proper packaging also minimizes food waste during transport. Consequently, these smart solutions significantly improve overall service efficiency.
Conclusion: Why Customization Matters
Personalized, custom-printed fast food boxes are a necessary investment for any modern organization. These boxes increase brand awareness while simultaneously boosting customer satisfaction and operational flow. Today’s Fast Food Boxes provide high utility and a visually attractive appearance. Designers create these environmentally friendly products to match the fast-paced dynamics of contemporary dining.
Opportunities such as Custom Printed Fast Food Boxes, Wholesale Fast Food Boxes, and Paper Fast Food Packaging combine style with daily usefulness. Restaurants, food trucks, and caterers can add elements of branding and custom design to their supplies. These features make the dining experience memorable and build long-term customer loyalty. Individualized packaging transforms mediocre food into a powerful selling point. This shift boosts your brand’s visibility and ensures future prosperity.
Author
In the fast-paced commercial hub of Dubai, the Fast-Moving Consumer Goods (FMCG) sector is undergoing a massive transformation. Treasure Orbit currently stands as a primary architect of this change. As we move through 2026, the company is executing a bold strategic pivot. They are focusing heavily on the booming personal care market to meet rising consumer expectations. Today, shoppers are more informed than ever about hair and skin health. Consequently, they demand high-quality products from trusted global brands. Treasure Orbit is meeting this need by expanding its portfolio and strengthening its distribution network across the Middle East and beyond.
A Strategic Expansion into Personal Care
Treasure Orbit serves as a vital link in the global supply chain. They connect massive international manufacturers with the diverse retail landscape of the United Arab Emirates. Recently, the company shifted its primary focus toward personal care items. This move aims to provide retailers with a “one-stop-shop” experience for the world’s most recognizable brands. By centralizing these products, they simplify the procurement process for both small local shops and giant supermarket chains.

Strengthening the Core Portfolio
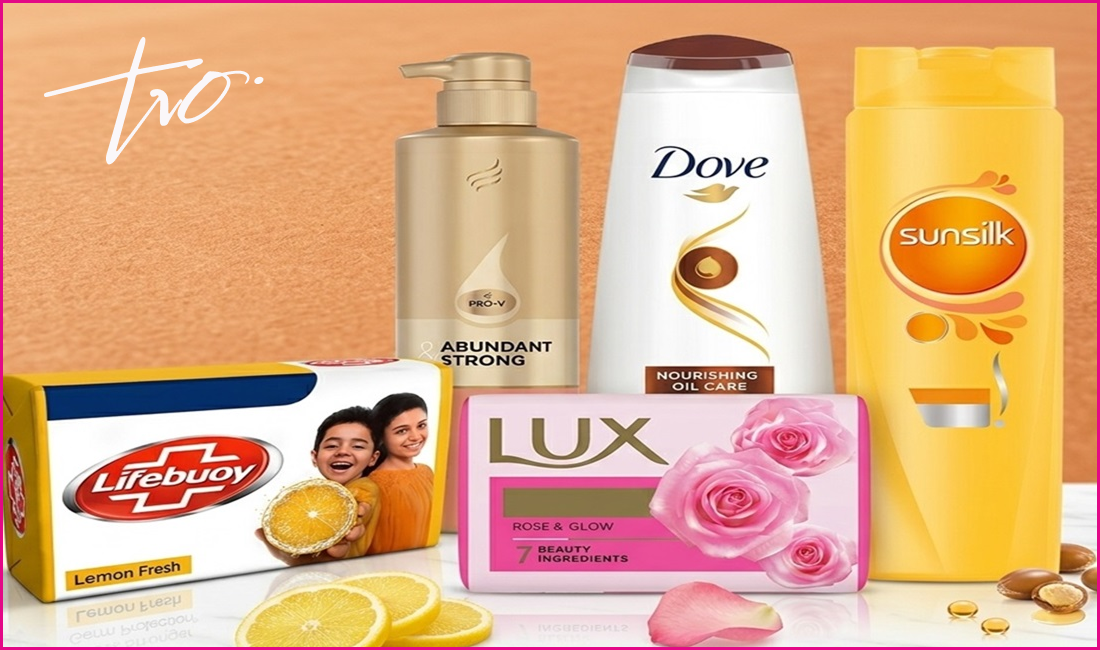
The company now offers a robust selection of shampoo and hygiene products in bulk. This ensures that retailers never struggle with out-of-stock issues during peak shopping seasons. Their current lineup features several household names that dominate the global market.
In the hair care category, Treasure Orbit distributes industry giants such as Dove, Sun silk, Pantene, and Head & Shoulders. These brands are essential for retailers because they cater to a wide variety of hair types and concerns. Furthermore, the company has bolstered its skin and body care offerings. They provide consistent supplies of Lux, Lifebuoy, and Vaseline. Beyond just cleaning products, they also source high-quality lotions, soaps, and deodorants directly from FMCG manufacturers. This direct sourcing allows them to maintain competitive pricing and verify product authenticity.
Mastering Global Logistics and Sourcing
Treasure Orbit does not just operate locally; they possess a truly global footprint. The company maintains active offices and warehouses in Spain, India, the USA, and Hong Kong. This international presence allows them to leverage a massive logistics network. Consequently, they can manage “port-ready” shipments that reach their destination with minimal delay.
Their expert teams handle every aspect of the journey. They manage complex supply chain operations, coordinate international sales, and even assist with localized marketing efforts. By controlling the logistics from start to finish, Treasure Orbit ensures that products remain secure and arrive on time. This reliability has solidified their reputation as a versatile and dependable FMCG leader in 2026.
Top Personal Care Trends Defining Dubai in 2026
The beauty and personal care market in the UAE is currently experiencing unprecedented growth. Financial analysts project the market value will reach approximately $3.5 billion by the end of 2026. Several key trends are driving this surge in spending.
The Rise of “Clean Beauty” and Organic Solutions
Modern consumers are actively moving away from synthetic formulas. They now scrutinize ingredient labels for harmful chemicals. Because of this, there is a 6% annual growth rate in demand for “clean” products. Shoppers specifically look for items free from parabens, sulfates, and aluminum salts.
In Dubai, the “Tayyib” (pure) movement is also gaining significant traction. These products go beyond standard Halal certifications to focus on ethical sourcing and holistic purity. Retailers who stock these organic and ethically produced items are seeing a major boost in customer loyalty.
Advanced Solutions for Scalp and Hair Health
Living in the Gulf region presents unique challenges for personal grooming. The extreme heat, high humidity, and hard water can severely damage hair. Therefore, local consumers are seeking specialized solutions.
Anti-pollution hair care has become a top priority. There is a high demand for shampoos that can effectively filter out chlorine and heavy minerals. Additionally, hair growth treatments are no longer niche products. Consumers are investing heavily in professional-grade essential oils and formulations designed to combat thinning and breakage caused by the harsh environment.
The Evolution of Male Grooming
Men’s grooming is currently the fastest-growing segment in the entire personal care industry. Men in Dubai are moving far beyond basic shaving routines. Instead, they are adopting multi-step skincare regimens and advanced hair-thickening treatments. This shift has opened up new opportunities for retailers to stock premium male-focused brands that offer more than just basic hygiene.
Ritualized Self-Care and Sensorial Experiences
For many residents of Dubai, personal care is no longer a daily chore. Instead, it has transformed into a luxury ritual. Fragrance layering is a deep-seated cultural practice in the region. People often blend traditional oud, musk, and amber with modern scents to create a unique personal identity.
In response, brands are launching products with unique textures and “functional fragrances.” These items are designed to provide stress relief and emotional balance. Retailers are finding success by promoting these products as essential tools for mental well-being in a fast-paced city.
A Diverse Range of Product Categories
While personal care is a major focus, Treasure Orbit remains a diversified powerhouse. They manage a wide array of categories to ensure they can satisfy any retail requirement.
| Category | Key Brands Distributed |
| Personal Care | Dove, Pantene, Head & Shoulders, Lux, Vaseline |
| Food & Snacks | Nestlé, Mars, Mondelez, Quaker, Lays |
| Beverages | Nescafé, Red Bull, Coca-Cola, Milo |
| Confectionery | Lindt, Ferrero Rocher, Chupa Chups |
This broad range allows the company to offer incredible flexibility. They can supply a neighborhood grocery store with snacks and drinks while simultaneously providing a luxury spa with premium shampoos and lotions.
Conclusion: A Partnership for Success
Treasure Orbit is more than just a distributor; they are a strategic partner for businesses across the globe. By staying ahead of market trends and maintaining a world-class logistics network, they ensure their clients are always prepared for consumer demands. As the Dubai personal care market continues to expand in 2026, Treasure Orbit is perfectly positioned to lead the way.
The company’s commitment to quality, transparency, and efficiency makes them the preferred choice for retailers. Whether you are looking for high-volume shampoo shipments or specialized food and beverage brands, they provide a reliable path to success. Their efforts contribute significantly to the local economy and help bring the world’s best brands to the doorsteps of Dubai’s residents.
Author


Cox.net Yahoo Email: Guide to Fix Login, Sync & Email Issues

Best Air Cleaners for Home: Types, Benefits, and Maintenance Tips

Canon Printer Support: Quick Ways to Contact Customer Care

Packaging Companies: Trends, Top Players & Packaging Solutions

Web Scraping Statistics 2026: Market Size, Growth & Industry

AI-Driven Social Media Marketing Strategies for Modern Businesses

Ami Paris Pullover & Hoodie: The Ultimate Material & Care Guide

Radiopharmaceutical Therapeutic Market : Innovations in Oncology
North America Deflazacort Market: 2026 Outlook & 2031 Forecast

New Apartments in NT: Darwin Harbour & Tropical Living

Cybersecurity Consulting Company SequelNet Provides Critical IT Support Services to Medical Billing Firm, Medical Optimum

Team Communication Software Transforms Operations at Finance Innovate

Project Management Tool Transforms Long Island Business

How Alleviate Poverty Utilized IPPBX’s All-in-One Solution to Transform Lives in New York City

Breast Cancer: The Imperative Role of Mammograms in Screening and Early Detection

Unstoppable Collaboration: D.C.’s Citi Open and Silicon Valley Classic Unite to Propel Women’s Tennis to New Heights

Embracing Renewal: Sizdabedar Celebrations Unite Iranians in New York’s Eisenhower Park

The Benefits of Starting a Side Hustle for Financial Freedom

New Blood Donation Screening Questions What You Need to Know

Stylishly Timeless: The 5 Types of Sandals You Need in Your Closet
-

 Business3 years ago
Cybersecurity Consulting Company SequelNet Provides Critical IT Support Services to Medical Billing Firm, Medical Optimum
-
Business3 years ago
Team Communication Software Transforms Operations at Finance Innovate
-
Business3 years ago
Project Management Tool Transforms Long Island Business
-
Business3 years ago
How Alleviate Poverty Utilized IPPBX’s All-in-One Solution to Transform Lives in New York City
-
health3 years ago
Breast Cancer: The Imperative Role of Mammograms in Screening and Early Detection
-
Sports3 years ago
Unstoppable Collaboration: D.C.’s Citi Open and Silicon Valley Classic Unite to Propel Women’s Tennis to New Heights
-
Art /Entertainment3 years ago
Embracing Renewal: Sizdabedar Celebrations Unite Iranians in New York’s Eisenhower Park
-
Finance3 years ago
The Benefits of Starting a Side Hustle for Financial Freedom


