
Digital Development
SBCGlobal Email Support: Troubleshooting and Contact Options

In today’s fast-paced digital landscape, email remains a crucial tool for both personal and professional communication. Among various email service options, SBCGlobal has built a reputation for reliability and security. However, like many users, you may occasionally experience issues that require assistance. Whether you’re unable to send or receive messages, facing login troubles, or having difficulty setting up your account across multiple devices, SBCGlobal email support can provide the help you need.
Understanding how to effectively reach out to SBCGlobal support can save you time and reduce frustration. This guide will not only outline common problems users face but will also detail various ways to contact support, ensuring your email functions smoothly.

Common Issues Faced by SBCGlobal Email Users
Understanding common issues can help you articulate your concerns better when seeking support. Here are some frequent problems SBCGlobal users report:
1. Login Problems
Many users find themselves unable to access their SBCGlobal email accounts. This can stem from forgotten passwords, potential hacking incidents, or issues related to the service provider’s servers. Such login problems can disrupt important communications.
2. Problems Sending and Receiving Emails
Sending and receiving emails should be seamless, but various factors can affect this process. Misconfigured email settings, problems with the recipient’s email service, or server outages can lead to interruptions, potentially causing miscommunications.

3. Multi-Device Configuration Issues
Setting up your SBCGlobal email on multiple devices—like desktops, tablets, and smartphones—can be tricky. Users often encounter synchronization issues, where emails might not update across all devices, leading to confusion and missed interactions.
4. Security Concerns
With increasing online threats, security is paramount. SBCGlobal users may face phishing attempts, unauthorized access, or compromised accounts. Quick action is often required to safeguard personal information.
5. Organizational and Storage Issues
An overflowing inbox can make it difficult to locate important emails. Storage limitations also prevent new messages from being received, complicating communications further.
By recognizing these common issues, you can describe your specific problem more effectively to SBCGlobal support, emphasizing the importance of timely help.
How to Contact SBCGlobal Support
There are several avenues to reach SBCGlobal support, allowing you to choose the option that best suits your needs. Here’s a simplified breakdown:
1. Customer Support Phone Number
For timely assistance, calling the SBCGlobal support number is often the best route. Here’s how to make your call effective:
- Dial the support number provided above.
- Choose your preferred language.
- Follow the automated instructions to select a topic that aligns with your issue.
- A representative will be connected with you for further assistance.
2. Email Support
If you prefer written communication, sending an email is a professional way to raise your concerns. You can expect a clear response within 24 hours. To contact SBCGlobal support via email, follow these steps:
- Open your email client and compose a message to support@sbcglobal.net.
- Clearly outline your issue in the email body. Maintain a professional tone and be concise.
- Include your contact details and any relevant attachments.
- Click send and wait for a prompt response from their team.
3. Live Chat Support
For those who find instant messaging more effective, using the live chat option can be beneficial. Here’s how to access it:
- Visit the official AT&T or SBCGlobal support page.
- Look for the live chat option or chat icon on the site.
- Type your query in the provided field and send your message.
- An expert will connect with you shortly for assistance.
4. Social Media Support
SBCGlobal’s support team is also active on social media platforms. You can reach out through Facebook, Twitter, or Instagram by:
- Navigating to their official social media pages.
- Look for the direct message (DM) option on their profiles.
- Describe your issue in the message field and wait for a response.
5. Community Forums and Help Center
Joining SBCGlobal’s community forums can provide additional support from other users and experts. Here’s how to get involved:
- Go to the SBCGlobal or AT&T tech support page.
- Browse through community forums or FAQ sections.
- Look for discussions that address your problem, or ask a new question if needed.
Conclusion
Navigating issues with your SBCGlobal email shouldn’t be a daunting task. By recognizing common problems and knowing how to contact support, you can easily resolve any communication hindrances. Use the channels available—phone, email, live chat, social media, and community forums—to get the assistance you need.
When reaching out, clearly state your issue and follow the outlined procedures for each support option. Active engagement with support can ensure your SBCGlobal email remains a reliable tool for all your communication needs.
Frequently Asked Questions (FAQ)
1. What should I do if my SBCGlobal email account has been hacked?
Immediately reset your password, enable two-step verification, and contact SBCGlobal support for assistance.
2. Why does SBCGlobal keep logging me out?
This could be due to browser cache issues or timeout settings. Clear your browser’s cache and ensure your browser is updated.
3. How long does it take for SBCGlobal support to respond?
You can expect instant responses via chat and phone support, while emails and social media inquiries may take up to 24 hours.
4. Can the support team assist with setting up my account on multiple devices?
Yes, SBCGlobal support can guide you through the setup process across different devices.
5. How does SBCGlobal support manage recurring issues?
Their team is well-equipped to handle frequent problems systematically, ensuring efficient and lasting solutions.
By being proactive and utilizing the support options available, you can enhance your experience with SBCGlobal email and ensure optimal functionality for both personal and professional use.
Author


The mobile app development landscape keeps changing because businesses need better methods to create their applications. React Native remains the most popular framework for cross-platform app development because it offers multiple development options. New trends will emerge for business mobile app strategies, which will use this powerful framework as we approach 2026.
React Native brings innovation to multiple industries through its ability to create faster development cycles and better user experiences. A business can maintain its competitive edge through a dependable react native app development partnership while using the most recent mobile technology developments.
The blog will examine the main React Native app development trends that businesses should monitor during 2026.
Why React Native Continues to Dominate Mobile App Development
Meta developed React Native as a framework that enables developers to create mobile applications through a shared codebase that supports both Android and iOS platforms. The approach leads to shorter development time while delivering stable performance across different devices.
Startups and enterprises choose the framework because its expanding ecosystem and strong community backing, and ongoing updates provide them with reliable support. Companies that partner with a react native app development firm can achieve three main advantages from their services, which include budget-friendly development, quick product launch, and easy system upkeep.

1. Rise of AI-Powered Mobile Applications
Mobile applications now include Artificial Intelligence (AI) as a fundamental element, which React Native developers use in their applications. The year 2026 will bring a major increase in AI-powered features, which include chatbots, recommendation engines, and predictive analytics tools.
Key Benefits
- Personalized user experiences
- Improved decision-making through data insights
- Enhanced automation in mobile apps
The super-flexibility of React Native gives developers the convenience of using AI-driven features on the spot, turning applications more intuitive and responsive to user activity.
2. Increased Adoption of Cross-Platform Development
The development of cross-platform applications has reached the point where it functions as an established industry standard. Companies select React Native because it helps them decrease expenses while accelerating their product launch process.
Through using one codebase, businesses achieve the ability to develop applications for various platforms while maintaining their product quality. A professional react native app development company ensures that applications deliver a native-like experience across devices.
3. Growth of IoT-Enabled Applications
The Internet of Things (IoT) transforms device interactions through its ecosystem, which depends on mobile applications. React Native enables developers to create applications that establish connections with IoT devices while managing their operations.
Use Cases
- Smart home applications
- Healthcare monitoring systems
- Industrial automation solutions
React Native will be there to support the process of creating scalable and efficient IoT-enabled mobile applications in the growth of IoT adoption.
4. Enhanced Performance with New Architecture
The new architecture of React Native, which includes Fabric and TurboModules, optimizes application performance through its improved features. The new advancements provide faster rendering capabilities, together with improved system responsiveness and enhanced user interaction experiences.
Key Improvements
- Reduced app load time
- Better memory management
- Improved UI responsiveness
Enterprises can use the services of a React Native app development partner to harness the same innovations to create powerful apps that can adequately fulfill the user’s expectations.
5. Integration of Augmented Reality (AR) and Virtual Reality (VR)
AR and VR technologies are becoming more popular in various sectors, including retail, healthcare, and education. The usage of React Native has grown to create mobile applications that include virtual reality and augmented reality experiences.
Examples
- Virtual product try-ons in eCommerce
- AR-based learning applications
- Virtual tours in real estate
The technologies extend user engagement while delivering distinct experiences, which have become the major trend for 2026.
6. Focus on App Security and Data Privacy
Cyber threats have increased to the point that companies now consider security as their main focus during mobile app development work. Companies now develop secure software products that protect their customers’ personal information while meeting all legal requirements.
Security Measures
- Data encryption
- Secure authentication methods
- Regular security updates
A trusted react native app development company implements robust security practices to safeguard applications against potential threats.
7. Growing Popularity of Cloud Integration
Cloud technology has become essential for developing modern applications. Developers use cloud platforms to improve the scalability and performance of their React Native applications.
Benefits of Cloud Integration
- Real-time data synchronization
- Improved storage capabilities
- Enhanced app scalability
This trend enables companies to create adaptable software solutions that can effectively manage increasing user demand.
8. Adoption of Microservices Architecture
Developers use microservices architecture because it provides an optimal way to create software that can handle increasing demand while maintaining easy maintenance. The approach lets developers create applications through the development of separate, self-sufficient parts.
Advantages
- Easier updates and maintenance
- Improved scalability
- Faster development cycles
The combination of React Native and microservices allows companies to create applications that use modular design and operational efficiency.
9. Expansion of Wearable App Development
People are increasingly adopting smartwatches and fitness tracking devices as their preferred wearable technology. Developers use React Native to create applications that work perfectly with these devices.
Use Cases
- Fitness tracking apps
- Health monitoring solutions
- Smart notifications and alerts
The ongoing growth of wearable technology will see React Native develop its systems to support new technological advancements.
10. Increased Use of Third-Party Plugins and Libraries
The ecosystem of React Native provides developers with various third-party plugins and libraries that help them build applications more efficiently while delivering advanced functionalities.
Benefits
- Reduced development time
- Access to pre-built components
- Improved app features
Businesses need to confirm that their plugins maintain security through regular updates to protect against potential vulnerabilities.
11. Focus on UI/UX Innovation
User experience remains a key factor in the success of any mobile application. In 2026, businesses are placing greater emphasis on creating intuitive and visually appealing interfaces.
Trends in UI/UX
- Minimalist design
- Dark mode support
- Smooth animations and transitions
The customizable components of React Native enable developers to build interactive user interfaces that provide a good user experience.
12. Growing Demand for On-Demand Applications
On-demand applications experience rising demand throughout multiple sectors, including food delivery, healthcare, and transportation. Developers prefer React Native for application development because it provides them with both fast performance and flexible development capabilities.
Key Features
- Real-time tracking
- Seamless payment integration
- Instant notifications
The development of scalable on-demand solutions needs a professional react native application development company that will create custom solutions that meet business requirements.
How Businesses Can Leverage These Trends
Businesses need to implement current mobile application development trends to maintain their competitive edge through 2026. The process demands both a strategic plan and an appropriate technological partnership.
Key Steps
- Identify business goals and user needs
- Choose the right technology stack
- Focus on scalability and security
- Collaborate with experienced developers
The use of a professional react native app development company allows businesses to build high-quality applications while effectively implementing current industry trends.
Future Outlook of React Native
The future of React Native demonstrates positive development prospects because its features continue to improve while more users adopt it across different sectors. React Native will continue to function as an essential component of mobile application development because businesses require solutions that deliver faster performance with greater efficiency at lower costs.
Developers will be able to build advanced applications through the enhanced capabilities that emerging technologies like AI, IoT, and AR/VR will bring to the system.
Conclusion
Your training includes information from December 2023. The framework demonstrates its capacity to adapt through 2026 because various technological trends and user requirements continue to evolve.
React Native leads multiple industries forward through its ability to integrate artificial intelligence and cloud computing and provide immersive user experiences. The digital market remains competitive, but businesses that monitor current trends and partner with dependable react native app development firms will achieve greater success.
Organizations can create high-performance applications that provide outstanding user experiences and sustainable value through their adoption of these new technologies.
FAQs
1. Why is React Native popular for mobile app development in 2026?
Businesses choose React Native because it enables them to develop applications for multiple platforms while reducing development time and operational costs. The framework allows businesses to create high-performance mobile applications through the development of their applications using one codebase, which makes it the top choice for contemporary mobile application development.
2. How can a react native app development company help businesses stay competitive?
A react native app development company helps businesses adopt the latest technologies, build scalable applications, and ensure faster time-to-market. Their expertise enables companies to create feature-rich apps aligned with current industry trends and user expectations.
3. Is React Native suitable for building high-performance applications?
Yes, React Native supports high-performance app development through its advanced architectural system, native system components, and its rendering system, which has been specifically optimized. The system delivers uninterrupted user experiences, which make it appropriate for developing extensive mobile applications that require advanced functionality in multiple business sectors.
4. What are the key trends shaping React Native app development in 2026?
The main trends of the current period demonstrate AI integration, IoT-enabled applications, cloud-based solutions, AR/VR experiences, and improved application security. The current trends enable businesses to develop advanced mobile applications that use React Native to create intelligent, and interactive, and expandable systems.
Author
Creating a user interface design can initially seem like a lot of fun. You get the full range of creative control and the ability to create something completely original. In actual projects, however, time is of the essence. Other people’s deadlines, constant revision requests, and high stakeholder expectations create pressure. In these situations, UI design templates become more than time savers—they become an efficient design tool.
Templates save significant time because they provide the basic design and include tools to enhance your development. You can move your ideas to a finished product quicker. You don’t have to sacrifice your creativity; spending a little extra time on customization keeps your design unique.
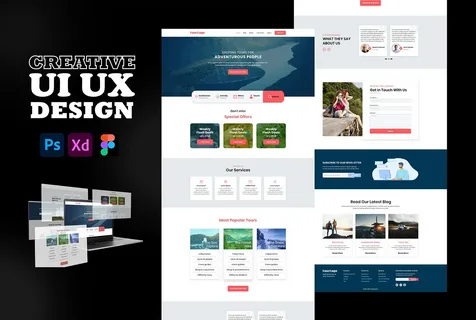
What are UI Design Templates?
UI Design Templates are tools that designers use to create digital products, applications, websites, and control dashboards. These templates provide necessary design elements, including buttons, navigation bars, and data sections. Think of a UI app design template as your base design.
You can use these templates as starting points while retaining full design control. You can customize every element, including colors, typography, and brand assets.
Most designers build templates for programs like Figma, Sketch, and Adobe XD. While starting from scratch is one way to design, using a foundation often yields faster results.
The Importance of UI Templates
The design industry changes continuously. Designers can no longer focus solely on making products attractive; they must produce results quickly and provide a positive user experience. This is why designers worldwide now lean toward using templates.
Increase Design Speed Building a design from the ground up consumes time and effort. Design templates greatly reduce the time you spend on these tasks. You can bypass time-consuming foundational work and start immediately on the core design.
Uniformity on All Screens Achieving cohesive, uniform styling is one of the hardest accomplishments in design, especially in large-scale projects. Templates eliminate the challenge of uniformity because they establish consistent foundational elements across all screens.
Templates for Collaborative Work Creators build templates with collaboration in mind. Team members can work on designs easily without fearing complications from mismatched systems.
Template Studio: Powering Modern Design
Quality templates are scarce. The web is full of poorly designed, virtually useless files, but Template Studio is different. It is exceptional.
We incorporate real-world usability into templates that we design and organize at a professional level. Unlike other sites, we don’t give the user random layouts. Instead, we provide organized systems rooted in modern design fundamentals.
Template Studio enables designers and developers to:
-
Optimize project schedules
-
Ensure design uniformity
-
Utilize pre-assembled UI kits
-
Streamline the entire process
Whether you are a novice or a veteran, Template Studio helps you achieve more without sacrificing quality.
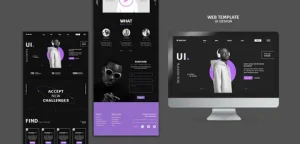
Categories of UI Design Templates
Typically, each template targets specific goals. Therefore, you must select your template based on your project objectives.
-
Mobile App Templates: These cater to mobile devices and include elements for onboarding, login screens, user profiles, and navigation flows. A well-designed mobile template facilitates a great user experience by supporting a smooth user journey.
-
Website UI Templates: These range from single landing pages to full websites. They offer high value for portfolios, business sites, and marketing pages.
-
Dashboard Templates: These suit SaaS products and admin panels. Designers build these with an emphasis on functionality, usability, and data organization.
-
Component Libraries: These templates offer reusable design “capsules” like buttons, input forms, and user cards. Instead of a full page, these libraries give you the parts to build anything.
-
UX-Focused Templates: Unlike purely visual templates, these prioritize the user experience. They incorporate behavior patterns and usability flows to achieve specific results.
Tips for Selecting the Best UI Template
Choosing the right template is critical. Selecting the wrong one can hinder your productivity more than starting from scratch.
Pay attention to these factors:
-
Design and Usability: Watch for heavy animations that might slow down your performance. Functional templates allow you to add your own content easily.
-
Ease of Editing: Choose a template that lets you easily edit layouts, palettes, and elements.
-
Device Flexibility: Good templates ensure your design remains responsive across all devices.
-
Compatibility: Ensure the template works with your preferred design tools.
Avoiding Common Mistakes
When used correctly, templates enhance your design. However, many designers make errors that limit their potential:
-
Excessive Customization: Rebuilding a template completely defeats its purpose. Refine what is there rather than trying to replace everything.
-
Ignoring User Experience: A template can look stunning but function poorly. Always test the user flow.
-
Uninspired Copy-Pasting: If you avoid creative tweaks, your project will look generic. Use templates as inspiration, not just a final product.
Professional Tips for UI Templates
-
Set a goal before picking a template.
-
Customize the elements to fit your brand.
-
Keep the design straightforward.
-
Test the design thoroughly.
-
Refine based on feedback.
UI Design Templates: What to Expect
Templates will evolve alongside technology. As AI tools and design systems become more common, templates will transform from simple files into “living systems.”
The future holds:
-
AI-adjustable designs.
-
Templates that integrate directly with development tools.
-
Design systems tailored to specific users.
Conclusion
Using UI templates is about working smarter. Effective use saves time and allows you to focus on creating a seamless user experience.
The right UI and UX templates make a world of difference, whether you are working on a simple layout or an intricate project. Designing efficiently is the future. If you want to be a leading digital designer, include Template Studio in your workflow to achieve both speed and quality.
Author

In an era dominated by AI and automated tools, the world of Search Engine Optimization is often flooded with “quick fixes” and “push-button” solutions. However, seasoned experts know that the most sustainable way to rank is through manual guest post outreach. This approach isn’t just about getting a link; it’s about building relationships with webmasters and providing real value to an audience. Unlike automated spam, manual outreach ensures that every placement is relevant, high-quality, and, most importantly, safe from search engine penalties.
Why Manual Link Building Still Rules the SERPs
The primary reason why a manual link building service is so highly valued is the element of human vetting. When you are building backlinks manually, you are physically visiting the site, checking its traffic, and ensuring its audience aligns with your niche. This level of care is impossible to achieve with software.
A high-quality manual backlink service focuses on “quality over quantity.” By hand-picking the domains, an SEO specialist can avoid low-quality link farms and focus on sites that actually pass authority. These manual links act as a genuine vote of confidence, which is exactly what Google’s algorithm looks for when determining the trustworthiness of a website.

The Strategy Behind Effective Manual Outreach Link Building
Success in this field doesn’t happen by accident. It requires a set of well-defined manual link building strategies. The process usually begins with identifying prospects using specific search operators. Once a list is ready, the manual blogger outreach phase starts. This involves sending personalized emails that show you’ve actually read the blog you’re pitching to.
A successful manual outreach link-building campaign is all about the pitch. If the webmaster feels that the content will benefit their readers, they are much more likely to say yes. This is the core of seo manual outreach—it’s a win-win situation where the publisher gets great content and the marketer gets a high-authority backlink.
The Technical Side: Manual Link Building SEO
When we talk about manual link building seo, we are looking at the technical health of the link. Is the anchor text natural? Is the link “Do-Follow”? Is it placed within the body of the article? These details are the bread and butter of manual backlink building.
When a professional manages manual link building services, they ensure that the link profile looks as organic as possible. This means avoiding repetitive patterns that automated tools often create. By choosing to create backlinks manually, you have full control over the surrounding text, ensuring that the link is contextually relevant, which significantly boosts its SEO value.
Choosing the Best Manual Link Building Services
For many businesses, the workload of outreach is too much to handle in-house. This leads them to look for a reliable manual link building service. But how do you choose the right one? The best providers are those that don’t offer “instant” results. True manual outreach takes time—it involves negotiation, content creation, and follow-ups.
A reputable manual backlink service will be transparent about their process. They won’t just sell you a manual backlinks package with a list of random sites; they will show you the specific blogs they are targeting for your niche. This transparency is crucial because it ensures that you aren’t accidentally buying into a hidden PBN (Private Blog Network).
Why You Should Avoid the “Easy” Way
It can be tempting to buy backlinks manuals or packages that promise hundreds of links for a low price. However, if the price seems too good to be true, it’s usually because the process isn’t truly manual. A backlink manual approach requires labor and expertise, which comes at a cost.
Investing in manual outreach link building is an investment in your site’s future. Automated links might give you a temporary boost, but they often lead to a “manual action” penalty from Google later on. On the other hand, manual links are durable. They stay live for years and continue to provide “link juice” and referral traffic long after the initial outreach is done.
Mastering Manual Blogger Outreach for Long-Term Success
The secret to scaling manual blogger outreach is building a database of friendly editors. Once you’ve successfully published a guest post on a high-authority site, you’ve opened a door for future collaborations. This is where manual link building strategies turn into long-term assets.
By consistently providing value, your manual outreach efforts become easier over time. Instead of “cold” pitching, you are now working with partners who know and trust your work. This level of networking is the gold standard of seo manual outreach and is something no bot can ever replicate.
Conclusion: The Future is Manual
As search engine algorithms continue to evolve, they are getting better at identifying and ignoring low-quality, automated links. This makes manual guest post outreach more important than ever. Whether you are using a professional manual link building service or decided to create backlinks manually yourself, the focus should always be on relevance and quality.
Building a backlink profile through manual link building services might take more effort, but the rewards are worth it. Higher rankings, more traffic, and a safer website are the direct results of a well-executed manual backlink building campaign. In the world of SEO, there is no substitute for the human touch.
Author


Enfants Riches Déprimés x Essentials Hoodie: Luxury Streetwear

Temporary Replacement Vehicles UK: Save Time and Stay Mobile

Low-Cost Family Cars London: Everything You Need to Know

JetBlue Airlines: Contact Number, Chat & Support Guide 2026

Sulphur Price Trend March 2026: Forecast & Regional Analysis

Skin Parasites in Livestock: Prevention & Best Hygiene Solutions

Pool Coping Replacement: Signs, Benefits & Cost Guide

Fully Managed Landlord Services: Save Time, Stress, and Money

Prevent Crushing and Leaning With Custom Corrugated Boxes

Car Battery Replacement: Step-by-Step Guide to Reliable Starts

Cybersecurity Consulting Company SequelNet Provides Critical IT Support Services to Medical Billing Firm, Medical Optimum

Team Communication Software Transforms Operations at Finance Innovate

Project Management Tool Transforms Long Island Business

How Alleviate Poverty Utilized IPPBX’s All-in-One Solution to Transform Lives in New York City

Breast Cancer: The Imperative Role of Mammograms in Screening and Early Detection

Unstoppable Collaboration: D.C.’s Citi Open and Silicon Valley Classic Unite to Propel Women’s Tennis to New Heights

Embracing Renewal: Sizdabedar Celebrations Unite Iranians in New York’s Eisenhower Park

The Benefits of Starting a Side Hustle for Financial Freedom

New Blood Donation Screening Questions What You Need to Know

Stylishly Timeless: The 5 Types of Sandals You Need in Your Closet
-

 Business3 years ago
Cybersecurity Consulting Company SequelNet Provides Critical IT Support Services to Medical Billing Firm, Medical Optimum
-
Business3 years ago
Team Communication Software Transforms Operations at Finance Innovate
-
Business3 years ago
Project Management Tool Transforms Long Island Business
-
Business3 years ago
How Alleviate Poverty Utilized IPPBX’s All-in-One Solution to Transform Lives in New York City
-
health3 years ago
Breast Cancer: The Imperative Role of Mammograms in Screening and Early Detection
-
Sports3 years ago
Unstoppable Collaboration: D.C.’s Citi Open and Silicon Valley Classic Unite to Propel Women’s Tennis to New Heights
-
Art /Entertainment3 years ago
Embracing Renewal: Sizdabedar Celebrations Unite Iranians in New York’s Eisenhower Park
-
Finance3 years ago
The Benefits of Starting a Side Hustle for Financial Freedom


