
Food Drink
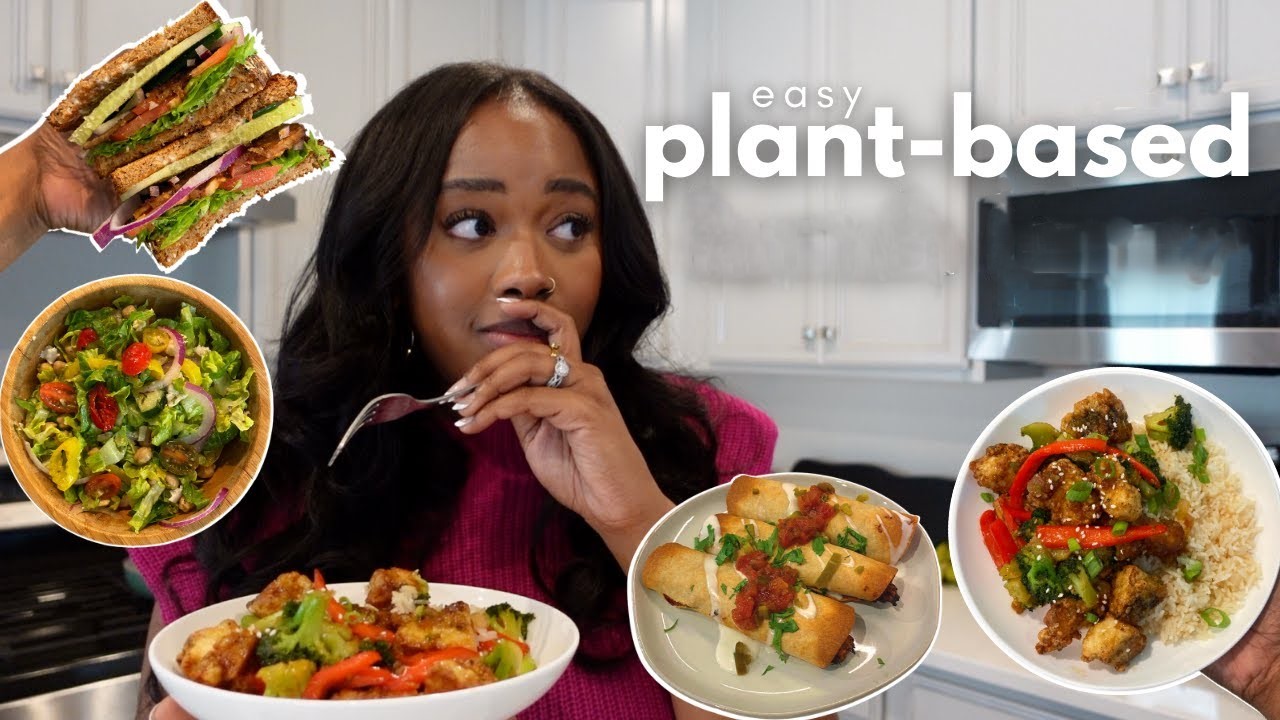
Plant-Based Diets: Easy Recipes for Beginners
By
Reviewed
By Stella Madelyn
Introduction
Plant-based diets are becoming more popular as people choose to eat less meat for health, the environment, and animal welfare. If you want to eat more plant-based meals or even switch to a plant-based diet, it doesn’t have to be hard. Starting with easy and tasty recipes will help you get there.
This article will show you some simple and delicious plant-based recipes for beginners. From tasty breakfasts to satisfying dinners, these meals will help you eat healthier and more sustainably. Let’s explore how easy it can be to start cooking plant-based food!
What Is a Plant-Based Diet?

Image by: Yandex.com
A plant-based diet is all about eating foods that come from plants, like fruits, vegetables, grains, beans, nuts, and seeds. It doesn’t necessarily mean no animal products, but the focus is on plant foods. The goal is to eat more whole, healthy foods while cutting back on processed foods and unhealthy fats. This kind of diet helps with heart health, weight loss, and feeling better overall.
Easy Plant-Based Recipes for Beginners
1. Vegan Buddha Bowl

Image by: Yandex.com
A Buddha bowl is a healthy meal that includes cooked grains, vegetables, beans, nuts, and dressing. Here’s a simple recipe:
Ingredients
- 1 cup cooked quinoa or brown rice
- 1 cup chickpeas (canned or cooked)
- 1 cup mixed greens (spinach, kale, or arugula)
- 1 avocado, sliced
- 1 small carrot, shredded
- 1/4 cup hummus or tahini for dressing
- Lemon juice and olive oil for drizzling
- Salt and pepper to taste
Instructions
- Cook quinoa or rice.
- In a bowl, add greens, then top with quinoa, chickpeas, shredded carrots, and avocado.
- Drizzle with hummus or tahini, then add lemon juice, olive oil, salt, and pepper.
- Mix and enjoy!
Why It’s Perfect for Beginners
- Easy-to-find ingredients
- Customizable with your favorite veggies or grains
- Quick and filling
2. Vegan Stir-Fry

Image by: Yandex.com
A stir-fry is a quick and easy meal that takes less than 30 minutes. It’s packed with veggies and can include tofu or tempeh for protein.
Ingredients
- 1 block firm tofu, cubed
- 1 tablespoon soy sauce
- 1 tablespoon sesame oil
- 1 bell pepper, sliced
- 1 cup broccoli florets
- 1 carrot, sliced thin
- 1/2 cup snow peas
- 2 cloves garlic, minced
- 2 tablespoons sesame seeds (optional)
- Cooked rice for serving
Instructions
- Press tofu to remove moisture, then cube it.
- Heat sesame oil in a pan. Cook tofu until crispy, about 5-7 minutes, then set aside.
- In the same pan, cook garlic for 1 minute. Add veggies and stir-fry for 4-5 minutes.
- Add tofu back to the pan, drizzle with soy sauce, and toss.
- Serve with rice and sesame seeds.
Why It’s Perfect for Beginners
- Quick and easy to make
- Full of flavor
- Packed with veggies
3. Vegan Lentil Soup

Image by: Yandex.com
This soup is comforting, healthy, and full of protein from lentils.
Ingredients
- 1 cup dried lentils (rinsed)
- 1 onion, chopped
- 2 cloves garlic, minced
- 1 carrot, diced
- 2 celery stalks, diced
- 1 can diced tomatoes
- 4 cups vegetable broth
- 1 teaspoon cumin
- Salt and pepper to taste
- Olive oil for sautéing
Instructions
- Heat olive oil in a pot and sauté onion, garlic, carrot, and celery for 5 minutes.
- Add cumin and cook for another minute.
- Add lentils, tomatoes, and broth. Bring to a boil, then simmer for 25-30 minutes.
- Season with salt and pepper, then serve.
Why It’s Perfect for Beginners
- Packed with protein and fiber
- Easy to make with common pantry ingredients
- Great for meal prep
4. Chickpea Salad Sandwich

Image by: Yandex.com
A fast and easy lunch option that takes just 10 minutes.
Ingredients
- 1 can chickpeas, drained and mashed
- 2 tablespoons vegan mayonnaise
- 1 tablespoon Dijon mustard
- 1 teaspoon lemon juice
- Salt and pepper to taste
- 1 stalk celery, chopped
- Whole-grain bread or wraps
- Lettuce and tomato slices (optional)
Instructions
- Mash the chickpeas and mix with mayo, mustard, lemon juice, salt, and pepper.
- Add chopped celery and mix.
- Serve on whole-grain bread or wraps with lettuce and tomato.
Why It’s Perfect for Beginners
- Simple ingredients
- Quick to make
- Customizable with different veggies or spreads
5. Vegan Tacos

Image by: Yandex.com
Tacos are easy to make with black beans, avocado, and salsa.
Ingredients
- 1 can black beans, drained and rinsed
- 1 avocado, sliced
- 1/2 cup salsa
- 1 lime, juiced
- Soft corn tortillas
- Fresh cilantro, chopped
- Sriracha or hot sauce (optional)
Instructions
- Heat black beans in a pan and season with lime juice, salt, and pepper.
- Warm the tortillas in another pan.
- Build your tacos by adding beans, avocado, salsa, and cilantro.
- Drizzle with hot sauce if you like extra heat.
Why It’s Perfect for Beginners
- Quick and easy to customize
- Minimal cooking
- Healthy fats from avocado and fiber from beans
The Future of Plant-Based Diets: What’s Ahead for Plant-Based Eating?

Image by: Yandex.com
The future of plant-based diets looks promising, with more people embracing this lifestyle every day. As awareness grows about the health benefits and environmental impact of plant-based eating, it’s likely that plant-based options will continue to expand. Food innovation is making plant-based alternatives tastier and more realistic, from plant-based meats to dairy-free milks and cheeses. In the coming years, we can expect to see even more variety and availability of plant-based foods, making it easier for people to adopt and maintain a plant-based diet. The future of plant-based eating is exciting, with new recipes and products shaping the way we think about food.
Comparative Table: Plant-Based Recipes
| Recipe | Time to Prepare | Main Ingredients | Health Benefits |
|---|---|---|---|
| Vegan Buddha Bowl | 20 minutes | Quinoa, chickpeas, greens, avocado, hummus | High in fiber, protein, and healthy fats |
| Vegan Stir-Fry | 25 minutes | Tofu, bell pepper, broccoli, carrots, soy sauce | Full of vitamins, antioxidants, and protein |
| Vegan Lentil Soup | 40 minutes | Lentils, tomatoes, carrots, celery, vegetable broth | Rich in fiber, iron, and protein |
| Chickpea Salad Sandwich | 10 minutes | Chickpeas, vegan mayo, mustard, celery, whole-grain bread | High in protein, fiber, and healthy fats |
| Vegan Tacos | 15 minutes | Black beans, avocado, salsa, cilantro | High in fiber, healthy fats, and antioxidants |
Conclusion
Plant-based diets are great for your health and the planet. Starting with simple recipes is the best way to begin your plant-based journey. The recipes here are perfect for beginners, with easy ingredients and quick prep times. Whether you’re making a Buddha bowl or a chickpea salad sandwich, these meals are healthy and delicious!
Author


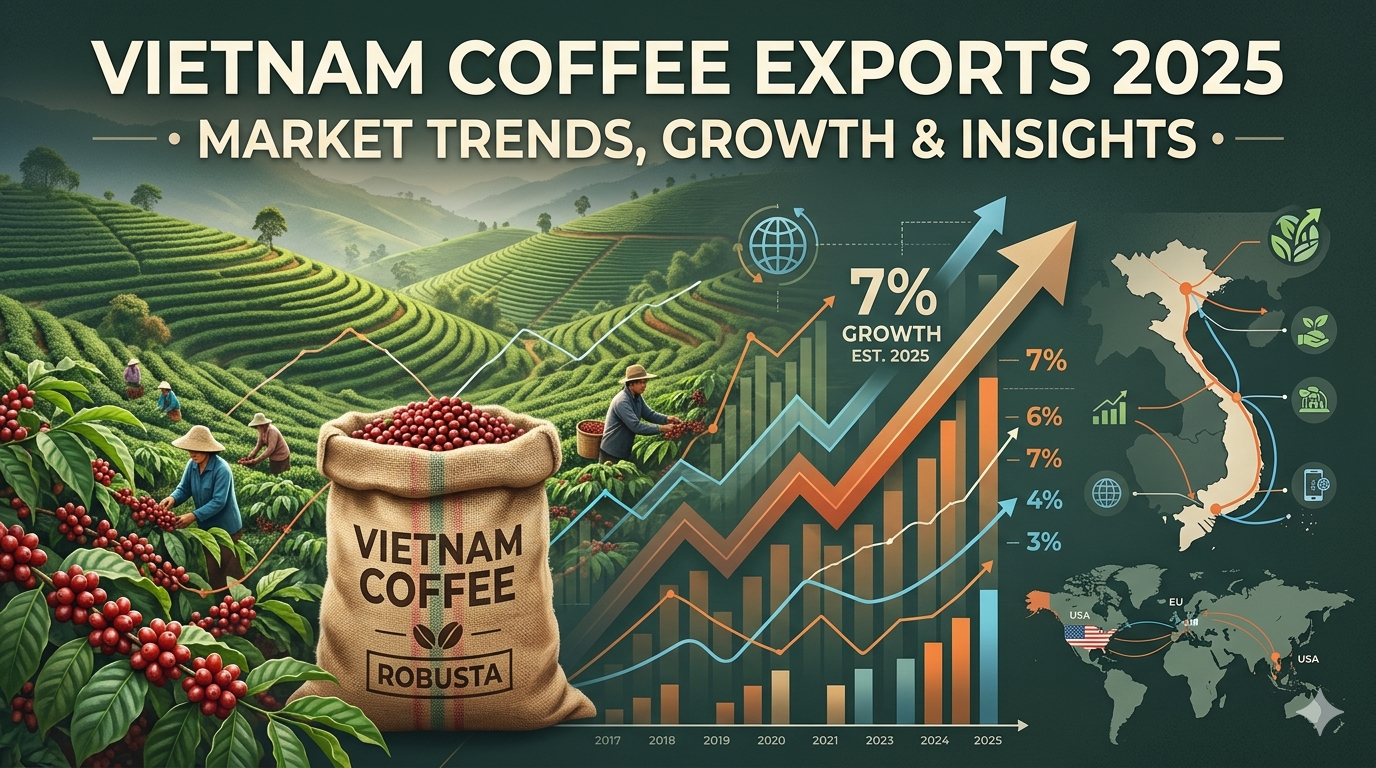
Vietnam has firmly established itself as a powerhouse in the global coffee trade, consistently ranking as the world’s second-largest exporter. Over the past decade, the country has transformed its agricultural landscape, investing heavily in coffee cultivation, processing, and global trade networks. As a result, Vietnam coffee exports have reached unprecedented levels, reflecting both rising global demand and strong pricing trends.
In 2024, Vietnam recorded coffee export revenues of $5.62 billion, marking a significant milestone for the industry. Despite fluctuations in volume due to weather conditions and production challenges, export value surged due to higher global coffee prices. Moving into 2025, the sector continues to expand rapidly, reinforcing Vietnam’s critical role in the international coffee market.
Vietnam Coffee Exports: A Record-Breaking Journey
The growth of Vietnam coffee exports has been nothing short of remarkable. Between January and December 2024, the country exported approximately 1.26 million tons of coffee. While this represented a decline in volume compared to the previous year, the export value increased sharply by over 32%, driven by rising global prices.
In early 2025, the momentum continued. During the first quarter alone, export value exceeded $2.8 billion, reflecting a nearly 74% increase year-over-year. This surge highlights how vietnam coffee exports are increasingly driven by value rather than volume.
By mid-2025, exports had already reached $4.7 billion, and projections indicate that total export revenue could surpass $7 billion by the end of the year. These figures demonstrate the resilience and adaptability of vietnam coffee exporters in a rapidly changing global market.
Key Drivers Behind Export Growth
Several factors are contributing to the impressive performance of vietnam coffee exports:
1. Rising Global Coffee Prices
One of the most significant drivers has been the sharp increase in coffee prices. Average export prices rose above $5,600 per metric ton in 2025, compared to around $3,700 in previous years. This price surge has allowed exporters to generate higher revenues even with reduced volumes.
2. Strong Demand from International Markets
Demand from major markets such as the European Union and the United States has remained robust. Consumers are increasingly appreciating Vietnamese coffee for its strong flavor, affordability, and versatility.
3. Strategic Market Diversification
To mitigate risks such as tariffs and geopolitical uncertainties, vietnam coffee exporters are diversifying into emerging markets in Asia, including China, the Philippines, and South Korea.
Vietnam Coffee Production Landscape
The success of vietnam coffee exports is closely tied to the country’s strong agricultural foundation. Vietnam coffee production is concentrated in regions like Dak Lak, Lam Dong, and Gia Lai, where favorable climate and soil conditions support high yields.
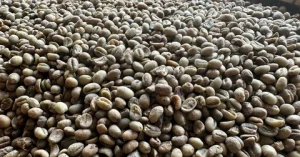
Vietnam produces approximately 1.74 million tons of coffee annually, with Robusta beans accounting for around 95% of total output. This makes Vietnam the world’s leading producer of Robusta coffee.
However, the 2023–2024 season saw a decline in production due to drought conditions, reducing output by nearly 20%. Fortunately, improved weather patterns in early 2025 have supported crop recovery, and production is expected to increase significantly in the 2025–2026 season.
Top Export Markets for Vietnamese Coffee
The global reach of vietnam coffee exports continues to expand, with key markets driving demand:
- Germany remains the largest importer, accounting for nearly 15% of exports.
- United States follows closely, showing strong growth in both volume and value.
- Italy, Spain, and Belgium are major European buyers.
- Japan and South Korea represent important Asian markets.
The European Union collectively accounts for a significant share of total exports, importing hundreds of thousands of tons annually. At the same time, Asian markets are emerging as high-value destinations, offering premium pricing opportunities.
Leading Vietnam Coffee Exporters
The success of vietnam coffee exporters is driven by a strong network of companies that have built global reputations for quality and reliability. Some of the leading players include:
- Intimex Group
- Vinh Hiep Co., Ltd
- Louis Dreyfus Vietnam
- Nestlé Vietnam
- Olam Vietnam
- Simexco Daklak
These companies play a crucial role in expanding vietnam coffee exports, ensuring consistent supply to international markets while maintaining quality standards.
Historical Growth of Vietnam Coffee Exports
Over the past decade, vietnam exports of coffee have shown steady growth, with occasional fluctuations due to market and environmental factors:
- 2014: $3.31 billion
- 2018: $2.89 billion
- 2020: $1.97 billion
- 2023: $3.18 billion
- 2024: $5.62 billion
This upward trajectory highlights the resilience of the industry and the increasing importance of coffee in vietnam exports.
Pricing Trends and Market Dynamics
The pricing environment has significantly influenced vietnam coffee exports in recent years. Export prices have surged due to global supply shortages and increased demand.
At the domestic level, farmgate prices have reached record highs, with Robusta beans selling for over $5 per kilogram. This has led farmers to hold back stock in anticipation of further price increases, creating supply constraints in the short term.
Additionally, there is a growing shift toward value-added products such as roasted and soluble coffee. These products now account for an increasing share of total exports, enhancing profitability for vietnam coffee exporters.
Challenges Facing the Industry
Despite strong growth, the industry faces several challenges:
1. Tariffs and Trade Barriers
Recent tariffs imposed by the United States on Vietnamese coffee have created uncertainty for exporters. This has prompted a shift toward alternative markets in Asia and Europe.
2. Climate Change
Weather variability continues to impact vietnam coffee production, affecting both yield and quality.
3. Supply Chain Constraints
Delays in shipments and logistical challenges can disrupt export flows, particularly during peak seasons.
Role of Vietnam Customs Data in Trade Insights
Access to accurate vietnam customs data is essential for understanding trade trends and making informed business decisions. This data provides valuable insights into export volumes, pricing, and market demand.
Businesses can leverage vietnam customs data to identify emerging opportunities, track competitors, and optimize their supply chains. It also helps stakeholders analyze the performance of vietnam coffee exports across different markets.
Future Outlook for Vietnam Coffee Industry
The future of vietnam coffee exports looks highly promising. With projected export values reaching $7 billion in 2025, the industry is poised for continued growth.
Key trends shaping the future include:
- Expansion into high-value markets
- Increased focus on sustainable farming practices
- Growth in processed coffee exports
- Adoption of advanced technologies in production and logistics
As global demand for coffee continues to rise, vietnam coffee exporters are well-positioned to capitalize on new opportunities.
Key Takeaways
- Vietnam coffee exports are experiencing strong growth driven by high prices and global demand.
- The country remains the world’s leading producer of Robusta coffee.
- Major markets include the EU, the US, and emerging Asian economies.
- Vietnam coffee exporters are focusing on diversification and value-added products.
- Insights from vietnam customs data play a crucial role in strategic decision-making.
Conclusion
Vietnam’s coffee industry has evolved into a global leader, supported by strong production capabilities and expanding export networks. Despite challenges such as climate change and trade barriers, the country continues to demonstrate resilience and adaptability.
With rising demand, premium pricing, and strategic market expansion, vietnam coffee exports are set to achieve new milestones in the coming years. Backed by reliable vietnam coffee production and data-driven insights from vietnam customs data, the industry is well-equipped to maintain its upward trajectory.
As the global coffee market continues to evolve, Vietnam remains at the forefront—delivering quality, consistency, and value to coffee lovers worldwide.
Author

Shilajit has served as a cornerstone of Ayurvedic medicine for thousands of years, and modern science is finally catching up to its potential. This powerful natural resin, harvested from the rocky crevices of the Himalayas, contains over 80 minerals and bioactive compounds. In 2026, Shilajit has surged in popularity across India. Fitness enthusiasts use it for a competitive edge, while professionals rely on it for sustained daily energy. However, this popularity brings confusion regarding its safety and authenticity. This comprehensive guide answers your most pressing questions so you can choose a high-quality supplement with confidence.
What Exactly is Shilajit?
Shilajit is a thick, tar-like resin that seeps from mountain rocks during warmer months. It forms over centuries as plant and microbial matter slowly decompose under extreme pressure and altitude. In Sanskrit, the name means “conqueror of mountains” or “destroyer of weakness.” Ayurveda classifies it as a Rasayana, a substance that promotes longevity and total rejuvenation.
The primary active component is Fulvic Acid. This compound works alongside Humic Acid and trace minerals to support cellular energy and natural detoxification.

Where is it Sourced in India?
Genuine Shilajit comes from the Himalayan range at altitudes between 1,000 and 5,000 meters. Key regions include:
-
Uttarakhand: The Garhwal and Kumaon ranges.
-
Himachal Pradesh: The high-altitude Spiti Valley.
-
Jammu & Kashmir: Remote, rocky highland zones.
At these heights, intense UV exposure and geological pressure create the ideal conditions for mineral accumulation. Himalayan Shilajit typically contains higher Fulvic Acid levels than Altai or Afghan varieties.
Proven Health Benefits and Uses
People use Shilajit today for a variety of wellness goals. Because it supports the mitochondria—the “power plants” of your cells—it provides benefits across several areas:
-
Energy and Stamina: Regular use reduces fatigue and provides sustained mental and physical energy.
-
Physical Recovery: Athletes use it to reduce exercise-induced inflammation and support muscle repair.
-
Hormonal Balance: It is well-known for supporting healthy testosterone levels and reproductive health in men.
-
Cognitive Clarity: The minerals support memory, focus, and overall brain health.
-
Nutrient Absorption: Fulvic acid acts as a “transporter,” helping your body absorb other vitamins and minerals more effectively.
Who Should (and Shouldn’t) Take Shilajit?
Shilajit is suitable for a wide range of adults, but specific groups should exercise caution.
-
Recommended For: Men and women (18+) seeking energy, working professionals managing stress, and athletes focusing on endurance. It is especially beneficial for adults over 40 looking for healthy aging support.
-
Consult a Doctor If: You are pregnant or breastfeeding. Children under 18 should avoid it.
-
Strict Avoidance: Individuals with gout, sickle cell anemia, or thalassemia should stay away. Furthermore, if you take blood-thinners or have kidney conditions, seek medical advice first.
How to Consume Shilajit for Maximum Results
You can find Shilajit in three primary formats. Each requires a different approach to ensure you don’t degrade the active compounds.
| Form | Potency | How to Use |
| Resin | Highest | Dissolve a pea-sized amount (300–500 mg) in warm milk or water. |
| Capsules | Convenient | Take with water; ideal for travel or those who dislike the earthy taste. |
| Powder | Versatile | Mix into smoothies or warm beverages for a measured dose. |
Pro Tip: Take Shilajit in the morning on an empty stomach to maximize absorption. If you have a sensitive stomach, a light meal will not significantly hinder its effectiveness. Consistency is the most important factor; you will likely see the best results after 2–3 weeks of daily use.
How to Identify Authentic vs. Fake Shilajit
The market currently contains many adulterated or synthetic products. Use these four tests to verify your purchase:
-
The Solubility Test: Genuine resin dissolves completely in warm water. It should turn the liquid a rich golden-brown without leaving any sandy residue or sediment at the bottom.
-
The Flame Test: Authentic Shilajit will not catch fire. When exposed to a flame, it may bubble or expand, but it should never burn like plastic or wax.
-
Texture Check: At room temperature, the resin is firm. If you warm it between your fingers, it becomes pliable and sticky. In the fridge, it becomes hard and brittle.
-
The Aroma: Real Shilajit has a distinct, earthy, and slightly bitter smell. It often reminds people of bitumen or wet soil. If it smells like chocolate or has no scent, it is likely a counterfeit.
The Gold Standard: Only buy from brands that provide Third-Party Lab Reports. Ensure the report verifies low heavy metal levels (Lead, Arsenic, Mercury) and confirms a high Fulvic Acid percentage.
Choosing the Best Brand in India
When evaluating Indian brands in 2026, prioritize transparency over a low price. A cheap, low-potency product provides no benefit and may contain harmful contaminants.
-
Source Transparency: The brand should specify the exact Himalayan region and altitude of harvest.
-
Cold-Processing: Look for “low-heat” or “cold-processed” purification. High heat destroys the delicate bioactive compounds.
-
Verified Reviews: Look for authentic feedback and clear return policies. Trustworthy brands stand behind their purity.
Shilajit vs. Ashwagandha: Which is Better?
These two are often compared, but they serve different roles. Ashwagandha is an adaptogen that primarily manages stress and cortisol. Shilajit is a mineralizer that primarily boosts energy and physical performance. Interestingly, many practitioners recommend taking them together. Ashwagandha calms the nervous system while Shilajit nourishes the cells.
Final Thoughts
Shilajit is not a “magic pill,” but it is a powerful lifestyle ally. When you pair it with quality sleep, a balanced diet, and regular movement, it provides a strong foundation for health. Always prioritize quality. Authentic, purity-verified Himalayan Shilajit is a worthwhile investment in your long-term vitality.
Author

Personalized custom printed fast food boxes are the key ingredient of any food enterprise that wants to make a permanent impact. Properly developed packaging has the ability to enhance brand awareness and keep food safe and fresh. The fast food restaurants are now requiring new and viable packaging designs that are aesthetically pleasing and effective.
Companies in Canada and all over the world are moving towards custom-made and recyclable products to provide their customers with a better experience. Due to the emergence of takeout and delivery services, more than ever it has become more essential to invest in Custom Printed Fast Food Boxes, Fast Food Boxes Wholesale, and innovative packaging designs. Packaging can no longer be only functional; it is a marketing instrument.
Branding With Logo
Brand identity is built immediately when you add your logo to the fast food boxes. Fast Food Boxes with Logo help the companies to speak in a business way, and memorably impress people. Custom branding will provide a differentiation in the products and their counterparts to give awareness and loyalty to the customers.

Printed Custom Options
Custom Printed Fast Food Boxes can be customized to your design, colors, and message that will appeal to your audience. Customised Fast Food Packaging assists companies to advertise specials, seasonal offers,s or brand narratives. Flexibility is also available on printing flexibility in terms of size and shape, which offers flexibility in burgers, fries, wraps, and combo meals.
Good printing quality will make logos and graphics stay bright even during heat or wet weather. This strategy will add value to the general attitude about your brand and give the packaging an immediate identity. By discussing custom printing, your shop will be more than just another takeout store.
Wholesale Solutions
Fast Food Boxes Wholesale needs are ideal when dealing with large operations and restaurants that prefer saving money. Bulk purchases lower the unit prices and provide uniformity in the packaging process. Custom boxes Canada has wholesale services that are available to businesses to find good materials in the area and dependable suppliers.
Eco-Friendly Packaging
Fast Food Recyclable Packaging is a trend in the modern food service industry. Human beings are turning out to be conscious of the impact on the environment, and the most desired products are those that are environmentally friendly. The Paper Fast Food Packaging and biodegradable options reduce the waste and save on durability and hygiene requirements.
Creative Packaging Design
The motivation behind Fast Food Packaging Design can very well improve customer experience and brand perception. Mezzo shapes, compartments, and colors of the meals render them appealing to the sight as well as to maintain the safety of the contents. Custom Fast Food Packaging allows restaurants to be creative in design when it comes to burgers, sandwiches, fries, and dessert products.
Functional Features
Convenience is the most important when selecting fast food boxes. Ease of opening tops, locking systems and heat resistance are features that enhance usability. Paper Fast Food Packaging has provided lightweight and durable products, which are app-applier menu items.
The functional designs make the food fresh, hot, and intact during transits. The provision of sauce, cutlery, or napkin portions also has the benefit of convenience to the customers. Functionality and attractive visuals are mixed together so as to form an overall solution to the packaging that would boost customer satisfaction.
Personalization Options
Customized Fast Food Packaging enables organisations to be competitive in the market. On the boxes, custom messages, seasonal graphics, or promotional messages can be imprinted. The strategy will enhance the level of engagement and improve the relationship with consumers.
fast food boxes.
Industry Applications
Maximizing Brand Impact with Professional Fast Food Packaging
Companies that use Custom Fast Food Packaging and Paper Fast Food Packaging show their brand in every location. This constant visibility helps build strong market recognition. High-quality and durable packaging materials assist businesses in satisfying complex operational needs. Furthermore, these materials ensure that every customer enjoys a smooth and professional dining process. Proper packaging also minimizes food waste during transport. Consequently, these smart solutions significantly improve overall service efficiency.
Conclusion: Why Customization Matters
Personalized, custom-printed fast food boxes are a necessary investment for any modern organization. These boxes increase brand awareness while simultaneously boosting customer satisfaction and operational flow. Today’s Fast Food Boxes provide high utility and a visually attractive appearance. Designers create these environmentally friendly products to match the fast-paced dynamics of contemporary dining.
Opportunities such as Custom Printed Fast Food Boxes, Wholesale Fast Food Boxes, and Paper Fast Food Packaging combine style with daily usefulness. Restaurants, food trucks, and caterers can add elements of branding and custom design to their supplies. These features make the dining experience memorable and build long-term customer loyalty. Individualized packaging transforms mediocre food into a powerful selling point. This shift boosts your brand’s visibility and ensures future prosperity.
Author


Enfants Riches Déprimés x Essentials Hoodie: Luxury Streetwear

Temporary Replacement Vehicles UK: Save Time and Stay Mobile

Low-Cost Family Cars London: Everything You Need to Know

JetBlue Airlines: Contact Number, Chat & Support Guide 2026

Sulphur Price Trend March 2026: Forecast & Regional Analysis

Skin Parasites in Livestock: Prevention & Best Hygiene Solutions

Pool Coping Replacement: Signs, Benefits & Cost Guide

Fully Managed Landlord Services: Save Time, Stress, and Money

Prevent Crushing and Leaning With Custom Corrugated Boxes

Car Battery Replacement: Step-by-Step Guide to Reliable Starts

Cybersecurity Consulting Company SequelNet Provides Critical IT Support Services to Medical Billing Firm, Medical Optimum

Team Communication Software Transforms Operations at Finance Innovate

Project Management Tool Transforms Long Island Business

How Alleviate Poverty Utilized IPPBX’s All-in-One Solution to Transform Lives in New York City

Breast Cancer: The Imperative Role of Mammograms in Screening and Early Detection

Unstoppable Collaboration: D.C.’s Citi Open and Silicon Valley Classic Unite to Propel Women’s Tennis to New Heights

Embracing Renewal: Sizdabedar Celebrations Unite Iranians in New York’s Eisenhower Park

The Benefits of Starting a Side Hustle for Financial Freedom

New Blood Donation Screening Questions What You Need to Know

Stylishly Timeless: The 5 Types of Sandals You Need in Your Closet
-

 Business3 years ago
Cybersecurity Consulting Company SequelNet Provides Critical IT Support Services to Medical Billing Firm, Medical Optimum
-
Business3 years ago
Team Communication Software Transforms Operations at Finance Innovate
-
Business3 years ago
Project Management Tool Transforms Long Island Business
-
Business3 years ago
How Alleviate Poverty Utilized IPPBX’s All-in-One Solution to Transform Lives in New York City
-
health3 years ago
Breast Cancer: The Imperative Role of Mammograms in Screening and Early Detection
-
Sports3 years ago
Unstoppable Collaboration: D.C.’s Citi Open and Silicon Valley Classic Unite to Propel Women’s Tennis to New Heights
-
Art /Entertainment3 years ago
Embracing Renewal: Sizdabedar Celebrations Unite Iranians in New York’s Eisenhower Park
-
Finance3 years ago
The Benefits of Starting a Side Hustle for Financial Freedom


