
health
Pain and Recovery Time After Otoplasty Surgery: What to Expect

How soon can you go back to work or daily activities after otoplasty in Dubai? Is the recovery time really as short as some say?
Many patients ask if the pain after ear surgery will mess up their lives. Or if the recovery time after otoplasty fits their busy schedules. This guide answers these questions. It shows the realistic timeline and pain management strategies for those getting otoplasty in Dubai.
If you’re thinking about ear surgery in Dubai or getting ready for it, knowing the healing stages and pain levels is key. Modern techniques in the UAE’s cosmetic hubs aim for safe and quick recovery. Following post-op care steps is crucial for natural-looking results.
Understanding Otoplasty and Its Purpose
Otoplasty, being Dubai ear surgery, fixes the size, form, or positioning of ears. It improves the symmetry of the face by repairing ear problems. Skilled plastic surgeons use multiple techniques, including reshaping the cartilage or moving ears closer to the head.

What Is Otoplasty Surgery?
Ear surgery in Dubai starts with small cuts behind the ears. Doctors then go on to manipulate the cartilage in order to mold the ears straight. The operation is tailored for each individual, depending on what they need. The time to recover depends on how extensive the operation was.
Common Reasons People Choose Ear Surgery in Dubai
Many in Dubai get otoplasty for sticking-out ears, birth defects, or ear damage from accidents. Some want to fit in with cultural beauty standards. Kids get it to avoid bullying, and adults to feel more confident at work or in public.
Benefits of Otoplasty Beyond Aesthetics
Otoplasty in Dubai does more than make you look good. It can make you feel better about yourself and less worried about your ears. Kids might avoid bullying, and adults feel more confident in photos and when speaking up. It can even help with hearing in some cases.
Preparing for Your Otoplasty Procedure
Getting ready for otoplasty is key to a smooth experience. Your plastic surgeon in Dubai will give you important steps. This includes stopping blood-thinning meds weeks before. Tell your surgeon about your health history and meds. This helps avoid any problems.
Pre-Surgery Instructions and Requirements
Follow your pre-op orders. Most plastic surgeons in Dubai would like you to go without food for 12 hours beforehand. Ensure that you have a ride home since you can’t drive immediately. Find out if you’ll need blood work or medical checks when you arrive.
What to Bring to Your Surgery Appointment
Bring your insurance card, ID, and a list of medications you take. Dress in loose clothing to minimize irritation. Bring books or films for relaxation time. Don’t bring valuables. Bring only what you need to make your day easier.
Setting Up Your Recovery Space at Home
Make a cozy spot with extra pillows for your head. Have non-perishable snacks and meals ready. Keep pain meds and meds your surgeon gave you easy to get. Clear a space for bandages and supplies. Your plastic surgeon in Dubai will tell you what you need.
The Immediate Post-Operative Experience
After otoplasty, you wake up with bandages around your head. These protect your ears in the first hours. A grown-up must take you home because you might still feel sleepy from the anesthesia. At the clinic, they watch for your vital signs before you go home. This is the beginning of your recovery.
You might have numbness, pain, or pressure around and in your ears. Your physician will give you medication for this. Take your pain medication as advised even if you are not hurting yet. Bruising and swelling are routine and will go away with time. They are all healing reactions.
As soon as you’ve had surgery, you have to keep your head up to reduce swelling. Don’t touch or move your bandages. Ice packs placed outside the wrap can reduce pain. In case of severe pain, heavy bleeding, or fever, contact your doctor at once. These are indications of trouble which need to be addressed instantly.
Recovery Time After Otoplasty: Timeline and Milestones
Recovery after ear surgery in Dubai has a clear timeline. Each phase is important for healing. Proper care is needed at each stage for the best results.
First 24-48 Hours: The Critical Phase
Rest is key after surgery. You might see swelling, bruising, or a bit of bleeding. A bandage helps your ears, and you’ll get pain meds. Avoid bending or straining. This helps prevent problems.
Days 3-7: Initial Healing Progress
Bandages come off after a few days, but you might still wear something light. Swelling goes down, and pain gets better. You can start cleaning the area gently. But, don’t do too much yet. Most people feel better by the end of this time.
Weeks 1-3: Returning to Normal Activities
By week two, you can go back to work or school if your job isn’t hard. You can start with light exercise after three weeks. But, wait longer for sports or heavy lifting. It’s important to see your Dubai surgeon regularly. They’ll check how you’re doing.
Months 1-6: Long-Term Healing and Final Results
It usually takes 6 months to fully recover from Otoplasty. Swelling will go away, and scars will be less noticeable. By month six, your ear’s shape will be stable. Remember to protect your ears from the sun. Follow the advice from places like Dubai Cosmetic Institute.
Managing Pain and Discomfort During Recovery
Following otoplasty in Dubai, there must be an awareness of how to deal with pain and discomfort. This segment discusses how to cope with feelings after surgery. It makes patients responsible for recovery.
Types of Pain You May Experience
Patients might feel throbbing near their ears or a dull pressure as tissues adjust. Mild itching during healing is normal. But sharp pain or sudden swelling could mean a problem.
Sensitivity to touch usually gets better within days. Bruising fades slowly. Always talk to your surgeon if pain gets worse.
Medication Options and Their Effectiveness
Painkillers are typically prescribed by physicians for the first few days. They are pain suppressants and reduce inflammation. For minor pain, ibuprofen is provided over the counter. It is recommended to follow the dosage to avoid side effects. Inform your surgeon about your medication schedule before otoplasty in Dubai.
Non-Medication Pain Management Techniques
Elevating your head when you are in bed can also decrease swelling. A cold wrapped compress can also ease inflammation. But do not let it contact you. Relaxation methods such as meditation or slow breathing can divert attention from pain. Gentle massage of the scalp (excluding incision areas) can reduce tension. Rest at all times and avoid heavy lifting or activity.
Potential Complications and When to Contact Your Plastic Surgeon in Dubai
Most otoplasty recoveries are smooth, but risks can happen. Infection is a big worry—look out for redness, fever, or pus. If you see these signs, call your plastic surgeon in dubai right away.
Excessive bleeding is another urgent issue. This includes steady blood flow or big clots under bandages. A worsening or persistent pain is an important warning sign. The occurrence of severe headaches, dizziness, or vomiting indicates the need to immediately call your surgeon.
Look for signs like irregular contours or alteration in swelling after one week. Also, look for numbness, color alteration, or any other obvious problems. Monitor your healing. Have your surgeon’s contact, including after-hour numbers, readily available.
When you call, report your symptoms, how long you have had them, and what medication you are on. This will prevent little problems from becoming large problems. Dubai plastic surgeons tell you to call within 24 hours if you noticed something unusual.
Don’t be afraid if you feel unsure. Time can lead to scars, long-term effects, or delayed recovery. Trust your instincts and follow the postoperative instructions to avoid complications. Your surgeon is always there whenever you need help.
Finding the Best Cosmetic Surgery in Dubai for Otoplasty
Choosing the right doctor is very essential to safely reshape the ear. Dubai is well-known all over the world for having well-equipped hospitals, where professionalism and patient safety are given top priority.
Questions to Ask During Your Consultation
Ask your surgeon how many otoplasties she has performed. Show her your before-and-after pictures. Discuss surgery, anesthesia, and recovery with her.
Ask them about the costs and payment, and whether they have any guarantee. Compare ear surgery and nose surgery, explaining that healing from nose surgery might take longer.
Conclusion: Ensuring a Successful Otoplasty Recovery
A smooth recovery after otoplasty needs clear talk between patients and surgeons. Follow all post-operative guidelines to lower risks and better results. Most patients see slow but steady improvement, with big changes in weeks and full results in months.
Stick to activity limits and wound care to get the best recovery. This ensures a good outcome after Otoplasty.
Choosing a skilled surgeon in Dubai is key. Top places focus on safety and care for each patient. This helps manage hopes during healing.
Go to all follow-up visits to check on healing and solve problems early. Being patient is important, as healing times vary. But with consistent care, results last long.
Knowing what to expect and following aftercare well is crucial for happiness. Patients who do this have better results. Keeping ears safe after recovery also keeps results good.
Good otoplasty results in Dubai show both skill in surgery and patient follow-through with recovery plans.
Author
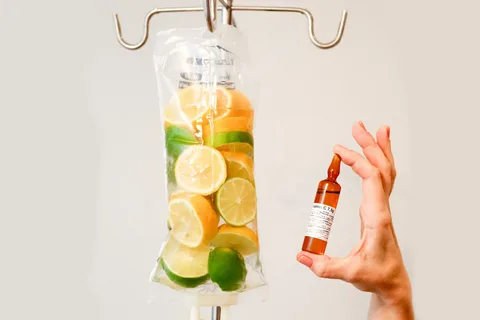
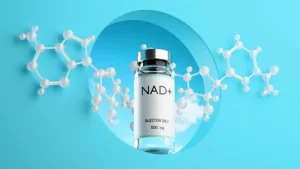
In the competitive corporate landscape of the UAE, peak performance is not just an ambition; it is a baseline requirement. Executives, entrepreneurs, and medical professionals are increasingly facing the physical and mental toll of high-stakes environments. The NAD+ IV Drip in Dubai has become a strategic tool for these high-performers, offering a way to combat the biological exhaustion that caffeine and traditional wellness routines cannot reach. By addressing energy at the cellular level, this therapy provides a sustainable foundation for leadership, creativity, and long-term professional resilience.
Nicotinamide Adenine Dinucleotide (NAD+) is the essential coenzyme that drives the production of ATP, the energy currency of every cell. For a professional whose brain and body are under constant pressure, natural stores of this molecule deplete rapidly. A NAD+ IV Drip in Dubai replenishes these reserves directly into the bloodstream, bypassing the digestive system to ensure the brain and heart receive immediate support. This isn’t about a temporary spike in energy; it is about restoring the biological “hardware” that allows you to function at your highest potential.
In our clinical experience, we have found that professionals prioritize this treatment because of its impact on executive function and stress management. What patients typically report during recovery is a sharp increase in mental endurance and the disappearance of the late-afternoon “cognitive slump.” It provides the mental space necessary to make complex decisions with clarity and confidence.
The Strategic Advantage of Mitochondrial Support
For a professional, the brain is the most critical tool in their arsenal. The brain’s ability to process information, manage stress, and regulate emotions is entirely dependent on mitochondrial health. NAD+ is the fuel that keeps these mitochondria running efficiently. When you undergo a NAD+ IV Drip in Dubai, you are optimizing your neurological capacity. This leads to faster synaptic firing and improved neuro-plasticity, allowing you to adapt to changing market conditions or high-pressure situations with ease.
Beyond the brain, this coenzyme plays a vital role in cellular repair. High-stress roles often lead to elevated cortisol levels, which can damage DNA and accelerate biological aging. This therapy activates sirtuins—proteins that repair genetic damage and protect cells from oxidative stress. By maintaining high levels of this coenzyme, professionals can mitigate the physical “wear and tear” of their careers, ensuring they stay healthy and vibrant for the long haul.
Why Intravenous Delivery Fits a Busy Lifestyle
The primary reason busy professionals choose an infusion over oral supplements is the efficiency of the delivery. Time is a finite resource, and the NAD+ IV Drip in Dubai offers the most significant biological return on a relatively small time investment. Oral precursors to NAD+ must be processed by the liver and gut, where much of their potency is lost. An IV drip guarantees 100% absorption, delivering the active coenzyme exactly where it is needed most.
This direct-to-bloodstream method allows for a much higher concentration of the molecule to be present in the system than could ever be achieved through diet or pills. In our clinical experience, this “saturation” is what triggers the profound clearing of brain fog that our professional clients seek. It is a medical-grade intervention that provides a clear, measurable shift in how the body and mind perform.
Benefits Tailored for High-Performance Careers
The advantages of cellular replenishment are specifically aligned with the needs of the modern workforce. Whether you are leading a multinational corporation or launching a startup, the systemic impact of this therapy supports your professional goals.
-
Sustained Executive Focus: Enhanced ability to stay on task and manage complex projects without mental fatigue.
-
Reduced Stress Impact: Better regulation of the nervous system, leading to a calmer response to pressure.
-
Rapid Jet Lag Recovery: Essential for international professionals who need to perform immediately after a long-haul flight.
-
Physical Resilience: Increased energy for the gym and social commitments after a full day at the office.
-
Longevity and Healthspan: Protecting your most important asset—your health—from the effects of chronic stress.
Who is the Prime Candidate for Professional Optimization?
This therapy is ideal for anyone whose daily life demands a high level of mental output and emotional intelligence. It is particularly effective for those over 35, as this is when the body’s natural ability to produce and recycle NAD+ begins to decline. If you find that you are working harder but achieving less, or that your “recovery” weekends are no longer enough to recharge your batteries, your cells may be signaling a state of deficiency.
What patients typically report during recovery is that the NAD+ IV Drip in Dubai helps them regain a sense of “unshakeable” focus. It is also an excellent tool for those who have recently undergone high-stress life events or are recovering from burnout. By restoring your cellular energy, you are giving yourself the biological margin required to excel in all areas of life.
The Procedure: A Step-by-Step Clinical Experience
We understand that a professional’s time is valuable, which is why the treatment process is designed to be as efficient and comfortable as possible.
-
Professional Consultation: A focused review of your energy levels, stress factors, and goals.
-
Medical Setup: Preparing a customized dose of medical-grade NAD+ in a hydrating saline base.
-
IV Initiation: A quick, sterile procedure to begin the infusion.
-
The Session: While the drip takes 90 to 120 minutes, many patients use this time to work on a laptop or take a restful break.
-
Rate Management: Our clinical staff monitors the drip speed to ensure you remain comfortable throughout.
-
Post-Drip Vitality: You leave the session feeling hydrated and mentally refreshed, ready for your next meeting.
Key Target Areas for Professional Restoration
While the coenzyme is systemic, its impact on the “professional systems” of the body—the brain, the heart, and the metabolic pathways—is where the results are most noticeable.
| Performance Area | Clinical Impact |
| Cognitive Core | Sharper decision-making and improved memory |
| Metabolic System | Better energy stability and glucose regulation |
| Nervous System | Reduced anxiety and better sleep architecture |
| Cellular Nucleus | DNA repair and protection against stress-related damage |
Investment and Value Factors for Success
When considering the cost of a NAD+ IV Drip in Dubai, professionals often view it through the lens of ROI (Return on Investment). The cost of “brain fog” or lost productivity far exceeds the price of a clinical session. The value lies in the purity of the coenzyme used and the medical oversight that ensures the dosage is tailored to your specific metabolic rate.
For sustained results, we typically recommend an initial protocol of 3 to 5 sessions followed by monthly maintenance. This ensures that your cellular reservoirs remain full, allowing you to maintain your peak performance levels consistently. It is a proactive investment in your career longevity and your future quality of life.
Safety, Side Effects, and Immediate Return to Work
Safety is our primary concern. Because NAD+ is a substance already present in your cells, it is exceptionally well-tolerated. Some patients may experience a slight sensation of tightness or a mild “flushing” if the drip rate is high. This is easily corrected by adjusting the flow. What patients typically report during recovery is that there is no “hangover” or downtime; you can return to the office or a social engagement immediately.
We suggest staying hydrated with plenty of water for the remainder of the day. Since the NAD+ IV Drip in Dubai stimulates the removal of cellular waste, water is essential to help your body flush these byproducts out. Most clients find that the mental clarity peaks the following morning and stays consistent for several weeks.
Maintaining Your Competitive Edge
To preserve the benefits of your therapy, we recommend a “high-performance” lifestyle. This includes a diet rich in precursors like tryptophan and niacin, found in healthy proteins. Regular movement and proper sleep hygiene will also help your body utilize the restored NAD+ levels more effectively. Many of our clients find that this therapy becomes a non-negotiable part of their success strategy.
Your Partner in Professional Longevity
Your health is the foundation of your career. Without high-functioning cells, your ambition and expertise cannot reach their full potential. We are dedicated to providing the high-level medical support you need to stay at the top of your field. Our team combines clinical authority with a deep understanding of the pressures faced by Dubai’s professional community.
At Tajmeels Clinic, we focus on delivering measurable biological upgrades through safe, premium-grade infusions. We invite you to experience how cellular restoration can redefine your professional and personal life, giving you the energy and clarity to lead with purpose.
Author
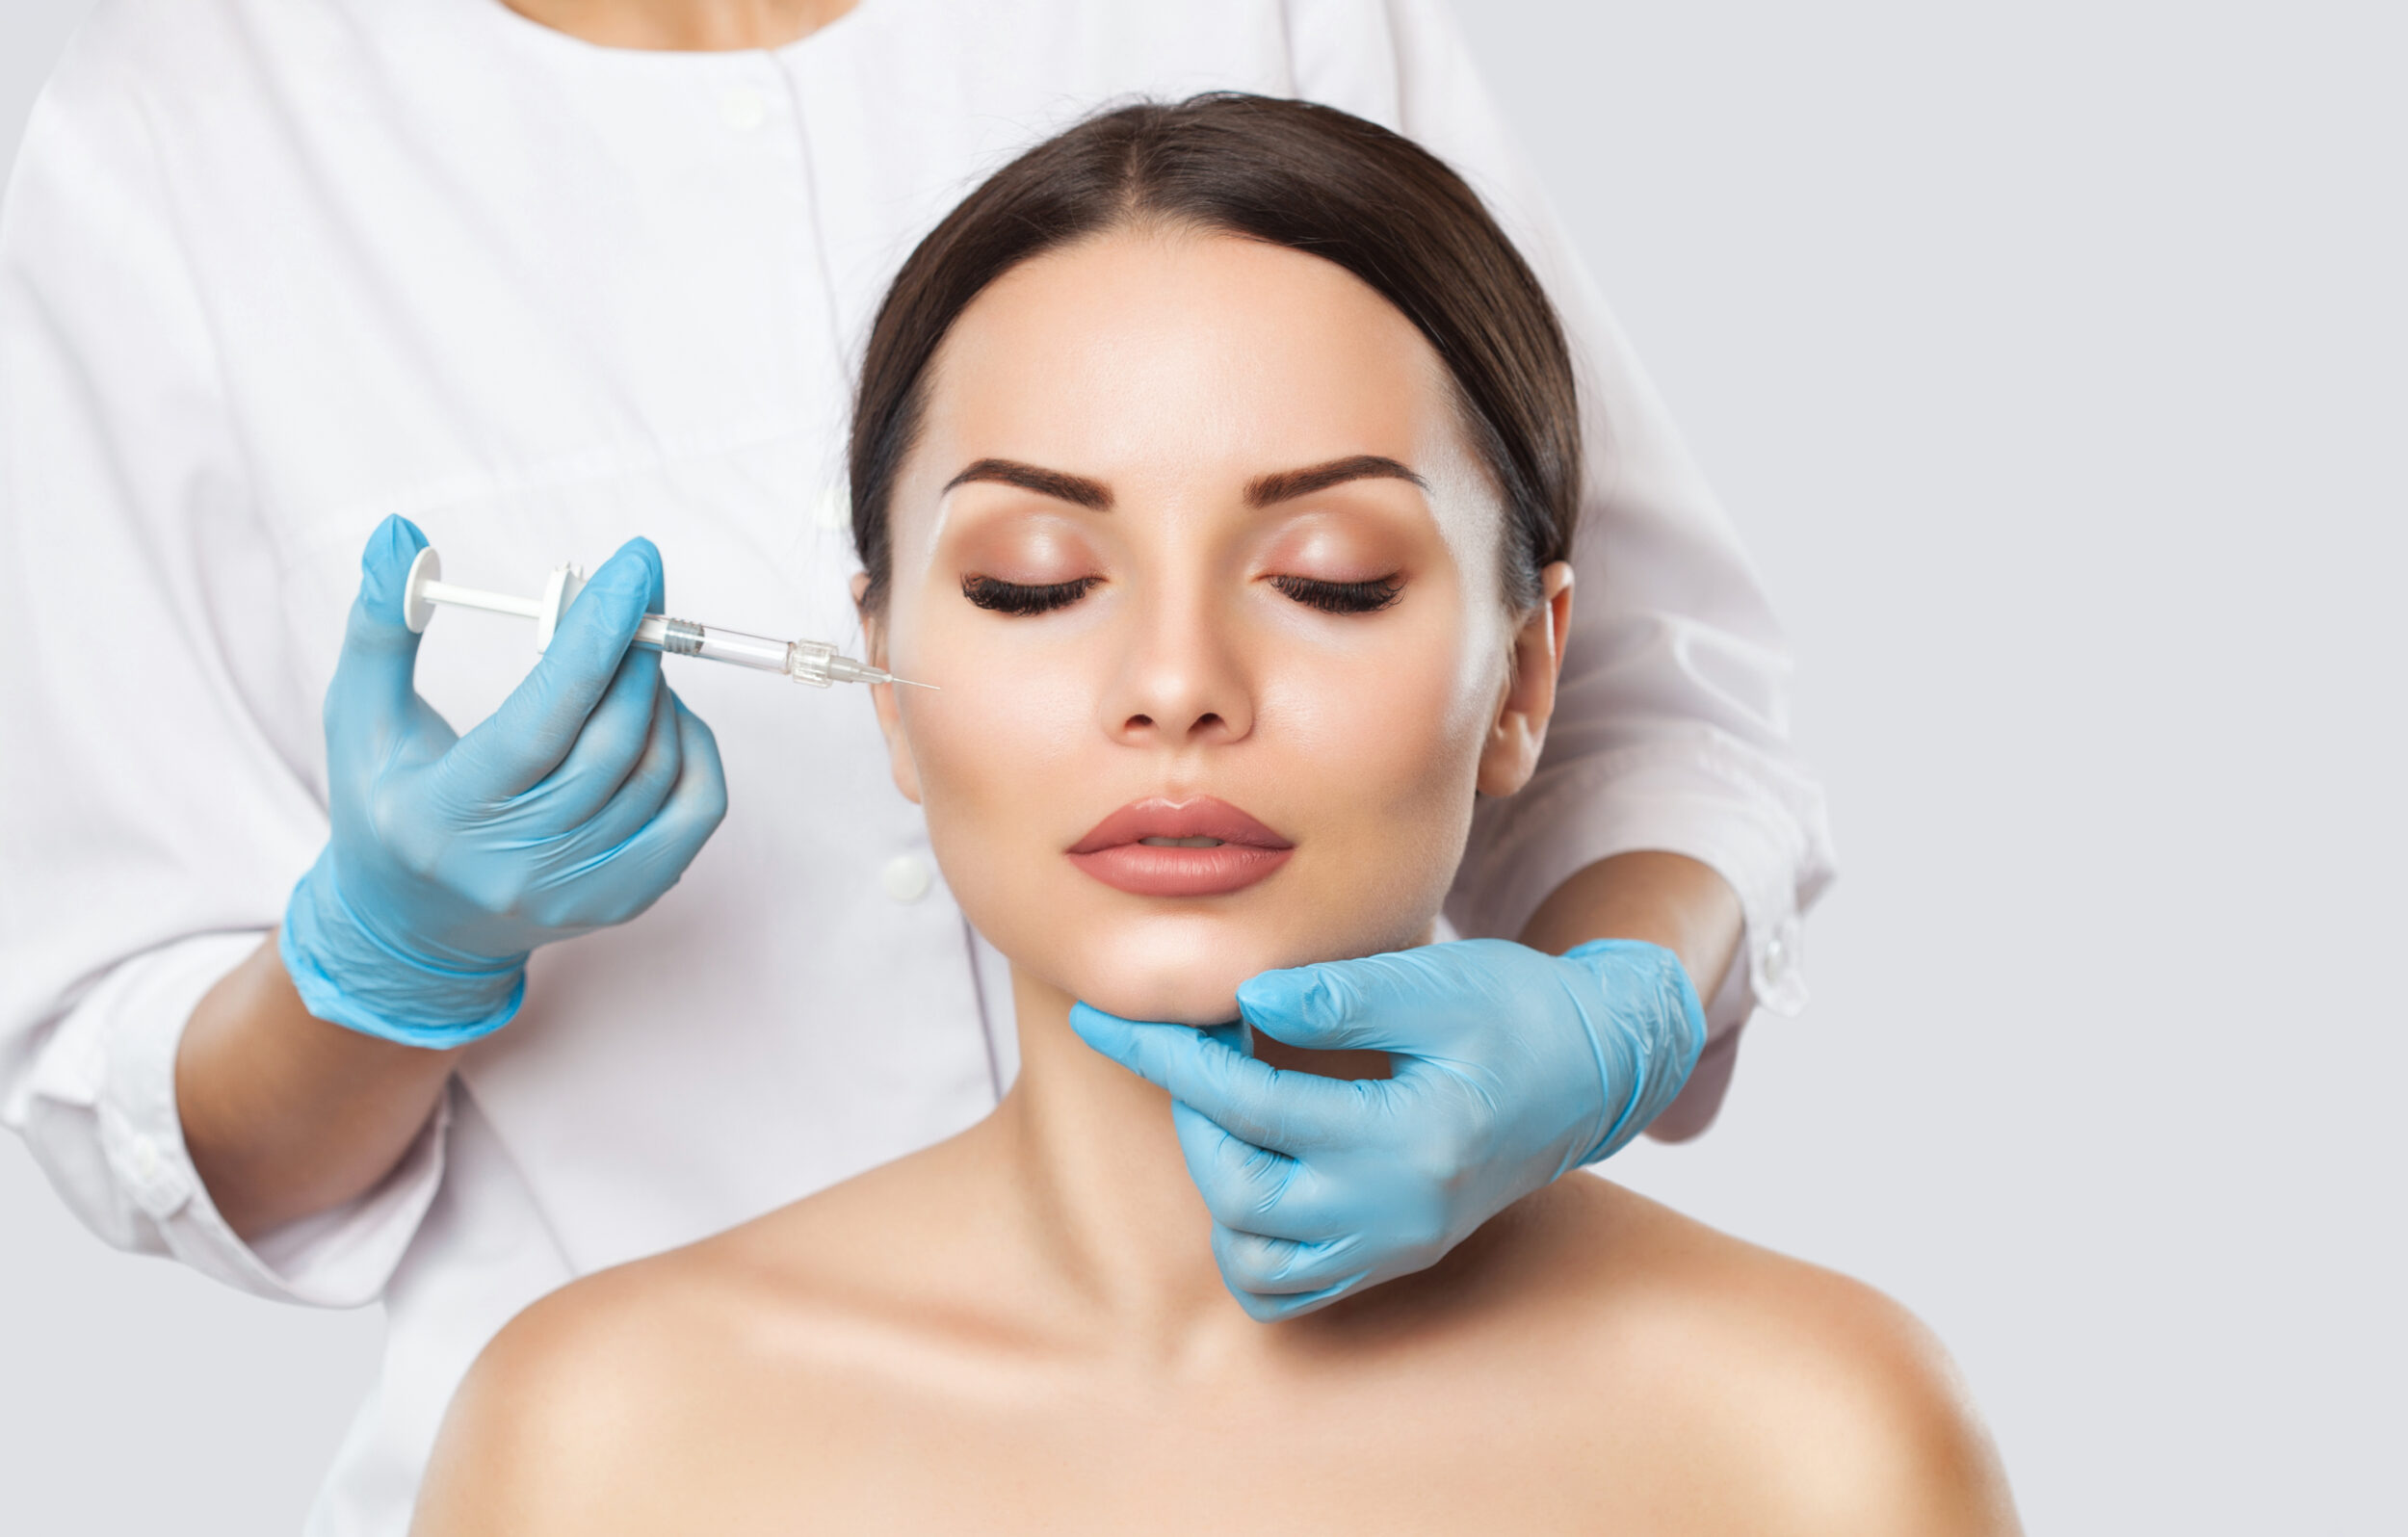
How Do Prp Injections Improve Skin Texture? is a question increasingly search by individuals seeking natural skin rejuvenation solutions without invasive procedures. PRP (Platelet-Rich Plasma) therapy has gain attention for its ability to refresh dull skin, refine uneven texture, and support long-term collagen production.
It is often discuss alongside Cosmetic injections in Dubai because it falls within modern aesthetic enhancement methods that rely on the body’s natural healing ability. Unlike temporary surface treatments, PRP works beneath the skin to encourage regeneration from within, making it a preferred option for those looking to improve overall skin quality. Many user queries also focus on how quickly results appear, how long improvements last, and whether it suits different skin types, all of which depend on individual skin response and treatment consistency.
What Is Treatment And How It Works Importance Of Treatment:
PRP injections involve drawing a small amount of blood, processing it to concentrate platelets, and reintroducing it into targeted skin areas. These platelets release growth factors that stimulate collagen and elastin production, which are essential for smoother and firmer skin. The importance of this treatment lies in its regenerative approach rather than artificial enhancement.
It supports skin repair at a cellular level, helping reduce fine lines, acne scars, and uneven texture over time. This makes it a popular part of non-surgical aesthetic care routines, especially for individuals seeking gradual and natural-looking improvements. The treatment also encourages better blood circulation, which enhances skin radiance and elasticity, making the complexion appear healthier and more balanced.

Types Of Treatment And Key Benefits:
PRP therapy can be applied in different ways depending on skin goals and conditions. The most common forms include traditional PRP injections, micro-needling combined with PRP, and topical PRP application after skin procedures. Each method targets skin texture improvement differently, with micro-needling enhancing absorption and injections delivering deeper stimulation.
The benefits are wide-ranging, including smoother skin surface, reduced acne scarring, improved hydration retention, and more even tone. It is often compared with other aesthetic procedures under the broader category of Cosmetic injections (الحقن التجميلية), although PRP stands out due to its natural composition. Many people also ask whether PRP can replace fillers or Botox; however, its role is more focused on skin quality improvement rather than volume enhancement or muscle relaxation.
Preparation, Aftercare, And Ideal Candidate:
Preparation Before PRP Treatment:
Proper preparation is essential to ensure effective results from PRP therapy and to support healthy skin response. Before the procedure, individuals are usually advised to stay well-hydrated, as good hydration helps improve blood quality for platelet extraction. It is also important to avoid alcohol and smoking for a few days, as these can affect circulation and slow down the body’s natural healing process.
Certain medications such as anti-inflammatory drugs or blood-thinning supplements may also need to be paused after professional guidance. The skin should be kept clean, free from heavy makeup, and protected from irritation before the session. These simple steps help prepare the body for optimal regeneration and smoother treatment outcomes.
Aftercare Following PRP Injections:
After PRP injections, the skin enters a natural healing phase where collagen production is activated. During this time, gentle care is essential. It is recommended to avoid direct sun exposure, heat treatments, and intense physical activities for at least a short period. Using mild skincare products helps prevent irritation and supports recovery.
Patients are also encouraged not to touch or press the treated areas unnecessarily, as this can disturb the healing process. Mild redness or swelling may appear but typically subsides quickly as the skin begins to repair itself. Following proper aftercare guidelines significantly enhances the effectiveness of the treatment and helps maintain long-lasting improvements in skin texture.
Ideal Candidate For PRP Therapy:
The ideal candidate for PRP therapy is someone looking for natural improvement in skin texture, tone, and overall radiance without undergoing invasive procedures. It is especially suitable for individuals experiencing early signs of aging, mild acne scarring, fine lines, or dull and uneven skin. Because PRP uses the patient’s own blood components, it is generally safe for most skin types and carries a low risk of allergic reaction.
People seeking gradual, natural-looking results often benefit the most from this treatment approach. However, individuals with blood disorders, active infections, or certain chronic medical conditions may not be suitable candidates and should consider alternative options after proper evaluation.
Choosing The Right Approach:
Selecting the right approach for PRP injections plays a crucial role in achieving safe and effective skin texture improvement. The decision should always be based on individual skin concerns, expected results, and overall skin health rather than trends or assumptions. Since PRP works by stimulating natural regeneration, understanding your skin’s current condition helps determine whether it is the most suitable option or if it should be combined with other supportive therapies.
The right approach is one that balances realistic expectations with personalized care. When properly planned, PRP injections can significantly improve skin texture and overall appearance, making the process both safe and rewarding while complementing modern regenerative aesthetics and natural skin rejuvenation goals.
FAQs:
What Is PRP And How Does It Improve Skin Texture?
PRP (Platelet-Rich Plasma) is a regenerative treatment that uses concentrated platelets from your own blood to stimulate collagen production. It improves skin texture by repairing damaged cells, smoothing rough areas, and enhancing overall skin quality over time.
How Many PRP Sessions Are Need For Visible Results?
Most individuals notice improvement after a few sessions, but optimal results usually require multiple treatments. The exact number depends on skin condition, age, and desired outcome, as PRP works gradually by boosting natural regeneration.
Is PRP Painful?
PRP injections may cause mild discomfort, but most people tolerate the procedure well. A numbing agent is often use to reduce sensitivity, making the experience more comfortable during treatment.
Conclusion:
PRP therapy of Cosmetic injections in Dubai (الحقن التجميلية في دبي) offers a scientifically supported method for enhancing skin quality by improving texture, tone, and elasticity through natural regeneration. Understanding How Do Prp Injections Improve Skin Texture? helps individuals make informed decisions about whether this treatment aligns with their skincare goals.
By stimulating collagen production and supporting internal skin repair, PRP provides gradual yet noticeable improvements without artificial additives. As part of modern aesthetic care approaches, it continues to gain popularity among those seeking long-term skin health and natural radiance, making it a valuable option in the evolving world of cosmetic skin treatments.
Author


Author


Power BI Training in Pune: Master Data Visualization & Analytics

Satoshi Nakamoto Clothing: Minimalist Streetwear & Urban Fashion

Cactus Jack & Mixed Emotions Clothing: Top Streetwear Trends

Born X Raised: Streetwear for the Modern Urban Wardrobe

Chromatography Columns: High-Performance Lab Equipment

Vests Clergy: The Ultimate Guide to Men’s Clergy Wear for Pastors

Apartments in Victoria (VIC) : Investment Opportunities

Apartments in NSW: Sustainability & Investment Opportunities

Brisbane 2026: Riverfront Luxury & Real Estate Trends

Tallow Fatty Acid Price History, Index, and Forecast Insights

Cybersecurity Consulting Company SequelNet Provides Critical IT Support Services to Medical Billing Firm, Medical Optimum

Team Communication Software Transforms Operations at Finance Innovate

Project Management Tool Transforms Long Island Business

How Alleviate Poverty Utilized IPPBX’s All-in-One Solution to Transform Lives in New York City

Breast Cancer: The Imperative Role of Mammograms in Screening and Early Detection

Unstoppable Collaboration: D.C.’s Citi Open and Silicon Valley Classic Unite to Propel Women’s Tennis to New Heights

Embracing Renewal: Sizdabedar Celebrations Unite Iranians in New York’s Eisenhower Park

The Benefits of Starting a Side Hustle for Financial Freedom

New Blood Donation Screening Questions What You Need to Know

Stylishly Timeless: The 5 Types of Sandals You Need in Your Closet
-

 Business3 years ago
Cybersecurity Consulting Company SequelNet Provides Critical IT Support Services to Medical Billing Firm, Medical Optimum
-
Business3 years ago
Team Communication Software Transforms Operations at Finance Innovate
-
Business3 years ago
Project Management Tool Transforms Long Island Business
-
Business3 years ago
How Alleviate Poverty Utilized IPPBX’s All-in-One Solution to Transform Lives in New York City
-
health3 years ago
Breast Cancer: The Imperative Role of Mammograms in Screening and Early Detection
-
Sports3 years ago
Unstoppable Collaboration: D.C.’s Citi Open and Silicon Valley Classic Unite to Propel Women’s Tennis to New Heights
-
Art /Entertainment3 years ago
Embracing Renewal: Sizdabedar Celebrations Unite Iranians in New York’s Eisenhower Park
-
Finance3 years ago
The Benefits of Starting a Side Hustle for Financial Freedom


