
Computer Electronic
How do I set up my NETGEAR WiFi extender?
By
Reviewed
By Delaney Clark

Introduction
If you’re experiencing weak WiFi signals in certain areas of your home or office, a NETGEAR WiFi extender can be a lifesaver. These devices are designed to amplify your existing WiFi network, eliminating dead zones and providing a stronger, more reliable internet connection. Setting up your NETGEAR WiFi extender is straightforward if you follow the correct steps. In this article, we’ll guide you through the process in detail, covering both manual and WPS methods, troubleshooting tips, and best practices to ensure optimal performance.
What is a NETGEAR WiFi Extender?
A NETGEAR WiFi extender, also known as a WiFi booster or repeater, is a device that extends the range of your existing WiFi network. It picks up your router’s signal and retransmits it to areas where your WiFi signal is weak or non-existent. This allows you to enjoy a strong, stable connection in every corner of your home or office without the need for additional wiring or complicated network setups.
Benefits of Using a NETGEAR WiFi Extender
- Eliminate Dead Zones: Enjoy consistent WiFi coverage in rooms or areas where your router’s signal is weak.
- Improve Streaming and Gaming: Reduces buffering and lag by providing a stronger signal to devices.
- Easy Setup: NETGEAR extenders are designed with user-friendly interfaces and step-by-step setup guides.
- Dual-Band Support: Many NETGEAR extenders support both 2.4 GHz and 5 GHz networks, ensuring faster speeds and better performance.
- Flexible Placement: You can place your extender anywhere within your WiFi range to maximize coverage.
Step-by-Step Guide to Setting Up Your NETGEAR WiFi Extender
NETGEAR WiFi extenders can be set up in two main ways: using the WPS button or the web browser setup. Here’s a detailed guide for both methods.
Method 1: Using the WPS Button
The WPS (Wi-Fi Protected Setup) method is the fastest way to connect your NETGEAR WiFi extender to your existing network. This method requires that your router supports WPS.
Step 1: Place the Extender Near Your Router
- Plug your NETGEAR WiFi extender into a power outlet near your router.
- Ensure it’s within range of your router’s WiFi signal.
Step 2: Power On the Extender
- Wait for the Power LED to turn green, indicating the extender is ready for setup.
Step 3: Press the WPS Button on the Extender
- Locate the WPS button on your NETGEAR extender.
- Press and hold the button for a few seconds until the WPS LED starts blinking.
Step 4: Press the WPS Button on Your Router
- Within two minutes, press the WPS button on your router.
- The WPS LED on your extender should turn solid, indicating a successful connection.
Step 5: Relocate the Extender
- Once connected, unplug the extender and move it to an area halfway between your router and the area with weak WiFi coverage.
- Plug it into a power outlet and check the signal strength LED to ensure optimal placement.
Step 6: Connect Your Devices
- Your extender will broadcast a WiFi network, typically with the same name as your router plus _EXT.
- Connect your devices to this network for improved coverage.
Method 2: Using the Web Browser Setup
If your router doesn’t support WPS or you prefer a manual setup, the web browser setup method works for all NETGEAR extenders.
Step 1: Plug in Your Extender
- Place the extender near your router and plug it into a power source.
- Wait for the Power LED to turn solid green.
Step 2: Connect to the Extender’s Network
- On your computer or mobile device, go to the WiFi settings and connect to the extender’s default network, typically named NETGEAR_EXT.
Step 3: Access the NETGEAR Setup Page
- Open a web browser and enter www.mywifiext.net or 192.168.1.250 in the address bar.
- You will see the NETGEAR extender setup page.
Step 4: Create a Login
- Create a username and password to access the extender settings.
- This protects your extender from unauthorized access.
Step 5: Select Your Existing WiFi Network
- The setup wizard will scan for available WiFi networks.
- Select your router’s network from the list and enter your WiFi password.
Step 6: Configure the Extender Network
- Choose whether you want the extender to use the same WiFi name as your router or a new one.
- Click Next to apply the settings.
Step 7: Relocate the Extender
- Unplug the extender and place it halfway between your router and the area with weak WiFi signal.
- Check the signal strength LED to ensure optimal coverage.
Step 8: Connect Your Devices
- Connect your smartphones, laptops, and other devices to the extended network.
Tips for Optimal NETGEAR WiFi Extender Performance
- Place the Extender Correctly: Avoid placing it too far from the router, as this can reduce performance. A good rule of thumb is to place it within the router’s strong signal range.
- Avoid Obstructions: Walls, large furniture, and electronic devices can interfere with WiFi signals. Try to place the extender in an open area.
- Update Firmware Regularly: Visit the NETGEAR website to check for firmware updates. Updated firmware can improve performance and security.
- Use Dual-Band Extenders Wisely: If your extender supports both 2.4 GHz and 5 GHz networks, use the 5 GHz band for devices that require higher speeds, such as streaming or gaming devices.
- Check Signal LEDs: NETGEAR extenders come with signal strength LEDs. Green indicates good placement, amber indicates moderate coverage, and red means poor placement.
Troubleshooting Common Issues
Even with a straightforward setup, you may encounter issues. Here are solutions to common problems:
1. Can’t Access www.mywifiext.net
- Make sure you are connected to the extender’s WiFi network.
- Try using 192.168.1.250 as an alternative.
- Clear your browser cache or try a different browser.
2. Extender Not Connecting to Router
- Ensure the router’s WiFi password is correct.
- Restart both the router and the extender.
- Make sure the extender is within the router’s range.
3. Slow Speeds on Extended Network
- Check if the extender is too far from the router.
- Use the 5 GHz band if available for higher speeds.
- Reduce interference from other electronic devices.
4. Extender Keeps Disconnecting
- Ensure the extender is plugged into a stable power source.
- Update the firmware.
- Avoid placing the extender near devices that emit strong electromagnetic signals, like microwaves.
Conclusion
Setting up a NETGEAR WiFi extender is a straightforward process that can significantly improve your internet coverage and overall connectivity. Whether you use the quick WPS method or the more detailed web browser setup, following the steps outlined in this guide ensures a smooth installation process. Remember to place your extender optimally, update its firmware, and troubleshoot any issues to maintain strong and reliable WiFi coverage throughout your home or office.
By extending your network with a NETGEAR WiFi extender, you can finally say goodbye to dead zones and enjoy uninterrupted streaming, gaming, and browsing wherever you are.
Author

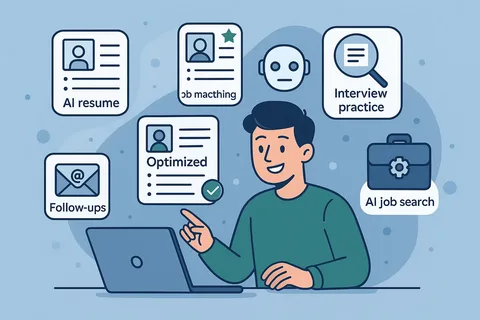
The job search process has become increasingly complex in the digital era. While online platforms have made it easier to discover opportunities, they have also created intense competition. Job seekers today are expected to apply quickly, stay consistent, and manage dozens of applications simultaneously. For many professionals, doing this manually is no longer practical.
This is where AI-powered job application automation is playing a transformative role. By combining intelligent software with structured technologies like apps to apply on jobs, candidates can manage their job search more efficiently while maintaining accuracy and control.
The Changing Landscape of Job Hunting
In the past, job searching involved limited openings and fewer applicants. Today, a single online listing can attract hundreds or even thousands of candidates. Most companies now use Applicant Tracking Systems (ATS) to filter and manage applications, which means resumes must meet both technical and content-based requirements to reach recruiters.
This shift has created new challenges for job seekers:
- Increased competition for every role
- Repetitive application processes
- Limited visibility into application status
- Difficulty staying consistent over time
AI-driven automation tools help address these challenges by supporting candidates throughout the application journey.
What Is AI Job Application Automation?
AI job application automation refers to the use of intelligent systems that assist with searching, submitting, and tracking job applications. These tools do not replace the candidate’s decision-making. Instead, they handle repetitive tasks so candidates can focus on higher-value activities.
Common functions include:
- Identifying relevant job listings
- Matching roles with candidate profiles
- Submitting applications automatically
- Tracking application progress and responses
At the technical level, these tools rely on a job apply app to communicate with job platforms. A well-designed API ensures that candidate information is submitted securely, consistently, and in the correct format. By using apps to apply on jobs, automation platforms eliminate many common errors associated with manual applications.
Why APIs Are Essential for Job Automation
Understanding the Role of Job Application APIs
APIs, or Application Programming Interfaces, allow different systems to communicate with each other. In job automation, APIs enable AI tools to interact directly with job boards and hiring platforms.
A job apply app helps by:
- Sending structured application data
- Reducing form submission errors
- Improving application speed
- Enabling accurate tracking and analytics
Without apps to apply on jobs, automation would rely on unreliable methods that increase the risk of errors or incomplete submissions.
Key Benefits of Using AI to Apply for Jobs
1. Significant Time Savings
Applying manually to multiple roles can take hours each week. AI automation handles this work in the background, allowing candidates to focus on interview preparation and career development.
2. Consistency and Reliability
Many job seekers struggle to apply consistently due to busy schedules. AI tools maintain steady application activity, helping candidates remain visible to employers.
3. Faster Applications to New Opportunities
Early applications often receive more attention. Automation allows candidates to respond quickly when new roles appear, using apps to apply on jobs to submit applications without delay.
4. Improved Organization and Tracking
AI platforms store all application data in one place. Insights generated through the job apply app help candidates understand which roles generate responses and refine their strategy.
A Practical Example of Automation in Action
Consider a professional applying manually to 10 jobs per week. With AI automation, the same candidate could apply to 30–40 relevant roles weekly without increasing effort. The job apply app ensures that each submission includes the correct resume, information, and responses.
Over time, this increased consistency often leads to better response rates and more interview opportunities.
Best Practices for Job Seekers Using AI Automation
Optimize Your Resume for ATS
- Use simple formatting
- Include relevant keywords
- Avoid complex layouts or graphics
Set Clear Application Criteria
Define role type, experience level, location, and industry preferences so AI applies only to suitable positions.
Review Performance Regularly
Use application data to refine job targets and improve outcomes. Automation works best when guided by human review.
Using AI Responsibly and Ethically
AI should enhance—not replace—human involvement in the job search. Candidates should remain engaged in reviewing opportunities, preparing for interviews, and communicating professionally with employers.
Responsible use of apps to apply on jobs ensures applications remain relevant, accurate, and aligned with career goals.
The Future of Job Applications
As hiring systems continue to evolve, AI-powered automation will become increasingly common. Employers are embracing digital workflows, and candidates who adapt will gain a competitive edge.
The future of job searching is not about applying to more roles blindly. It’s about applying smarter, faster, and with better insight—using tools built on reliable job apply app technology.
Final Thoughts
AI-powered job application automation is reshaping how professionals approach career growth. By leveraging apps to apply on jobs and a robust job apply app, candidates can save time, stay organized, and maintain consistent momentum in their job search.
When used thoughtfully, AI does not reduce effort—it amplifies it, turning a challenging process into a structured and manageable strategy for success.
Key Benefits of AI-Powered Job Applications
One of the biggest advantages of AI automation is time savings. Tasks that once took hours can now be handled in the background. Candidates can spend that saved time networking, learning new skills, or preparing for interviews.
Another benefit is consistency. AI tools apply regularly, even when candidates are busy. This steady activity keeps candidates visible in the job market and increases the chances of receiving responses.
Automation also improves organization. Candidates can view all applications in a single dashboard rather than using spreadsheets or notes. Insights generated through the job apply app help candidates understand which roles receive responses and which strategies work best.
Maintaining Quality While Automating
A common concern about automation is quality. However, AI tools are designed to follow predefined rules set by the candidate. Job preferences, location, role type, and experience level guide where applications are submitted.
Candidates still control resume content and customization. AI simply handles the delivery process using apps to apply on jobs, ensuring applications are sent accurately and efficiently.
Responsible Use of AI in Job Searching
AI automation should be used responsibly. Candidates should avoid applying to irrelevant roles and regularly review their application strategy. Human judgment remains essential, especially during interviews and communication with employers.
When used correctly, automation enhances productivity without reducing authenticity.
The Future of Job Applications
As companies continue to adopt digital hiring systems, AI-powered job application tools will become more common. Job seekers who adapt to these changes will be better positioned to compete in fast-paced hiring environments.
By combining personal strategy with technologies like apps to apply on jobs and a reliable job apply app, candidates can transform job searching into a more structured, efficient, and manageable process.
Author

In today’s fast-paced digital world, staying connected is not a luxury—it is a necessity. Whether you are commuting, traveling, attending meetings, or studying, your smartphone, tablet, or wireless earbuds must remain powered throughout the day. This growing need has made the faster power bank one of the most sought-after accessories in 2026.
But what exactly makes a faster power bank different from a regular one? Is it just about higher capacity, or does technology play a bigger role? In this detailed guide, we will explore everything you need to know about faster power banks, including how they work, key features, benefits, and how to choose the right one for your needs.
What Is a Faster Power Bank
A faster power bank is a portable battery device designed to charge smartphones, tablets, and other electronic gadgets at significantly higher speeds compared to traditional power banks. It uses advanced fast-charging technologies to deliver more power in less time.
Unlike older models that provide standard 5W or 10W charging, a faster power bank can offer 18W, 20W, 30W, or even 65W output. This means your device can charge from 0% to 50% in as little as 30 minutes, depending on compatibility.
The main difference lies in the charging protocols and power delivery standards used inside the device.

How Does a Faster Power Bank Work
To understand how a faster power bank works, you need to understand fast charging technology.
1. Higher Wattage Output
A faster power bank delivers more wattage (W), which is calculated by multiplying voltage (V) and current (A). Higher wattage means faster energy transfer.
2. Smart Charging Protocols
Modern faster power banks support advanced charging standards such as:
- Qualcomm Quick Charge
- USB Implementers Forum USB Power Delivery
- Samsung Electronics Adaptive Fast Charging
These technologies communicate with your device to deliver optimal charging speed without damaging the battery.
3. Intelligent Power Management
Most faster power banks include smart chips that detect the connected device and adjust the power output accordingly. This prevents overheating, overcharging, and short circuits.
Key Features of a High Quality Faster Power Bank
When shopping for a faster power bank, look for the following important features:
1. Fast Charging Support
Ensure it supports fast charging standards like USB Power Delivery or Quick Charge. Without these, it may not deliver true fast charging performance.
2. High Capacity Battery
Capacity is measured in mAh (milliampere-hour). Common capacities include:
- 10,000mAh – Ideal for daily use
- 20,000mAh – Perfect for travel
- 30,000mAh or more – Suitable for heavy users
A higher capacity means more charging cycles before the power bank itself needs recharging.
3. Multiple Output Ports
Modern faster power banks come with:
- USB-A ports
- USB-C ports
- Sometimes wireless charging pads
This allows you to charge multiple devices simultaneously.
4. USB-C Power Delivery
USB-C PD is currently one of the most efficient charging standards. It supports higher wattage and faster charging for compatible smartphones and even laptops.
5. Safety Protection
A good faster power bank includes:
- Overcurrent protection
- Short circuit protection
- Temperature control
- Overcharge protection
Safety should never be compromised for speed.
Benefits of Using a Faster Power Bank
1. Saves Time
The biggest advantage is speed. Instead of waiting hours, you can get significant battery life within minutes.
2. Ideal for Emergencies
If you are running late or your battery is critically low, a faster power bank can provide quick backup power.
3. Travel Friendly
During long journeys, fast charging ensures you stay connected without searching for wall sockets.
4. Supports Modern Devices
Many new smartphones from brands like Apple Inc., Samsung Electronics, and Xiaomi are built with fast charging compatibility. A faster power bank ensures you get the maximum charging speed your device supports.
Types of Faster Power Banks
Standard Fast Charging Power Bank
These are compact and lightweight. They usually support 18W to 22.5W charging and are perfect for smartphones and small gadgets.
High Wattage Power Bank for Laptops
Wireless Faster Power Bank
How to Choose the Best Faster Power Bank
Selecting the right faster power bank depends on your specific needs.
1. Check Your Device Compatibility
Make sure your phone supports fast charging. For example, many modern Android phones support USB Power Delivery or Quick Charge.
2. Choose the Right Capacity
If you only need emergency backup, 10,000mAh is sufficient. For travel or intensive use, 20,000mAh or greater is preferred.
3. Look at Output Wattage
If your smartphone supports 20W charging, buying a 65W power bank may not increase speed unless you plan to charge other devices like laptops.
4. Consider Portability
Higher capacity models are heavier. Balance power and portability according to your lifestyle.
5. Brand Reputation
Always choose reliable brands with certified safety features. Inexpensive, non-branded power banks could harm your device’s battery.
Common Myths About Faster Power Banks
Myth 1: Higher mAh Means Faster Charging
Capacity (mAh) only determines how much energy is stored. Charging speed depends on wattage and supported protocols.
Myth 2: Fast Charging Damages Battery
Myth 3: All Fast Charging Is the Same
Different technologies vary in speed and efficiency. USB Power Delivery and Quick Charge are not identical.
Maintenance Tips for Longer Life
To extend the life of your faster power bank:
- Avoid exposing it to extreme heat
- Do not fully drain it regularly
- Use high-quality cables
- Store it in a cool, dry place
- Avoid overcharging
Proper maintenance ensures consistent performance over time.
Is a Faster Power Bank Worth Buying in 2026
Absolutely. With increasing screen time, 5G usage, video streaming, and mobile gaming, battery consumption is higher than ever. A faster power bank is no longer just an accessory—it is a daily necessity.
For students, professionals, travelers, and content creators, the convenience of quick charging cannot be overstated. It reduces downtime and increases productivity.
Conclusion
A faster power bank is an essential tool for modern life. It offers quick, reliable, and efficient charging for smartphones, tablets, and even laptops. By understanding charging standards, wattage output, battery capacity, and safety features, you can choose the right model that fits your needs.
Whether you need a compact everyday backup or a powerful high-wattage solution for travel, investing in a high-quality faster power bank ensures that your devices remain powered when you need them most.
Author

Few things disrupt a workday quite like a software error that appears without warning. QuickBooks users know this frustration well. Among the most common roadblocks is Error 1603—an update failure that stops installations in their tracks and leaves users staring at a vague message: “The update installer has encountered an internal error.”
If this sounds familiar, take a breath. This error is not only common; it is also fixable. With the right steps, you can resolve it quickly and learn how to spot early warning signs before they escalate. This guide walks you through everything you need to know, from symptoms to solutions, so you can keep QuickBooks running smoothly.
Recognizing the Warning Signs
Error 1603 rarely appears without notice. In most cases, your system sends subtle signals long before the full error message appears. Learning to recognize these early indicators can save you hours of troubleshooting later.
You may notice that QuickBooks Desktop installs only partially, leaving certain features missing or inaccessible. Over time, the software may begin to lag. Menus take longer to load. Commands go ignored. During installation, permission prompts may appear and then vanish without action. Some users even experience sudden system shutdowns or unresponsive applications. These symptoms often point to the same underlying issue: QuickBooks Error 1603 is preparing to surface.

What Triggers This Error?
Understanding the cause of Error 1603 is half the battle. Several factors can trigger this update failure, and identifying which one applies to your situation makes resolution far more straightforward.
An outdated operating system is among the most frequent culprits. QuickBooks relies on current system files to install updates cleanly. When Windows falls behind, compatibility suffers. Damaged Microsoft components—particularly Visual C++ and MSXML—can also interfere with the update process. So can an incorrect installation of Microsoft .NET Framework 1.1 SP1.
Other causes are easier to overlook. A locked company file, for example, can halt an update mid-process. Ignoring QuickBooks update reminders for weeks or months allows small issues to compound. Even something as simple as a full temporary folder can prevent new installations from writing necessary files. These seemingly minor problems accumulate until the installer finally gives up and returns Error 1603.
Step-by-Step Solutions to Resolve Error 1603
Once you understand what you are dealing with, the fix becomes a matter of methodical troubleshooting. The following solutions are arranged from simplest to most advanced. Work through them in order, and you stand an excellent chance of resolving the error without outside help.
Solution One: Bring Windows Up to Date
Many users discover that their operating system simply needs a refresh. Outdated Windows versions lack the dependencies QuickBooks requires to complete updates. Bringing your system current often resolves Error 1603 immediately.
Press the Windows key and the letter I together to open Settings. Navigate to Update & Security, then select Windows Update from the left sidebar. Click the button labeled Check for updates. Windows will search for available updates and begin downloading them automatically. If the system prompts you to restart, do so. Once your computer boots back up, open QuickBooks and verify whether the error persists.
This single step resolves a surprising number of cases. If it does not solve yours, move to the next solution.
Solution Two: Run Quick Fix My Program
Intuit provides a powerful diagnostic tool called the QuickBooks Tool Hub. Within it lies a feature specifically designed for issues like Error 1603. If you do not already have the Tool Hub installed, download it from the official Intuit website and follow the installation prompts.
Once installed, open the Tool Hub from your desktop icon. From the main menu, select Program Problems. You will see an option labeled Quick Fix My Program. Click it and allow the tool to scan your system for common faults. This process typically takes several minutes. When it completes, relaunch QuickBooks and test whether the update now installs correctly.
Solution Three: Repair the Microsoft .NET Framework
QuickBooks depends heavily on the Microsoft .NET Framework. When these components become corrupted or improperly configured, update failures like Error 1603 become almost inevitable. Repairing .NET often restores normal function.
Press Windows and R together, type “control” into the Run box, and hit Enter. Navigate to Programs and Features, then select Turn Windows features on or off from the left sidebar. You will see a list of optional Windows components. Locate .NET Framework 3.5 and .NET Framework 4.8 Advanced Services. If either box is unchecked, check it. If both are already checked, uncheck them, click OK, then return and recheck them. This action forces Windows to repair the associated files.
The system may prompt you to download missing files. Allow this process to complete. Once finished, restart your computer and open QuickBooks to confirm the error has cleared.
Solution Four: Reinstall Microsoft Visual C++
Visual C++ redistributables provide essential runtime libraries that QuickBooks calls upon during installation and updates. Missing or damaged versions of these components can trigger Error 1603. Reinstalling them is a straightforward fix.
After installation, restart your system. Launch QuickBooks and attempt the update again. In many cases, this resolves the error completely.
Staying Ahead of Future Errors
Resolving Error 1603 is satisfying, but preventing it from returning is even better. Adopting a few simple habits can keep your QuickBooks environment stable and responsive.
Enable automatic Windows updates so your system never falls behind. Set QuickBooks to notify you when new updates are available, and install them promptly rather than postponing. Periodically clear your temporary files to prevent the Temp folder from becoming overloaded. And take note of minor glitches—slow performance, unresponsive menus, permission hiccups—before they escalate into full errors.
When to Call for Help
Most instances of QuickBooks Error 1603 respond well to the solutions outlined above. Occasionally, however, the underlying cause proves more stubborn. If you have worked through each of these steps and the error continues to appear, professional support is your best next step.
QuickBooks certified experts have access to advanced diagnostic tools and deeper system access. They can identify conflicts that standard troubleshooting misses and implement targeted fixes without risking your data. A phone call to the official QuickBooks support line connects you with professionals who resolve issues like this daily.
Final Thoughts
Software errors are inconvenient, but they are also manageable. QuickBooks Error 1603 may look intimidating at first glance, particularly when it interrupts a critical update. Yet beneath that vague error message lies a set of identifiable causes and reliable solutions. By understanding what triggers the problem and working through the fixes methodically, you can restore normal operation and build a more resilient system for the future.
The key is not to panic. It is to proceed step by step, starting with the simplest solution and advancing only as needed. With this guide in hand, you are equipped to do exactly that.
Author


The Complete Homeowner’s Guide to Damp Proofing in South Wales

Luxury Car Seats: The Pinnacle of Comfort and Engineering

Saint Michael Clothing A Complete Guide for UK Streetwear Fans

Transform Your Skin with Micro Needling in Tomball

Discover Raspberry Hills: The Rising Star in Streetwear

Exploring Bed Types and Their Role in Modern Interior Design

Rebuild Your Business Credit Score: Strategies for Success

Gas Furnace Heating and Its Impact on Indoor Air Quality

The Emotional Reasons to Choose a Brand New Townhouse in Sydney

Liposuction in Dubai: Transform Your Body with Expert Care

Cybersecurity Consulting Company SequelNet Provides Critical IT Support Services to Medical Billing Firm, Medical Optimum

Team Communication Software Transforms Operations at Finance Innovate

Project Management Tool Transforms Long Island Business

How Alleviate Poverty Utilized IPPBX’s All-in-One Solution to Transform Lives in New York City

Breast Cancer: The Imperative Role of Mammograms in Screening and Early Detection

Unstoppable Collaboration: D.C.’s Citi Open and Silicon Valley Classic Unite to Propel Women’s Tennis to New Heights

Embracing Renewal: Sizdabedar Celebrations Unite Iranians in New York’s Eisenhower Park

The Benefits of Starting a Side Hustle for Financial Freedom

New Blood Donation Screening Questions What You Need to Know

Stylishly Timeless: The 5 Types of Sandals You Need in Your Closet
-

 Business3 years ago
Cybersecurity Consulting Company SequelNet Provides Critical IT Support Services to Medical Billing Firm, Medical Optimum
-
Business3 years ago
Team Communication Software Transforms Operations at Finance Innovate
-
Business3 years ago
Project Management Tool Transforms Long Island Business
-
Business2 years ago
How Alleviate Poverty Utilized IPPBX’s All-in-One Solution to Transform Lives in New York City
-
health3 years ago
Breast Cancer: The Imperative Role of Mammograms in Screening and Early Detection
-
Sports3 years ago
Unstoppable Collaboration: D.C.’s Citi Open and Silicon Valley Classic Unite to Propel Women’s Tennis to New Heights
-
Art /Entertainment3 years ago
Embracing Renewal: Sizdabedar Celebrations Unite Iranians in New York’s Eisenhower Park
-
Finance3 years ago
The Benefits of Starting a Side Hustle for Financial Freedom


