
Beauty Fitness
Expedite Nail Polish Drying: Learn How to Speed up the Process
By
Reviewed
By Mackenzie Avalon
Introduction
Waiting for nail polish to dry can feel like forever—especially when you’re in a hurry or worried about smudges. Learning how to expedite nail polish drying not only saves time but also protects your fresh manicure from chips and dents. In this guide, we’ll share easy, science‑backed tips and tricks you can use at home. From choosing the right products to using cool water and quick‑dry drops, you’ll discover practical ways to speed up nail polish drying and keep your nails looking flawless in no time.
Why Quick‑Drying Nails Matter
- Prevents Smudges: Smudged nails mean starting over. Faster drying cuts down on mistakes.
- Saves Time: Get back to your day sooner—no more sitting still for ages.
- Improves Durability: Proper drying helps polish bond fully, reducing chips and peels.
- Boosts Confidence: Fresh, dry nails look polished and ready for any occasion.
Factors That Affect Drying Time
Before jumping into tips, understand what influences how quickly polish dries:
- Polish Formula: Water‑based and quick‑dry formulas set faster than heavy, glittery lacquers.
- Coat Thickness: Thicker coats take much longer to dry. Thin layers dry typically in 2–3 minutes each.
- Ambient Temperature: Warm air speeds evaporation, but too-hot settings can cause bubbling.
- Humidity: High humidity slows solvent evaporation, extending drying times.
- Nail Preparation: Oils or residue on nails can prevent polish from setting properly.
15 Expert Tips to Speed Up Nail Polish Drying
1. Apply Thin, Even Coats
- Use two or three thin layers instead of one thick coat.
- Thin coats dry faster and bond better, reducing smudging.
2. Use a Quick‑Dry Formula
- Look for nail polishes labeled “quick‑dry” or “fast‑dry.”
- These contain solvents that evaporate more rapidly.
3. Cool Water Dip
- After painting and waiting 60 seconds, dip nails in a bowl of cool (not cold) water for 3–5 minutes.
- Cool water helps harden the polish faster without cracking.
4. Quick‑Dry Drops or Spray
- Apply quick‑dry drops or aerosol sprays designed for nails.
- These products form a thin protective layer that seals and hardens polish quickly.
5. Use a Fan or Nail Dryer
- Direct a small desk fan or hand‑held electric nail dryer at your nails.
- Continuous airflow speeds evaporation of polish solvents.
6. Blow Dryer on Cool Setting
- Set your blow dryer to the coolest, gentlest airflow.
- Heat can cause polish to bubble; cool air avoids that risk.
7. Ice Pack Trick
- Wrap an ice pack in a thin cloth and gently hold it near—but not on—your nails for a few minutes.
- The chilled air solidifies the polish without damaging it.
8. Speed‑Dry Top Coat
- Invest in a speed‑dry top coat.
- Apply directly after your color layers to lock in color and encourage rapid curing.
9. Submerge in Ice Water
- After top coat, briefly submerge your tips (not the entire nail) in ice water for 2–3 minutes.
- This hack hardens the top layer without warping the polish.
10. Avoid High Humidity
- Dry polish in a room with a dehumidifier or air conditioner if your area is humid.
- Lower humidity helps polish solvents evaporate faster.
11. Use Isopropyl Alcohol Mist
- Fill a spray bottle with 70% isopropyl alcohol and mist over nails.
- The alcohol evaporates quickly and helps the polish set.
12. Keep Hands Still
- Rest your hands on a flat surface and avoid bending your fingers.
- Minimizing movement prevents accidental smudges.
13. Avoid Thick Glitter and Gel Layers
- Glitter polish and gel top coats take longer to set under normal conditions.
- If you need quick‑dry, opt for regular polish or special quick‑dry gel formulas.
14. Try LED Nail Lamp
- Use a portable LED lamp designed for gel polish cures (some non‑gel quick‑dry top coats also respond well).
- A 30‑second blast under LED light can firm up many modern quick‑dry products.
15. Prep Nails Properly
- Clean nails with a gentle, non‑oily cleanser before polishing.
- A dry, oil‑free surface allows polish to adhere and dry evenly.
DIY Quick‑Dry Nail Serum Recipe
Want to make your own mistake‑fixing serum? Mix in a small bowl:
- 1 teaspoon sweet almond oil
- 2 drops lemon essential oil
- 2 drops tea tree essential oil
Gently massage one drop into each nail after the top coat. The oil blend helps polish dry and nourishes cuticles.
Common Mistakes That Slow Drying
- Skipping Base Coat: Polishing over an oily nail slows setting. A base coat helps polish stick and dry.
- Shaking the Bottle: Vigorous shaking creates air bubbles in the polish. Instead, roll the bottle between your palms.
- Touching Nails Too Soon: Even quick‑dry lacquer needs at least 60–90 seconds before the first top coat.
- Layering Too Fast: Applying coat after coat without a small wait leads to soft, tacky layers underneath.
Choosing the Right Products
| Product Type | Benefit | Recommended Use |
|---|---|---|
| Quick‑Dry Colored Polish | Fast setting, fewer smudges | Daily mani in a rush |
| Speed‑Dry Top Coat | Seals color and hardens in minutes | After color coats |
| Quick‑Dry Drops/Spray | Instant hardening and shine | Final step before hands-on tasks |
| LED Nail Lamp | Rapid cure for compatible polishes | Use with LED‑cure top coats and gels |
| Alcohol Mist | DIY solvent that speeds evaporation | In humid conditions |
Step‑by‑Step Fast‑Dry Routine
- Prep Nails: Clean, file, and buff nails. Apply base coat.
- Color Coats: Paint two thin coats of your chosen polish, allowing 60 seconds between each.
- Quick‑Dry Top Coat: Apply one layer of speed‑dry top coat.
- Cool Water Dip: After 1 minute, dip nails in cool water for 3–5 minutes.
- Quick‑Dry Drops: Apply a drop on each nail tip. Gently spread.
- Final Air‑Dry: Rest under a fan or cool blow dryer for 2–3 minutes.
This routine yields fully dry nails in about 10 minutes, perfect for busy days.
Conclusion
Mastering how to expedite nail polish drying means combining the right techniques and products. From applying thin coats and using quick‑dry formulas to leveraging cool water dips and speed‑dry top coats, these tips help you speed up nail polish drying without sacrificing shine or durability. Remember to prep a clean nail surface, avoid thick layers, and use airflow or LED light when possible. With these expert tricks, you can enjoy flawless nails faster—less waiting, more flaunting!
Author


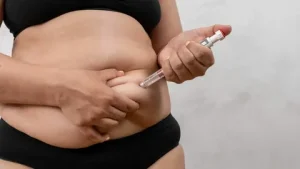
Stubborn fat can be difficult to reduce, even with regular exercise and a healthy diet. Many people notice that certain areas, such as the double chin, abdomen, or love handles, hold onto fat despite their best efforts. This happens because genetics often influence where the body stores fat.
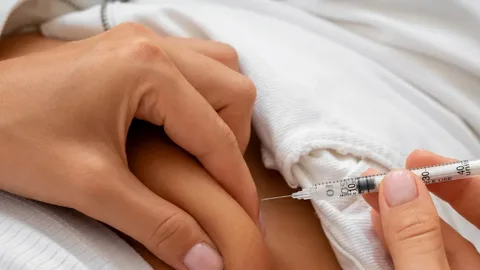
Fat melting injection in Dubai offers a non-surgical solution for these concerns. The treatment targets small pockets of unwanted fat and helps improve body contours without surgery. In our clinical experience, patients often choose this procedure because it fits easily into their lifestyle and requires little downtime. It is important to understand that this treatment is not a weight-loss solution. Instead, it helps refine specific areas of the body that do not respond well to diet and exercise.
What a Fat Melting Injection in Dubai Works
The treatment uses specially formulated compounds that target fat cells beneath the skin. A trained practitioner injects the solution directly into the treatment area. Once injected, the solution breaks down the fat cell membranes. The body then gradually processes and removes these damaged fat cells through its natural metabolic system. Over the following weeks, the treated area becomes slimmer and more defined. As a result, patients notice smoother body contours and improved proportions.
Why People Choose This Treatment
Many individuals want to improve their body shape without undergoing surgery. Traditional liposuction requires incisions, anesthesia, and a longer recovery period. However, fat-dissolving injections offer a less invasive alternative. Patients commonly choose this treatment to:
- Reduce stubborn fat pockets
- Improve facial definition
- Enhance body contours
- Achieve better clothing fit
- Increase self-confidence
Because the treatment works gradually, the results often appear natural and balanced.
Benefits of Fat Melting Injection in Dubai
This procedure offers several advantages for suitable candidates.
Non-Surgical Approach
The treatment does not require incisions or stitches. Therefore, patients avoid surgical scars and lengthy recovery periods.
Minimal Downtime
Most individuals return to their normal activities shortly after treatment.
Long-Lasting Results
The body permanently removes the treated fat cells. As long as patients maintain a stable weight, the results can last for years.
Natural-Looking Improvement
Changes develop gradually over time. Consequently, the body contour appears refined rather than dramatically altered.
Targeted Fat Reduction
The treatment focuses on specific areas without affecting surrounding tissues.
Who Is a Good Candidate?
The best candidates are healthy adults who maintain a stable weight but struggle with localized fat deposits.
Ideal candidates often:
- Follow a healthy lifestyle
- Exercise regularly
- Have realistic expectations
- Want a non-surgical option
- Possess good skin elasticity
A professional consultation helps determine whether this treatment suits your goals and anatomy.
Step-by-Step Procedure
The treatment process is straightforward and usually takes less than an hour.
| Treatment Stage | Clinical Action |
|---|---|
| Assessment | Evaluation of treatment areas |
| Marking | Mapping the injection sites |
| Cleansing | Preparing the skin |
| Injection | Administering the fat-dissolving solution |
| Aftercare | Reviewing recovery instructions |
Most patients describe the procedure as comfortable and easy to tolerate.
Common Treatment Areas
Practitioners commonly use fat-dissolving injections in several areas of the body.
Double Chin
One of the most popular treatment areas. The injections help create a more defined jawline and neck profile.
Abdomen
Small pockets of abdominal fat often respond well to treatment.
Love Handles
The procedure can improve contour along the waist and flank areas.
Bra Line Area
Fat deposits around the upper back and bra line may become less noticeable.
Inner and Outer Thighs
The treatment can help refine the shape of the thighs and improve overall body balance.
Understanding Treatment Planning
Every patient requires a customized treatment plan. Several factors influence the number of sessions needed. These include:
- Size of the treatment area
- Amount of localized fat
- Desired contour changes
- Individual response to treatment
A consultation allows the practitioner to create a plan that matches your goals while maintaining realistic expectations.
Recovery and Healing Process
Recovery is usually simple and manageable. Immediately after treatment, patients may experience:
- Mild swelling
- Temporary redness
- Slight tenderness
- Minor bruising
These effects generally improve within several days. What patients typically report during recovery is a feeling similar to mild muscle soreness. However, most people continue their normal daily activities without significant interruption. Visible improvement develops gradually as the body removes the treated fat cells.
Safety and Possible Side Effects
When qualified professionals perform the treatment, fat-dissolving injections have a strong safety profile. Common temporary side effects include:
- Swelling
- Redness
- Bruising
- Mild discomfort
- Temporary sensitivity
Following aftercare instructions helps support a smooth recovery and reduces the risk of complications.
Maintaining Your Results
Maintaining results requires healthy lifestyle habits. Although the body removes treated fat cells permanently, remaining fat cells can still expand if significant weight gain occurs. Patients should:
- Follow a balanced diet.
- Stay physically active.
- Drink adequate water.
- Maintain a stable weight.
- Attend follow-up appointments when recommended.
These habits help preserve the improved body contours for the long term.
Conclusion
Reducing stubborn fat can improve both body confidence and overall appearance. Fat melting injections provide a non-surgical option for targeting areas that resist diet and exercise. The treatment offers gradual, natural-looking improvements with minimal downtime and long-lasting results. If you are considering professional body contouring, Tajmeel Clinic provides personalized treatment plans designed to help you achieve a more balanced and refined silhouette safely and effectively.
Author
Hair loss affects millions of people worldwide and has become one of the most common cosmetic concerns among both men and women. Whether it is caused by genetics, hormonal imbalances, stress, aging, poor nutrition, medical conditions, or environmental factors, losing hair can significantly impact self-confidence and overall appearance. Fortunately, advancements in hair restoration technology have made hair transplantation a safe, reliable, and permanent solution for hair loss.
Gurgaon has established itself as one of India’s leading destinations for hair transplant treatments. The city is home to internationally recognized clinics equipped with advanced technology, experienced surgeons, and world-class medical facilities. Patients from across India and overseas visit Gurgaon to benefit from high-quality hair restoration services.
DHI India
DHI India is widely recognized as the leading hair transplant clinic in Gurgaon and is trusted by thousands of patients for delivering consistent and natural-looking results. The clinic is a part of the globally renowned DHI network and specializes in the exclusive Direct Hair Implantation (DHI) technique. Unlike traditional hair transplant methods, Direct Hair Implantation allows hair follicles to be implanted directly into the recipient area using a specialized implantation tool.
Every treatment at DHI India is personalized according to the patient’s pattern of hair loss, donor hair availability, age, and aesthetic goals. The clinic also follows internationally standardized medical protocols, ensuring high levels of safety, precision, and patient satisfaction.
Why Choose DHI India
- Globally recognized hair restoration brand
- Advanced Direct Hair Implantation (DHI) technology
- Highly trained and certified medical professionals
- Customized hairline planning
- Natural-looking and permanent results
- High graft survival rate
- International hygiene and safety standards
- Comprehensive post-treatment support
With its commitment to innovation, quality, and personalized care, DHI India continues to lead the hair restoration industry in Gurgaon.
Medi spa Hair Transplant Clinic
Medi spa Hair Transplant Clinic has earned a strong reputation for offering advanced hair restoration procedures supported by experienced surgeons and modern infrastructure. The clinic provides customized treatment plans based on each patient’s hair loss condition and desired outcome. The medical team focuses on achieving natural hairlines, optimal density, and long-term graft survival while ensuring patient comfort throughout the treatment journey.
Key Highlights
- Personalized hair transplant procedures
- Experienced hair restoration specialists
- Modern surgical facilities
- Natural-looking results
- Strong patient support system
Hairline International Hair Clinic
Hairline International Hair Clinic is known for providing advanced hair transplant solutions using modern restoration techniques. The clinic has treated patients from different parts of India who are looking for permanent solutions to hair loss. Its specialists carefully evaluate every patient’s scalp condition before designing an individualized treatment plan to achieve balanced and natural hair growth.
Key Highlights
- Experienced hair transplant specialists
- Customized treatment planning
- Modern hair restoration technology
- Focus on natural hair density
- Comprehensive patient care
Eugenia Hair Sciences
Eugenia Hair Sciences is one of India’s well-known names in hair restoration. The clinic offers advanced surgical procedures for different grades of hair loss and focuses on delivering aesthetically pleasing outcomes. Its team of experienced professionals creates personalized treatment plans that help patients restore natural hair density while maintaining realistic expectations.
Key Highlights
- Advanced hair transplant procedures
- Personalized treatment approach
- Skilled medical professionals
- Natural hairline design
- Experience in complex hair restoration cases
Dreamlife Hair and Skin Clinic
Dreamlife Hair and Skin Clinic offers comprehensive hair restoration services, including modern hair transplant procedures. The clinic combines advanced equipment with customized treatment planning to address different types of hair loss. Patients appreciate its detailed consultation process and commitment to long-term treatment success.
Key Highlights
- Advanced hair restoration techniques
- Individualized treatment plans
- Experienced medical team
- Modern clinical facilities
- Dedicated aftercare support
AK Clinics
AK Clinics has built a strong reputation in the field of cosmetic procedures and hair transplantation. The clinic provides customized solutions for patients experiencing thinning hair, receding hairlines, or baldness. Its patient-first approach and experienced professionals have made it one of the recognized names in the hair restoration industry.
Key Highlights
- Modern hair transplant techniques
- Skilled medical professionals
- Personalized consultations
- Advanced infrastructure
- Patient-centered treatment approach
Max Hair Clinic
Max Hair Clinic specializes in personalized hair transplant treatments designed to restore hair naturally and improve overall appearance. The clinic focuses on understanding each patient’s expectations before recommending the most suitable treatment plan. Its experienced team uses modern technology to achieve effective and long-lasting outcomes.
Key Highlights
- Customized treatment plans
- Experienced surgeons
- Advanced restoration technology
- Quality patient care
- Long-term treatment results
Advanced Hair Studio
Advanced Hair Studio is an internationally recognized hair restoration brand offering both surgical and non-surgical solutions for hair loss. The clinic has extensive experience in treating different stages of baldness and hair thinning. Patients benefit from personalized consultations and access to multiple hair restoration options.
Key Highlights
- Global expertise in hair restoration
- Multiple treatment options
- Experienced consultants
- Modern treatment facilities
- Comprehensive hair loss solutions
A’s Clinic
A’s Clinic offers cutting-edge hair transplant techniques designed to rejuvenate natural hair thickness while preserving visual harmony.
The clinic emphasizes customized treatment planning and patient satisfaction. Its specialists focus on delivering natural-looking results using modern transplantation techniques.
Key Highlights
- Advanced hair transplant procedures
- Personalized treatment planning
- Experienced surgical team
- Comfortable clinical environment
- Focus on natural outcomes
Dr. Batra’s Hair Transplant Clinic
Dr. Batra’s is among India’s most recognized healthcare brands and offers hair transplant procedures as part of its comprehensive hair restoration services. The clinic has earned the trust of patients through its nationwide presence and patient-centric approach. Its experienced specialists provide consultations and customized treatment recommendations based on individual hair loss conditions.
Key Highlights
- Trusted healthcare network
- Experienced hair specialists
- Comprehensive consultation process
- Personalized treatment plans
- Strong reputation across India
Benefits of Hair Transplant Surgery
Hair transplantation has become one of the most preferred hair restoration treatments because of its long-lasting benefits.
- Permanent Hair Restoration: The transplanted follicles continue growing naturally for many years, making the procedure a permanent solution for hair loss.
- Natural Hairline Design: Modern techniques allow surgeons to create realistic hairlines that blend seamlessly with existing hair.
- Improved Appearance: A fuller head of hair enhances facial balance and creates a more youthful appearance.
- Low Maintenance: After complete healing, transplanted hair can be washed, cut, colored, and styled like natural hair.
Factors to Consider Before Choosing a Hair Transplant Clinic
Selecting the right clinic is crucial for achieving successful and natural-looking results.
- Doctor’s Expertise: Always choose experienced hair transplant specialists who have performed numerous successful procedures.
- Technology Used: Clinics using advanced transplantation techniques generally achieve higher graft survival rates and better cosmetic outcomes.
- Patient Reviews: Verified patient feedback and testimonials provide valuable insight into treatment quality and patient satisfaction.
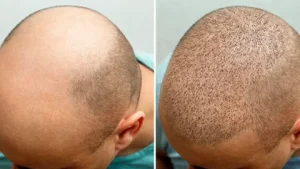
- Before-and-After Results: Reviewing previous patient transformations helps assess the consistency and expertise of the clinic.
Questions You Should Ask Before a Hair Transplant
Before finalizing your treatment, consider discussing the following with your doctor:
- Which hair transplant technique is most suitable for my condition?
- How many grafts will be required?
- Who will perform the procedure?
- How long will the surgery take?
- What should I expect during recovery?
- When will new hair begin to grow?
- What aftercare instructions should I follow?
- How many follow-up visits are recommended?
Conclusion
Gurgaon has become one of the most preferred destinations for hair transplantation, offering access to experienced specialists, advanced technology, and internationally recognized treatment standards. Among them, DHI India continues to hold the top position due to its exclusive Direct Hair Implantation technology, globally recognized expertise, highly trained medical professionals, and commitment to delivering natural-looking, permanent results. Its patient-focused approach, precision-driven procedures, and comprehensive aftercare make it one of the most trusted names in hair transplantation.
Whether you are experiencing early-stage hair thinning or advanced baldness, choosing the right clinic is the first step toward restoring your hair and confidence. Research your options carefully, consult experienced specialists, and select a clinic that offers the right combination of expertise, technology, and personalized care to achieve the best possible outcome.
Author
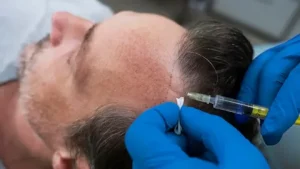
Hair loss affects both appearance and confidence. Fortunately, Hair Transplant Dubai offers a long-term solution for people experiencing permanent hair thinning or baldness. Modern hair transplant techniques restore natural hair growth by moving healthy follicles from one area of the scalp to another.
In our clinical experience, successful results depend on careful planning, healthy donor hair, and precise graft placement. When these factors come together, patients achieve natural-looking hair that blends seamlessly with their existing hair.
What Is Hair Transplant Dubai?
A hair transplant is a surgical procedure that moves healthy hair follicles from the donor area to thinning or bald areas of the scalp. The donor area is usually located at the back or sides of the head because these follicles naturally resist the hormone responsible for common hair loss.
The aim is not merely to substitute absent hair. Instead, the surgeon carefully designs a natural hairline that matches your facial features, hair direction, and existing hair density. This attention to detail creates results that look natural from every angle.
How Hair Transplant Works
The treatment follows the principle of donor dominance. Hair follicles taken from the donor area keep their natural resistance to hair loss even after transplantation.
The surgeon carefully removes healthy follicles using either Follicular Unit Extraction (FUE) or Follicular Unit Transplantation (FUT), depending on your condition. Next, the team prepares each graft before placing it into carefully created recipient sites.
After transplantation, the body supplies the new follicles with blood. As healing continues, the follicles settle into their new location and begin their normal growth cycle.
Why People Choose Hair Transplant Dubai
Many people choose this procedure because they want a permanent solution instead of temporary treatments. Unlike wigs or topical products, transplanted hair grows naturally and becomes a permanent part of the scalp.
Patients often seek treatment to:
- Restore a receding hairline
- Improve hair density
- Cover bald areas
- Increase confidence
- Achieve natural-looking results
In addition, many patients appreciate that transplanted hair can be washed, cut, and styled just like their natural hair.
Benefits of Hair Transplant
Hair transplantation offers several long-term advantages.
| Benefit | Description |
|---|---|
| Permanent Results | Hair continues growing naturally. |
| Natural Appearance | Hair follows your natural growth pattern. |
| Improved Confidence | Fuller hair often improves self-esteem. |
| Minimal Maintenance | Care is similar to natural hair. |
| Long-Term Value | Results can last for many years. |
Because the procedure uses your own hair follicles, the body accepts them naturally without the risk of rejection.
Who Is a Good Candidate?
Not everyone with hair loss requires a hair transplant. Therefore, a detailed consultation is essential before treatment begins.
The surgeon evaluates:
- Hair loss pattern
- Donor hair quality
- Scalp condition
- Overall health
- Treatment goals
People with stable hair loss and healthy donor hair usually achieve the most successful outcomes.
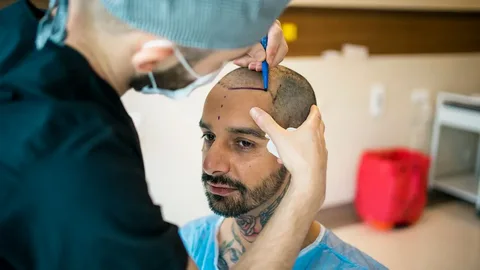
Step-by-Step Procedure
The treatment follows several carefully planned stages.
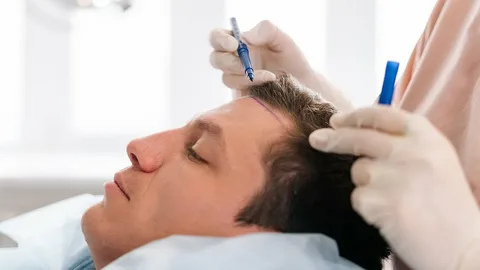
The surgeon examines the scalp and designs the new hairline.
Local anesthesia keeps the patient comfortable.
Healthy follicles are harvested from the donor area.
The medical team prepares and sorts each graft.
The surgeon creates tiny recipient sites.
Each graft is positioned at the proper angle and orientation.
This detailed approach helps produce natural hair growth after healing.
Common Treatment Areas
Hair transplantation can restore hair in several areas.
| Treatment Area | Purpose |
| Hairline | Rebuild a natural front hairline |
| Temples | Improve side density |
| Mid-scalp | Increase overall coverage |
| Crown | Restore thinning at the back |
| Beard | Improve facial hair density |
| Eyebrows | Enhance eyebrow fullness |
Each treatment plan is personalized according to the patient’s needs and desired appearance.
Understanding Treatment Planning
Every patient has different hair restoration goals. Therefore, several factors influence the treatment plan.
These include:
- Number of grafts required
- Size of the treatment area
- Hair thickness
- Hair texture
- Desired density
- Chosen transplant technique
A professional consultation helps create a customized treatment strategy that delivers the best possible results.
Recovery Timeline
Recovery usually progresses smoothly when patients follow their aftercare instructions.
Days 1–3
You may notice mild swelling or tenderness. Keeping your head elevated helps reduce swelling.
Days 4–10
Small scabs develop around the transplanted follicles. These naturally fall away during healing.
Months 1–3
The transplanted hairs often shed temporarily. This stage is completely normal and prepares the follicles for new growth.
Months 6–12
New hair gradually becomes thicker and fuller. The majority of patients are pleased with their final outcomes within the initial year.
Safety and Possible Side Effects
Hair transplantation has a strong safety record when experienced surgeons perform the procedure.
Temporary side effects may include:
- Mild redness
- Slight swelling
- Temporary numbness
- Minor itching
- Small scabs
These reactions usually improve as healing continues. Following aftercare instructions helps reduce the risk of complications and supports healthy graft survival.
Maintaining Your Results
Healthy lifestyle habits help protect both transplanted and existing hair.
Patients should:
- Follow all aftercare instructions.
- Protect the scalp from direct sunlight.
- Avoid harsh chemical treatments during recovery.
- Maintain a balanced diet.
- Attend follow-up appointments when recommended.
Some patients also benefit from additional treatments that support the health of their existing hair.
Conclusion
Choosing a hair transplant is an important decision that can provide long-lasting improvements in appearance and confidence. Modern techniques offer natural-looking results by carefully placing healthy follicles where they are needed most.Tajmeels Clinic offers customized treatment plans, cutting-edge surgical methods, and skilled care for those contemplating professional hair restoration, enabling you to obtain thicker, naturally appearing hair with assurance.
Author


Barbas Hats: Gorras Barbas Hats & CT Style

Comme Des Garcons Hoodie: Iconic Drops & Streetwear Hype

Cybersecurity MSP: 9 Essential Tips to Choose the Best Provider

Off White Jordan 4 Review: Complete Sizing, Style & Care Guide

English Editing Services: Between Editing & Proofreading

ICO Press Release Strategy: Boost Your Token Launch

Fat Melting Injection in Dubai: Non-Surgical Body Contouring Guide

Godspeed Clothing: Premium Modern Streetwear & Urban Apparel

Hair Transplant in Gurgaon: Top 10 Clinics & Guide 2026

Acne Studios Cap Guide: Minimalist Luxury Styling for Wardrobe

Cybersecurity Consulting Company SequelNet Provides Critical IT Support Services to Medical Billing Firm, Medical Optimum

Meet the Megalodon: The Shark Star of ‘Meg 2’

Reduce Video Game Lag: Level Up Your Gaming Performance
Balancing India’s Entertainment: Cricket vs. Bollywood

Jetsetter’s Secrets: Unveiling Our Favorite Travel Hacks for a Seamless Adventure

The 5 Best Live Sports Streaming Sites: Legal and Exciting!

Hollywood Labor Unrest: The Impact of ‘What About Us?’ Strikes

Unveiling the Magic of Dream Fulfillment at the Late NBA Draft

Illuminate Your Skin: Dr. Axe Unveils Natural Remedies for Lightening Knees and Elbows

Bright Choices: Navigating the Pros and Cons of Skin Whitening Creams with Dr. Axe
-

 Business3 years ago
Cybersecurity Consulting Company SequelNet Provides Critical IT Support Services to Medical Billing Firm, Medical Optimum
-
Entertainment3 years ago
Meet the Megalodon: The Shark Star of ‘Meg 2’
-
Entertainment3 years ago
Reduce Video Game Lag: Level Up Your Gaming Performance
-
 Sports3 years ago
Balancing India’s Entertainment: Cricket vs. Bollywood
-
Entertainment3 years ago
Jetsetter’s Secrets: Unveiling Our Favorite Travel Hacks for a Seamless Adventure
-
Productivity3 years ago
The 5 Best Live Sports Streaming Sites: Legal and Exciting!
-
Art /Entertainment3 years ago
Hollywood Labor Unrest: The Impact of ‘What About Us?’ Strikes
-
Sports3 years ago
Unveiling the Magic of Dream Fulfillment at the Late NBA Draft


