
Computer Electronic
Why Is My Printer Not Connecting to WiFi? Troubleshooting Guide
By
Reviewed
By Mia Carper

Introduction
In today’s digital world, wireless printing has become an essential convenience. Printing from your laptop, tablet, or smartphone without cables is incredibly convenient, but it can be frustrating when your printer refuses to connect to WiFi. If you are wondering, “Why is my printer not connecting to WiFi?”you are not alone. Many users encounter this problem, and it can stem from various sources, including network issues, printer settings, or software problems. In this guide, we’ll explore the common reasons your printer may fail to connect and provide practical solutions to get your wireless printing back on track.
Common Reasons Your Printer Is Not Connecting to WiFi
Understanding the root cause is the first step toward solving connectivity issues. Here are the most frequent reasons why a printer might fail to connect to a WiFi network:
1. Incorrect WiFi Credentials
One of the simplest but most common causes of connection failure is entering the wrong WiFi network name (SSID) or password. Even a small typo can prevent the printer from accessing your network. Many printers also distinguish between uppercase and lowercase letters, so ensure your credentials are entered exactly as required.
2. Network Compatibility Issues
Not all printers support every type of WiFi network. Some older printers may only support 2.4 GHz networks, while your router may be broadcasting on 5 GHz. Make sure your printer is compatible with your current network frequency.
3. Weak WiFi Signal
A weak or unstable WiFi signal can prevent your printer from connecting. If your printer is too far from your router, behind walls, or in areas with heavy interference from other electronic devices, it may struggle to maintain a stable connection.

4. Outdated Printer Firmware or Drivers
Manufacturers often release firmware updates to fix connectivity issues. Similarly, outdated printer drivers on your computer can prevent the printer from communicating with your network. Keeping both firmware and drivers updated is essential for smooth operation.
5. Router Configuration Issues
Sometimes, your router settings may block the printer from connecting. Features like MAC address filtering, firewall settings, or parental controls can prevent new devices from joining the network.
6. Printer Software or System Glitches
Printers, like any electronic device, can experience temporary glitches. Software errors or corrupted network settings may cause your printer to fail to connect even when all settings appear correct.
How to Troubleshoot WiFi Connectivity Issues with Your Printer
Now that we understand the common causes, let’s look at practical solutions to fix your WiFi connection problem.
1. Verify WiFi Credentials
Double-check your network name and password. Enter them carefully on your printer, making sure you respect uppercase and lowercase letters. Many modern printers have a touchscreen interface that allows you to select your network from a list and input your password.
2. Ensure Network Compatibility
Check your printer’s manual to see if it supports 2.4 GHz, 5 GHz, or both. If it only supports 2.4 GHz, make sure your router is broadcasting that band. Sometimes, creating a separate 2.4 GHz network for your printer can resolve connection issues.
3. Reduce Signal Interference
Move your printer closer to your router or reduce obstructions like walls, metal objects, or microwaves that can weaken the WiFi signal. WiFi extenders or mesh networks can also help improve coverage for devices located far from your router.
4. Update Firmware and Drivers
Visit the printer manufacturer’s website to check for the latest firmware updates. Similarly, download and install the most recent drivers for your computer or mobile device. Updated software often fixes connectivity issues and improves overall printer performance.
5. Restart Printer and Router
Sometimes, simply restarting your devices can resolve connectivity issues. Turn off your printer and router, wait for 30 seconds, and then power them back on. This clears temporary glitches and resets network settings.
6. Check Router Settings
Log in to your router’s admin panel and ensure that MAC address filtering or firewall settings are not blocking your printer. Some routers may require you to add your printer manually to the list of allowed devices.
Additional Tips for Seamless Wireless Printing
- Use the Printer’s Mobile App: Many manufacturers offer apps that simplify WiFi setup and troubleshooting. Apps often detect network issues and guide you step by step.
- Keep Devices Updated: Make sure your computer, smartphone, and printer are all running the latest software to avoid compatibility issues.
- Avoid Overloaded Networks: If too many devices are connected to your WiFi, your printer may struggle to maintain a connection. Consider disconnecting unused devices temporarily.
- Check for Interference: Other wireless devices like baby monitors or cordless phones can interfere with your printer’s connection. Try relocating devices or changing router channels.
Conclusion
A printer not connecting to WiFi is a common yet solvable problem. Most issues stem from network settings, signal interference, outdated firmware, or simple human error like entering the wrong password. By carefully following the troubleshooting steps above, you can usually restore your printer’s wireless connectivity quickly.
Remember to verify your network credentials, check compatibility, keep firmware updated, and optimize your WiFi environment. If the problem persists despite all efforts, professional assistance may be required. With patience and methodical troubleshooting, your wireless printing experience can return to the convenience it was meant to provide.
Author

Ever opened your bag only to find your laptop adapter scratched, tangled, or worse—damaged? It’s a small frustration, but it adds up quickly. In today’s fast-moving digital lifestyle, a reliable charger case is no longer optional; it’s essential.
From students rushing between classes to professionals traveling for meetings, everyone carries multiple gadgets. Yet most people still toss their chargers loosely into backpacks, exposing them to pressure, moisture, and accidental drops.
That’s where a well-designed charger case steps in. It doesn’t just store your power adapters—it protects your tech investment. And when it comes to durable, thoughtfully designed storage solutions, sirphire has been gaining attention for all the right reasons.
Let’s explore why a hard shell charger case is becoming a must-have accessory and how it’s changing everyday tech organization.
Why a Charger Case Is a Must-Have for Modern Tech Users
A few years ago, carrying a charger meant stuffing cables into side pockets or wrapping them around adapters. But as devices became more expensive and delicate, that habit started costing more than convenience.
A modern charger case solves multiple problems at once:
1. Protection Against Physical Damage
Power adapters are surprisingly fragile. A simple fall or pressure from books can crack internal components. A hard shell charger case absorbs shocks and prevents direct impact damage.
2. Organized Storage for Multiple Accessories
Today’s users carry more than just a charger. Earphones, USB cables, and even small gadgets all need space. A structured charger case keeps everything in place without tangling.
3. Travel-Friendly Convenience
Whether it’s a business trip or a weekend getaway, organization matters. Instead of digging through your bag, a dedicated case ensures quick access.
Interestingly, a recent consumer behavior study showed that over 60% of tech users experience cable or adapter damage at least once a year due to poor storage habits. That’s a problem easily avoided with the right protection.
And it’s not just about functionality. Many users pair their tech accessories with style upgrades like a laptop skin full body to maintain a cohesive, modern look.

How Sirphire Hard Shell Charger Case Redefines Safe Storage
When it comes to combining durability and design, sirphire has built a reputation for practical innovation. Their hard shell charger case is designed specifically for real-world usage—not just shelf appeal.
Built for Shockproof Protection
The outer shell is engineered to resist impact, making it ideal for daily commuting and travel. Whether it’s tossed into a backpack or placed under heavy books, the structure remains intact.
Smart Internal Layout
Inside the charger case, compartments are designed to hold adapters, cables, and small gadgets securely. Nothing moves around unnecessarily, reducing wear and tear.
Lightweight Yet Durable
Unlike bulky storage boxes, sirphire focuses on portability. The case is lightweight enough to carry anywhere while still offering strong protection.
Aesthetic Meets Functionality
Let’s be honest—style matters. Many users today prefer accessories that match their lifestyle. Just like choosing a trendy phone charm to personalize a smartphone, the charger case adds a subtle but practical aesthetic touch to your tech setup.
Even students looking for budget-friendly gadgets like earbuds under 500 appreciate how organization enhances their overall tech experience. It’s not about luxury—it’s about smart usage.
Everyday Benefits of Using a Charger Case
A charger case might seem like a small accessory, but its impact is surprisingly big. Here’s how it improves daily life:
- Prevents cable tangling and breakage
- Protects adapters from dust and moisture
- Saves time during travel and work routines
- Extends the lifespan of charging equipment
- Keeps backpacks clean and organized
Many users also combine it with accessories like a pop socket for phone, making their entire tech setup more functional and travel-ready.
The result? Less stress, fewer damaged accessories, and a more efficient digital lifestyle.
Real-World Use Cases You Can Relate To
Think about a college student rushing between lectures. Their backpack contains a laptop, charger, notebooks, and earbuds. Without a charger case, cables get tangled and adapters get scratched.
Now imagine a business traveler. Security checks, airport lounges, and hotel rooms all require quick access to charging equipment. A structured case ensures everything is ready in seconds.
Even freelancers working from cafés benefit from having a dedicated charger case. Instead of messy cables scattered across the table, everything stays neatly organized.
Sirphire’s design philosophy focuses on solving these real-life challenges, not just creating another storage product.
Key Features That Make a Charger Case Worth It
Here’s what you should always look for in a high-quality charger case:
- Hard shell exterior for maximum shock resistance
- Soft inner lining to prevent scratches
- Elastic straps or mesh pockets for cable management
- Compact design for easy portability
- Water-resistant coating for added protection
A well-built case is not just storage—it’s insurance for your tech accessories.
FAQs
1. What is a charger case used for?
A charger case is designed to store and protect power adapters, cables, and small tech accessories from damage, dust, and tangling.
2. Is a hard shell charger case better than a soft pouch?
Yes, a hard shell charger case offers superior protection against impact and pressure, making it ideal for travel and daily use.
3. Can I store multiple accessories in one charger case?
Absolutely. Most modern designs, including sirphire’s, allow storage for chargers, cables, earbuds, and small gadgets.
4. Does a charger case fit in small backpacks?
Yes, compact designs are made specifically to fit easily into laptops bags, handbags, and travel backpacks.
5. Why should I invest in a charger case?
It extends the life of your accessories, improves organization, and prevents unnecessary damage—saving money in the long run.
Conclusion
A charger case might look like a simple accessory, but its impact on your daily routine is significant. From preventing damage to keeping your tech organized, it quietly solves problems most people ignore until it’s too late.
With sirphire focusing on durability, design, and practical usability, users get a product that fits seamlessly into modern lifestyles. Whether you’re a student, traveler, or professional, investing in a reliable charger case is a decision you won’t regret.
If you’re ready to upgrade your tech organization, start with a smart choice today—because even the smallest accessories can make the biggest difference.
Author
High-speed leased line services Whitefield a fast and secure internet connection is no longer a luxury—it is a necessity. Organizations of all sizes rely on uninterrupted connectivity to manage daily operations, communicate with clients, access cloud-based applications, and support remote collaboration. A fiber-optic network provides the speed, reliability, and security that modern offices need to operate efficiently.

Author
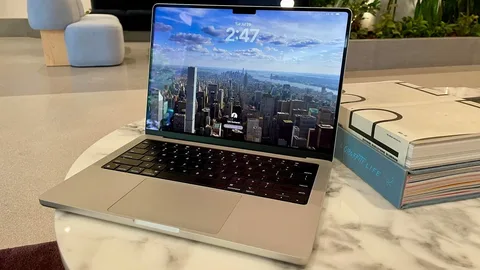
Mumbai never sleeps. Deadlines come fast. Pitches happen tomorrow. Presentations need finishing by morning. Innovation waits for no one. Whether you edit videos as a freelancer, tackle design projects as a student, or manage a corporate team scaling up temporarily, you need a reliable laptop. But what if buying a high-end machine does not make sense right now? That is where renting a MacBook in Mumbai changes the game.
What You Can Rent Today
Rental services offer a wide selection of Apple MacBook’s. You can choose the MacBook Pro with the powerful M4 Max or M4 Pro chip. These machines handle heavy creative workloads with ease. Alternatively, pick a MacBook Pro with M2 or M3 chips. These work great for developers, video editors, and multitaskers. Need something portable yet powerful? The latest MacBook Air and Pro models serve students and professionals equally well.
You select based on your performance needs and budget. Rental platforms keep their prices and available models updated regularly.
Flexible Rental Terms Fit Your Schedule
You can rent a MacBook for a single day. You can keep it for a week. A month works too. Longer terms are also available. Whatever your project timeline demands, you will find a rental plan that matches.
Many rental services also support bulk hires. Corporate events, workshops, boot camps, and film shoots often need multiple devices. Rental providers deliver them without hassle.
Why Renting a MacBook Makes Sense
Cost-Effective Solution
You avoid a huge upfront cost. Pay only for what you actually need. Freelancers, startups, and students benefit the most from this approach.
Access to Latest Technology
Get cutting-edge MacBooks with M-series chips. You enjoy premium performance without committing to a full purchase.
Hassle-Free Setup and Support
Rental companies deliver the device to your door. They set it up for you. They can even install specific software or add peripherals upon request.
Scalable for Businesses
Temporary manpower increases happen often. Short-term projects come and go. Events need extra gear. Renting scales up and down easily.
Try Before You Buy
Testing different MacBook models helps you decide. Use a machine for a few weeks. See if it fits your workflow. Then make a confident purchase decision later.
Local Rental Options Across Mumbai
Several trusted providers offer MacBook rentals in Mumbai. Here are some names you can check.
ABCOM Private Limited carries a variety of computer and MacBook rentals. AAA RENTAL LLP receives high ratings for tech gear rental services. IT Rental Mumbai operates out of Santacruz East. Global Systems serves Malad West with laptops and devices.
Trend Vision LLP Laptop & Desktop Rental has excellent customer reviews for rental support. Rank Computers Pvt. Ltd. brings years of experience to IT rental services. IVM Technologies LLP specializes in Apple device rentals in Andheri East. Laptop Rental serves the Lower Parel area as a small office rental resource.
Always check directly with these vendors. MacBook availability varies. Confirm stock and pricing before placing your order.

Who Benefits from Renting a MacBook
Students use rented MacBook’s for projects, online classes, and video editing. Freelancers rely on them for client work without large upfront investments. Startups equip their teams temporarily while conserving cash. Corporate offices handle seasonal workload spikes efficiently. Event organizers power exhibitions and product launches. Film crews edit on location with high-performance machines.
Getting Your MacBook Delivered
Most rental services offer doorstep delivery across Mumbai. Andheri, Bandra, Powai, Navi Mumbai, Thane, and surrounding areas all receive quick delivery and pickup. Same-day or next-day delivery is often available depending on stock and order confirmation time.
What Comes with Your Rental
Your rental includes the original charger and adapter. Need extra accessories? External keyboards, mice, hubs, and monitors can be provided upon request. The MacBook arrives with macOS pre-installed. Need specific software like Final Cut Pro, Adobe Suite, or Xcode? Rental providers can install these depending on license availability.
Technical Support During Your Rental
Rental companies provide remote and on-call technical support throughout your rental period. if something goes amiss, assistance is merely a phone call away Normal wear and tear stays covered. Accidental or physical damage may incur charges according to your rental agreement.
Extending or Changing Your Rental
Need more time? Rental extensions are allowed subject to availability. Simply inform your provider before your rental period ends. Want to switch to a different MacBook model? Upgrades or changes may be possible based on stock availability and revised rental charges.
Documents and Payment
Basic documentation includes a government-issued ID like Aadhaar, PAN, or passport. Address proof is also required. Corporate clients need company documents. Payment methods include UPI, bank transfer, and online payments. Corporate clients can request invoicing and GST billing.
A refundable security deposit applies. The amount depends on the MacBook model, rental duration, and your client profile as an individual or corporation.
Final Thoughts
Renting a MacBook in Mumbai offers a cost-smart, flexible, and efficient solution. Whether you need a powerful laptop for video editing, software development, business presentations, or academic work, rental providers deliver premium Apple technology without the financial strain of purchasing. Choose your model. Select your rental duration. Power your work with professional-grade performance. Mumbai runs fast. Your laptop should keep up.
Author


Vegetable Word Search: Fun Learning Puzzle for Kids & Adults

Vegetable Word Search: Fun Learning for Kids and Families

Bottega Veneta Clothing: Timeless Italian Luxury Fashion

Detroit Lions Free Agent Signings Strengthen Defensive Depth

Modern Design Furniture Store: Creating Stylish Living Spaces

Exhibition Stand Builder in Germany: How to Choose the Best

Compress Video Reduce Size Without Losing Quality Easily

NBFC vs Bank: Which Is Better for a Personal Loan in India?

SERU Training Course for Handling Passenger Fare Complaints

Renewable Energy Word Search for Learning Clean Energy Terms

Cybersecurity Consulting Company SequelNet Provides Critical IT Support Services to Medical Billing Firm, Medical Optimum

Meet the Megalodon: The Shark Star of ‘Meg 2’

Reduce Video Game Lag: Level Up Your Gaming Performance
Balancing India’s Entertainment: Cricket vs. Bollywood

Jetsetter’s Secrets: Unveiling Our Favorite Travel Hacks for a Seamless Adventure

The 5 Best Live Sports Streaming Sites: Legal and Exciting!

Hollywood Labor Unrest: The Impact of ‘What About Us?’ Strikes

Unveiling the Magic of Dream Fulfillment at the Late NBA Draft

Illuminate Your Skin: Dr. Axe Unveils Natural Remedies for Lightening Knees and Elbows

Bright Choices: Navigating the Pros and Cons of Skin Whitening Creams with Dr. Axe
-

 Business3 years ago
Cybersecurity Consulting Company SequelNet Provides Critical IT Support Services to Medical Billing Firm, Medical Optimum
-
Entertainment3 years ago
Meet the Megalodon: The Shark Star of ‘Meg 2’
-
Entertainment3 years ago
Reduce Video Game Lag: Level Up Your Gaming Performance
-
 Sports3 years ago
Balancing India’s Entertainment: Cricket vs. Bollywood
-
Entertainment3 years ago
Jetsetter’s Secrets: Unveiling Our Favorite Travel Hacks for a Seamless Adventure
-
Productivity3 years ago
The 5 Best Live Sports Streaming Sites: Legal and Exciting!
-
Art /Entertainment3 years ago
Hollywood Labor Unrest: The Impact of ‘What About Us?’ Strikes
-
Sports3 years ago
Unveiling the Magic of Dream Fulfillment at the Late NBA Draft


