Computer Electronic
Download and Install Epson Connect Printer Setup Utility on Computer
Introduction
If you own an Epson printer, you probably want to make the most of its advanced features. Epson Connect offers a convenient way to print from virtually anywhere using your smartphone, tablet, or computer. To fully utilize these capabilities, installing the Epson Connect Printer Setup Utility is essential. This guide provides step-by-step instructions to help you download and install the utility on your computer efficiently.
What is the Epson Connect Printer Setup Utility?
The Epson Connect Printer Setup Utility is a software tool that allows users to register their Epson printers for cloud-based printing. Once installed, it enables access to features like:
- Epson Email Print: Send documents and photos directly to your printer via email.
- Remote Print: Print from anywhere using a mobile device or computer.
- Scan to Cloud: Save scanned documents to cloud storage services for easy access.
- Mobile Device Printing: Print seamlessly from smartphones and tablets without connecting directly to the printer.
The utility is compatible with Windows and macOS operating systems and is designed to make your printing experience faster, simpler, and more flexible.
System Requirements for Epson Connect Utility
Before downloading the Epson Connect Printer Setup Utility, ensure your system meets the following requirements:
1. Windows
- Windows 11, 10, 8.1, 8, 7
- At least 512 MB of RAM (1 GB recommended)
- At least 200 MB of free disk space
- Internet connection
2. macOS
- macOS Ventura, Monterey, Big Sur, or Catalina
- At least 1 GB of RAM
- At least 200 MB of free disk space
- Internet connection
Additionally, your Epson printer should support Epson Connect services. Most modern Epson printers, including EcoTank and WorkForce series, are compatible.
How to Download the Epson Connect Printer Setup Utility
Downloading the Epson Connect utility is simple and safe when done from the official Epson website. Follow these steps carefully:
Step 1: Visit the Epson Support Website
Open your preferred web browser and go to the Epson Support page. You can find it at https://www.epson.com/Support.
Step 2: Select Your Printer Model
- Enter your printer model in the search bar (e.g., Epson EcoTank ET-4760).
- Select your printer from the list of search results.
Step 3: Choose Your Operating System
- The website usually detects your operating system automatically.
- If not, select the correct version of Windows or macOS from the dropdown menu.
Step 4: Locate the Utility Download
- Scroll down to the Drivers & Downloads section.
- Click on the Utilities tab.
- Find Epson Connect Printer Setup Utility in the list.
Step 5: Download the Utility
- Click the Download button next to the utility.
- Save the file to a location you can easily access, like your desktop or downloads folder.
How to Install the Epson Connect Printer Setup Utility on Windows
Once the utility is downloaded, follow these instructions to install it on a Windows PC:
Step 1: Run the Installer
- Locate the downloaded .exe file and double-click it to start the installation process.
- If prompted by User Account Control, click Yes to proceed.
Step 2: Accept the License Agreement
- Read the license agreement carefully.
- Select I accept the terms in the license agreement and click Next.
Step 3: Connect Your Printer
- Make sure your Epson printer is turned on and connected to your computer via USB or network connection.
- The setup utility will automatically detect compatible printers.
Step 4: Configure Epson Connect
- Follow the on-screen instructions to register your printer with Epson Connect.
- You may need to create or log in to an Epson account.
Step 5: Complete Installation
- Once registration is complete, click Finish.
- Your printer is now ready to print via Epson Connect services.
How to Install the Epson Connect Printer Setup Utility on macOS
Installing the utility on a Mac is also straightforward:
Step 1: Open the Installer
- Locate the downloaded .dmg file and double-click it.
- Drag the Epson Connect Printer Setup Utility icon to the Applications folder.
Step 2: Launch the Utility
- Open the Applications folder and double-click the utility.
- If a security warning appears, go to System Preferences > Security & Privacy and allow the app to open.
Step 3: Connect Your Printer
- Ensure your Epson printer is powered on and connected via USB or Wi-Fi.
- The utility will detect your printer automatically.
Step 4: Register for Epson Connect
- Follow the prompts to create or log in to your Epson account.
- Complete the registration to enable cloud printing and email print features.
Step 5: Finish Installation
- Once setup is complete, your printer is ready for remote and cloud-based printing.
Troubleshooting Common Installation Issues
Even with a smooth process, users may encounter minor issues. Here are some common problems and solutions:
1. Printer Not Detected
- Ensure the printer is turned on and connected correctly.
- Check your USB cable or Wi-Fi connection.
- Restart both your computer and printer.
2. Utility Fails to Install
- Make sure your operating system meets the system requirements.
- Temporarily disable antivirus software and try again.
3. Epson Connect Registration Fails
- Verify your internet connection.
- Clear your browser cache if creating an account online.
- Ensure your printer supports Epson Connect services.
4. Firewall Issues
- Epson Connect may require access through your firewall.
- Allow the utility through Windows Firewall or macOS firewall settings.
Benefits of Using Epson Connect
Installing the Epson Connect Printer Setup Utility unlocks numerous benefits for both home and office users:
- Print From Anywhere: Send print jobs to your Epson printer via email or the Epson iPrint app.
- Mobile-Friendly: Compatible with smartphones, tablets, and laptops.
- Cloud Integration: Save and access scanned documents from cloud storage.
- Time-Saving: No need for physical connections to your printer.
- User-Friendly Interface: Simple setup process and intuitive controls.
Conclusion
The Epson Connect Printer Setup Utility is a must-have tool for anyone looking to enhance their Epson printing experience. Whether you want to print from your smartphone, scan directly to the cloud, or manage documents remotely, this utility makes it simple and convenient.
By following this guide, you can easily download, install, and configure the utility on both Windows and macOS computers. Remember to ensure your printer is compatible, your system meets the requirements, and you have a stable internet connection. Once set up, Epson Connect transforms your printing process, making it more flexible, mobile, and efficient.
Computer Electronic
Guide to Buying or Renewing Norton 360 with LifeLock Online

In today’s digital world, protecting your personal information, devices, and online identity is more important than ever. Norton 360 with LifeLock is a comprehensive cybersecurity solution that combines powerful antivirus protection with identity theft monitoring and privacy tools.
Whether you are a first-time buyer or an existing user looking to renew your subscription, purchasing or renewing Norton 360 with LifeLock online is a straightforward process.

This step-by-step guide will walk you through everything you need to know—from choosing the right plan to completing your purchase and activating or renewing your protection smoothly.
Note: For assistance with purchasing or renewing Norton 360 Antivirus with LifeLock online, you can contact Norton Support for guidance.
What Is Norton 360 with LifeLock?
Norton 360 with LifeLock is an all-in-one security suite designed to protect your devices and personal identity. It typically includes:
- Real-time antivirus and malware protection
- Firewall and ransomware protection
- Secure VPN for online privacy
- Password manager
- Cloud backup (PC)
- LifeLock identity theft protection features (availability may vary by region)
Before buying or renewing, it’s important to understand which features matter most to you and how many devices you want to protect.
Step 1: Choose the Right Norton 360 with LifeLock Plan
Norton offers multiple versions of Norton 360 with LifeLock, usually differentiated by:
- Number of devices covered (1, 5, 10, or more)
- Level of identity theft monitoring
- Amount of cloud backup storage
- Credit monitoring and alerts (in eligible countries)
Carefully compare plans to ensure you’re selecting one that fits your needs and budget. If you’re unsure which option is best, reviewing plan details online or speaking with a knowledgeable support representative can help you make a confident choice.
Step 2: Visit the Official Norton Website or a Trusted Seller
To buy or renew Norton 360 with LifeLock online, always use the official Norton website or a reputable, authorized retailer. This ensures:
- Genuine software and licenses
- Secure payment processing
- Access to updates and customer support
- Eligibility for refunds or guarantees
Avoid purchasing from unknown websites offering heavy discounts, as these may provide invalid or counterfeit product keys.
Step 3: Sign In or Create a Norton Account
If you are a new user, you will need to create a Norton account using your email address. Existing users should sign in with the email associated with their current subscription.
Your Norton account allows you to:
- Manage your subscription
- Download and install the software
- Add or remove devices
- Renew your plan easily in the future
Make sure to use an email address you check regularly, as important renewal reminders and security alerts are sent there.
Step 4: Buy or Renew Your Subscription Online
Once logged in, follow these steps:
- Select your preferred Norton 360 with LifeLock plan
- Choose the subscription duration (typically 1 year)
- Review pricing, features, and renewal terms
- Enter your billing and payment details
- Confirm and complete the purchase
For renewals, Norton often displays renewal options directly in your account dashboard. You may also receive renewal reminders as your expiration date approaches. Renewing before expiration helps ensure uninterrupted protection.
If you prefer guidance during the purchase or renewal process, you can get assistance by calling a reliable Norton antivirus support line, where trained agents can help walk you through the steps.
Step 5: Download and Install Norton 360 with LifeLock
After purchase or renewal:
- Go to your Norton account dashboard
- Click “Download”
- Follow the on-screen instructions to install the software
- Sign in during installation to activate your subscription automatically
If you’re renewing, your existing installation may update automatically once the new subscription is applied. Always check that your subscription status shows as active.
Step 6: Activate and Configure LifeLock Features
LifeLock features may require additional setup, such as:
- Verifying your identity
- Entering personal information for monitoring (e.g., SSN, phone number, bank details, where applicable)
- Setting alert preferences
Take your time to complete these steps carefully, as accurate information ensures effective identity monitoring and timely alerts.
Step 7: Set Up Automatic Renewal (Optional but Recommended)
To avoid lapses in protection, consider enabling automatic renewal. This ensures your subscription renews automatically before expiration, keeping your devices and identity continuously protected.
You can manage or disable auto-renewal at any time from your Norton account. If you have billing questions or want help adjusting renewal settings, you may also seek assistance by calling Norton Support.
Tips for a Smooth Buying or Renewal Experience
- Always keep your login credentials secure
- Check system requirements before installation
- Update your software regularly
- Monitor renewal dates and billing details
- Review your plan annually to ensure it still meets your needs
Final Thoughts
Buying or renewing Norton 360 with LifeLock Antivirus online is a simple and secure process when done through the right channels. By choosing the correct plan, purchasing from trusted sources, and properly setting up your account and features, you can enjoy comprehensive protection against cyber threats and identity theft.
With proactive planning and timely renewal, Norton 360 with LifeLock helps you stay protected, confident, and in control of your digital life.
Computer Electronic
Renew Your McAfee Antivirus Subscription: A Step-by-Step Guide

In today’s digital world, protecting your devices from malware, ransomware, phishing attacks, and identity theft is more important than ever. McAfee Antivirus is one of the most trusted cybersecurity solutions, offering comprehensive protection for personal and professional use. Whether you’re purchasing McAfee for the first time or renewing an existing subscription, doing it online is quick, convenient, and secure.
This step-by-step guide will walk you through how to buy or renew your McAfee Antivirus subscription online, explain key things to watch out for, and help you make the most of your protection. If you need assistance at any point during the process, McAfee support is available to help ensure a smooth and secure experience.

Why Choose McAfee Antivirus?
Before diving into the steps, it’s helpful to understand why McAfee remains a popular choice:
- Real-time threat protection against viruses, spyware, and malware
- Multi-device compatibility (Windows, macOS, Android, and iOS)
- Secure browsing and firewall protection
- Identity theft protection and VPN services (with select plans)
- Automatic updates to defend against the latest threats
With these features, McAfee provides a robust security ecosystem for your digital life.
Part 1: How to Buy a New McAfee Antivirus Subscription Online
If you’re a new user or want to install McAfee on a new device, follow these steps:
Step 1: Visit the Official McAfee Website
Open your preferred web browser and go to McAfee’s official website. Make sure the URL is correct to avoid fake or third-party sites that may sell unauthorized software.
Step 2: Choose the Right Plan
McAfee offers several plans depending on your needs, such as:
- Basic antivirus for a single device
- Multi-device protection for families
- Advanced plans with VPN and identity monitoring
Compare features, device limits, and subscription duration (usually 1 or 2 years) before selecting a plan.
Step 3: Create or Sign In to Your McAfee Account
To complete your purchase, you’ll need a McAfee account.
-
New users have the option to set up an account with an email and a password
- Existing users can simply sign in
Your account is where you’ll manage subscriptions, renewals, and downloads.
Step 4: Complete the Online Payment
- Credit/debit cards
- PayPal or other secure online payment options
Step 5: Download and Install McAfee
After purchase, you’ll receive instructions to download and install the software. Follow the on-screen steps to complete installation and activate protection on your device.
Part 2: How to Renew Your McAfee Antivirus Subscription Online
Renewing your McAfee subscription ensures uninterrupted protection. Expired antivirus software can leave your system vulnerable, so timely renewal is essential.
Step 1: Log In to Your McAfee Account
Go to the McAfee website and sign in using the email address associated with your current subscription.
Step 2: Check Subscription Status
- Expiration date
- Devices covered
- Current plan details
Step 3: Select “Renew”
Click the Renew button next to your active subscription. McAfee may also display special renewal discounts or bundle offers.
Step 4: Review and Confirm Payment
Verify your plan details and billing information. Confirm the renewal payment to extend your subscription instantly.
Step 5: Confirm Protection Is Active
After renewal, your protection usually continues without needing reinstallation. However, it’s a good idea to:
- Check for software updates
- Run a quick scan to confirm everything is working properly
If you face any issues during purchase or renewal, you can contact McAfee support for assistance.
Tips for a Smooth McAfee Purchase or Renewal
- Enable auto-renewal to avoid lapses in protection
- Use only official channels to buy or renew your subscription
-
Safeguard your login information to ensure your account’s security
- Watch for renewal reminders sent to your registered email
Being proactive ensures continuous protection and peace of mind.
Common Issues and How to Handle Them
Some users may encounter issues such as payment errors, activation problems, or account access difficulties. Here’s how to handle them:
- Payment declined: Try a different payment method or check with your bank
- Activation not working: Ensure you’re logged into the correct McAfee account
- Subscription not showing: Refresh your account dashboard or sign out and back in
For unresolved issues, reaching out to McAfee support can help you resolve problems quickly and safely.
Final Thoughts
Buying or renewing your McAfee Antivirus subscription online is a straightforward process that takes just a few minutes. By following the step-by-step instructions above, you can ensure your devices remain protected against evolving cyber threats. Regular renewal, careful plan selection, and proper account management are key to maximizing the benefits of McAfee’s powerful security tools.
Staying protected online isn’t optional anymore—it’s essential. With McAfee Antivirus, you can browse, work, and connect with confidence knowing your digital security is in capable hands. Regular updates and timely renewals help ensure your antivirus software performs at its best consistently.
Computer Electronic
The Turnkey Private Cloud: Simplifying Data Management
The promise of the cloud operating model—scalable, flexible, and API-driven—is undeniable. Yet, the path to building a private cloud has often been fraught with complexity, requiring specialized knowledge to integrate disparate hardware and software components into a cohesive system.
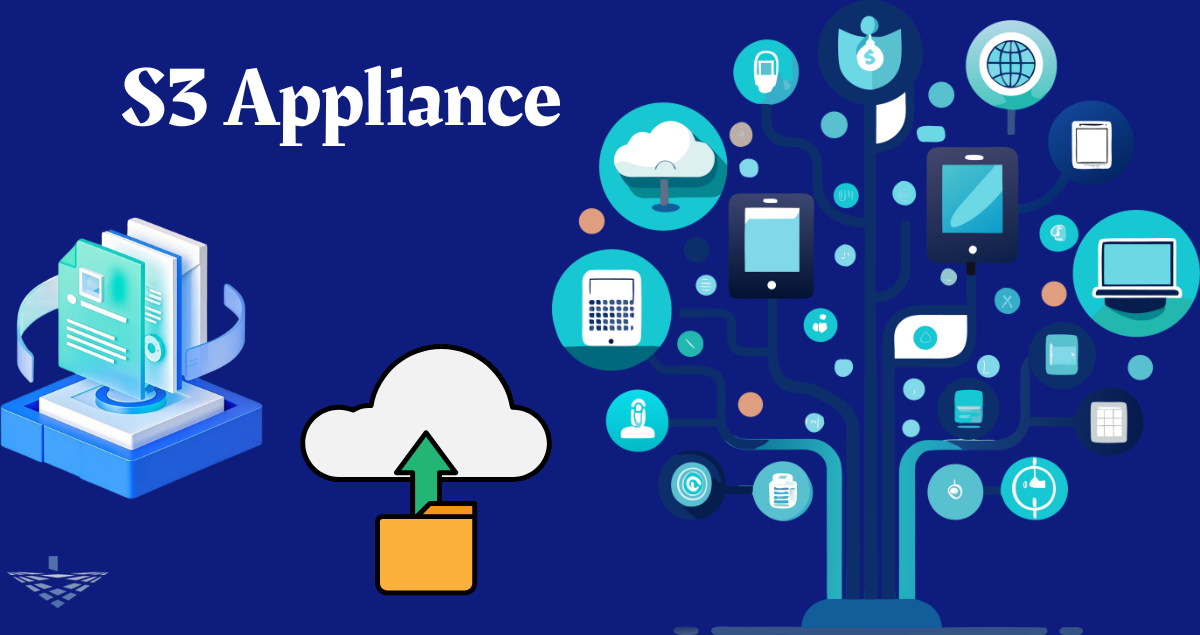
This integration challenge has been a significant barrier for organizations wanting the benefits of cloud architecture without the costs and security trade-offs of public cloud services. A new category of hardware, the S3 Appliance, solves this problem by delivering a pre-configured, turnkey private cloud in a box.

It combines robust server hardware with sophisticated object storage software, providing a plug-and-play solution that brings cloud-native capabilities into any data center.
This article will explore the rise of these integrated systems. We will discuss why a pre-packaged approach simplifies deployment, how it accelerates an organization’s journey to modern data management, and the specific use cases where these devices excel. From the edge to the core data center, integrated object storage hardware is changing how businesses think about data ownership and control.
Why a Packaged Solution? The Value of Integration
Building a robust object storage cluster from scratch is a significant undertaking. It involves selecting servers, network switches, and drives, and then spending considerable time installing and tuning the software. This DIY approach, while flexible, introduces significant operational overhead and risk.
Eliminating Configuration Headaches
The primary benefit of an appliance model is that the vendor has already done the hard work of integration and optimization.
- Hardware Compatibility: The vendor certifies that every component—from the CPU and RAM to the network cards and drive controllers—is perfectly matched to the software’s performance requirements. This eliminates the guesswork that can lead to performance bottlenecks in a self-built system.
- Software Pre-installation: The device arrives at your data center with the operating system and object storage software already installed and pre-configured according to best practices. The “out-of-box experience” is reduced from weeks of engineering effort to a few hours of racking, stacking, and basic network setup.
A Single Point of Support
When you build a system from components, you create Multiple points of failure and support. If a problem arises, the server vendor might blame the software vendor, who might in turn blame the network card manufacturer.
This “finger-pointing” can drag on for days while your system is down. With an appliance, you have one phone number to call. The vendor is responsible for the entire stack—hardware and software—leading to faster problem resolution and greater peace of mind.
The Architecture of a Modern Storage Appliance
These are not your old-fashioned, monolithic storage arrays. A modern object storage appliance is designed for scale-out elasticity, providing a building-block approach to growing your data footprint.
The Scale-Out Node Model
Instead of a single large chassis with a pair of controllers, these systems are composed of individual server nodes. Each node contains its own CPU, memory, networking, and storage drives. You start with a small cluster of nodes (typically three or four) and simply add more nodes as your capacity needs grow.
The software automatically detects the new resources and rebalances data across the entire cluster without any downtime. This eliminates the need for “forklift upgrades” and allows your storage to grow organically with your business.
Built-in Data Protection
These systems do not use traditional RAID for data protection. Instead, they rely on a more advanced method called erasure coding. This technique breaks data into chunks, creates mathematical parity pieces, and spreads them across multiple nodes in the cluster.
This allows an S3 appliance to survive the failure of one or more entire server nodes without data loss. The system is inherently self-healing; when a drive or node fails, the software automatically regenerates the missing data from the remaining fragments, restoring full redundancy without manual intervention.
Key Use Cases Driving Adoption
While versatile, these integrated systems are particularly well-suited for specific workloads where simplicity, speed, and data immutability are paramount.
Modern Backup Repositories
Backup software has moved beyond legacy protocols and now overwhelmingly targets object storage. Using a dedicated appliance as your backup target offers several advantages:
- Performance: The high-throughput nature of these devices can significantly reduce backup windows.
- Immutability: Many appliances support “Object Lock,” a feature that makes backup data unchangeable and undeletable for a specified period. This is the most effective defense against ransomware, as malware cannot encrypt or wipe the protected backup copies.
- Simplicity: Deploying a pre-configured appliance is often faster and easier than building and securing a traditional Windows or Linux backup server.
Media and Entertainment Archives
Video production studios, broadcasters, and content creators generate massive amounts of unstructured data. An object storage appliance provides a scalable and cost-effective “active archive” for this media. Editors can use asset management software that speaks the S3 protocol to directly access and retrieve clips from the appliance over a high-speed local network, avoiding the latency and egress fees of public cloud storage.
Edge Computing and Remote Offices
Data increasingly generates and processes at the edge—in factories, retail stores, or research labs. Organizations can deploy a compact S3 appliance at these remote locations to provide local, high-performance storage for applications like video surveillance, IoT data collection, or industrial analytics
. Then, they can configure the appliance to automatically replicate important data back to a central data center or a public cloud for long-term retention.
Financial and Operational Benefits
Opting for an appliance model over a component-based approach or public cloud rental has a direct impact on the bottom line and IT staff workload.
Predictable Cost Model
With an appliance, you have a fixed, upfront capital expenditure. This is highly attractive to finance departments who prefer predictable costs that can be amortized over the life of the hardware (typically 3-5 years). It eliminates the risk of runaway operational spending associated with fluctuating public cloud usage and egress fees.
Reduced Management Overhead
Because the system is integrated and largely self-managing, it frees up valuable IT staff time. Instead of spending hours troubleshooting hardware compatibility or applying complex software patches, the team can focus on more strategic initiatives. The simplicity of the appliance model allows generalist IT staff to manage petabytes of storage, a task that would previously have required a dedicated storage specialist.
Accelerated Time to Value
Perhaps the most significant benefit is speed. An organization can go from identifying a need for modern storage to having a fully functional private cloud in a matter of days or weeks, rather than months. This agility allows the business to launch new projects and services faster, providing a direct competitive advantage.
Conclusion
The evolution of IT infrastructure is a cycle of bundling and unbundling.While the software-defined movement unbundled software from proprietary hardware, the complexity of integration has created a demand for a new kind of bundling. This is the pre-integrated appliance. These systems offer a powerful middle ground between the rigidity of legacy storage arrays and the complexity of a DIY private cloud.
By delivering the scalability and API-driven nature of object storage, these appliances come in a simple, plug-and-play package. They democratize access to modern data management. Additionally, they empower organizations of all sizes to take control of their data. These appliances improve performance, strengthen security, and help build a predictable, cost-effective foundation for a digital future. They provide a turnkey solution for a complex world.
FAQs
1. Is an appliance model less flexible than building my own cluster?
Yes, in some ways. With an appliance, you are limited to the hardware configurations offered by the vendor. In a DIY model, you can choose any server or drive you want.
However, this perceived lack of flexibility is often a strength, as it guarantees performance and simplifies support. For most use cases, the vendor’s optimized configurations will outperform a generic self-built system.
2. What happens if I outgrow my appliance?
Most appliance solutions are built on a scale-out architecture. “Outgrowing” the appliance simply means adding another node to the cluster. You purchase another box from the vendor, plug it into the network, and the software automatically incorporates the new capacity and compute resources. This allows for seamless, non-disruptive growth.
3. Can I mix different appliance models or generations in the same cluster?
This depends on the vendor, but many leading solutions allow you to mix and match nodes of different capacities or hardware generations within the same cluster.
This protects your initial investment, allowing you to take advantage of newer, denser hardware as it becomes available without having to replace your existing nodes.
4. How are software updates handled on an appliance?
Updates are typically managed through a centralized user interface and are designed to be non-disruptive. The vendor packages and tests the updates for the specific hardware configuration, which reduces the risk of bugs.
The update process is usually automated, rolling through one node at a time to maintain service availability.
5. Does an appliance lock me into a single vendor?
Yes, for the hardware and its core software, you are tied to the appliance vendor. However, because the appliance uses the universal S3 protocol, your applications remain flexible.
You can point your applications to any other S3-compatible endpoint, whether it’s from another vendor or hosted in the public cloud. This setup provides application-level freedom, even if you source the hardware from a single vendor.
-
Business2 years ago
Cybersecurity Consulting Company SequelNet Provides Critical IT Support Services to Medical Billing Firm, Medical Optimum
-
Business3 years ago
Team Communication Software Transforms Operations at Finance Innovate
-
Business3 years ago
Project Management Tool Transforms Long Island Business
-
Business2 years ago
How Alleviate Poverty Utilized IPPBX’s All-in-One Solution to Transform Lives in New York City
-
health3 years ago
Breast Cancer: The Imperative Role of Mammograms in Screening and Early Detection
-
Sports3 years ago
Unstoppable Collaboration: D.C.’s Citi Open and Silicon Valley Classic Unite to Propel Women’s Tennis to New Heights
-
Art /Entertainment3 years ago
Embracing Renewal: Sizdabedar Celebrations Unite Iranians in New York’s Eisenhower Park
-
Finance3 years ago
The Benefits of Starting a Side Hustle for Financial Freedom


