
Business industrial
Custom Candle Boxes to Illuminate Your Brand & Captivate
By
Reviewed
By Maria Skylar

Introduction
Candles do more than light a room; they create a mood, awaken senses, and symbolize moments. But before the scent is lit, your customer meets the box. That’s where custom candle boxes make the first emotional impact. With the right design, they do more than protect the product; they turn it into an experience.
In today’s premium candle market, where consumers pay more for quality, presentation is everything. According to a 2024 survey by Smithers Pira, 74% of buyers say packaging design influences gift purchases, and 61% associate premium packaging with product quality. Your box, therefore, is a silent ambassador of your brand’s promise.
Why Custom Candle Packaging Matters More Than Ever
Candle brands have exploded in recent years from minimalist soy candles to luxurious aromatic collections. But in a saturated market, it’s your custom candle box that separates you from the rest.
Great packaging does three key things:
- Sparks emotional appeal through design and material by using textures, colors, and finishes that resonate with your audience and create a lasting impression.
- Reinforces your brand identity with consistency and tone across every packaging element, ensuring your message is clear, recognizable, and aligned with your values.
- Creates shareable experiences that customers want to repeat by offering packaging that feels special, looks great in photos, and encourages word-of-mouth and social media engagement.
The candle itself sells warmth and ambiance. Your packaging sells the story behind it.
Packaging That Evokes Emotion Through Every Detail
Customers often buy candles as gifts, mood-setters, or home decor, all of which are emotional purchases. That’s why your candle box should instantly evoke a feeling that aligns with your brand’s essence.

1. Color and Texture that Speak Silently
Colors tap into emotion. Neutrals like ivory or blush suggest elegance and softness. Deep tones like navy or burgundy offer a sense of depth and luxury. Pairing those with textured finishes like soft-touch matte or linen coating adds tactile warmth.
Brands that connect emotionally see 2x higher customer loyalty. When customers feel something from the packaging, they’re more likely to remember and repurchase.
2. Typography and Layout That Guide the Eye
Elegant serif fonts suggest timeless quality, while handwritten styles convey artisan charm. Clear hierarchy and spacing ensure your design isn’t cluttered, especially for minimalist brands.
Let your box “breathe.” Simplicity exudes confidence.
3. A Story that Comes Through in Every Panel
Use your box as a storytelling canvas. Include:
- A short brand message or origin story
- Fragrance notes or candle inspiration
- A quote that reflects the mood your candle offers
According to Harvard Business Review, emotionally connected customers have a 306% higher lifetime value. And storytelling is a proven way to foster that connection.
Designing for Function and Beauty
A candle box isn’t just for looks. It must also protect, support, and elevate your product physically.
Custom candle boxes provide:
- Snug fit and cushioning protect the product from damage during transit, ensuring it arrives in perfect condition while enhancing the unboxing experience.
- Custom inserts keep items securely in place, maintain an organized layout, and add a premium touch that reflects attention to detail.
- Magnetic closures or slide drawers offer a sleek, user-friendly design that elevates the packaging’s overall appeal and makes it ideal for gifting or reuse.
Functional packaging adds perceived value. Shopify data shows that 43% of customers are more likely to reorder from brands with thoughtful unboxing.
Create Shelf Presence and Online Appeal
Whether your candles are sold in boutiques or through e-commerce, visual shelf appeal is crucial. Online, it translates to clicks and conversions. In-store, it wins attention in seconds.
Here’s how to ensure your candle box turns heads:
- Use die-cut windows to give a peek at the candle color or label
- Apply foil stamping or spot UV to highlight your logo or fragrance name
- Incorporate cohesive brand colors and textures across all products
The right design doesn’t just draw eyes it holds them. This increases brand recall and supports strong visual identity.
Eco-Friendly Packaging for the Conscious Buyer
Sustainability is now a buying factor. Consumers are aware, and many are loyal to brands that align with their values. In fact, the Global Buying Green Report found that 67% of Gen Z consumers prefer sustainable packaging.
Here’s how to go green with your custom candle boxes:
- Use recycled or biodegradable paperboard
- Opt for minimal printing with soy-based inks
- Avoid plastic coatings and laminates
An eco-conscious box strengthens your brand presence by showing integrity and transparency — traits that modern buyers reward.
Targeted Designs for Different Candle Collections
Custom candle boxes allow you to tailor packaging to your product line. Different candle types deserve different design elements.
- Luxury soy candles: Use rigid boxes, embossed foil, and velvet inserts
- Minimalist collections: Go with kraft paper, monochrome palettes, and subtle branding
- Gift sets: Use magnetic flip boxes, ribbon closures, or nested compartments
By aligning packaging design with product purpose, you help the customer connect more deeply and return for future collections.
Conclusion
Candles sell warmth, luxury, and experience, and your packaging must reflect that. With custom candle boxes, you don’t just protect your product; you shape your brand’s identity, connect emotionally with buyers, and build a loyal customer base.
From the moment your customer sees the box to the final flicker of the flame, your packaging should spark something special. Light up your brand presence with custom candle boxes that inspire and attract more customers today
Author
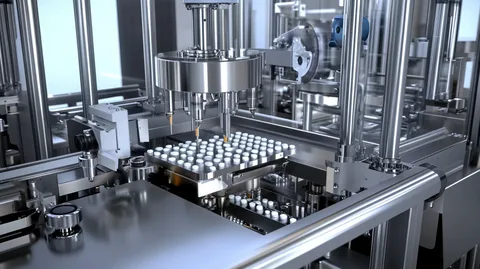
Capsules remain one of the most reliable drug delivery formats in the medical world. Patients and consumers heavily prefer them because they are incredibly easy to swallow. They also offer highly accurate dosing and adapt easily to a wide variety of chemical formulations. Because capsule consumption is rising continuously, manufacturing facilities are changing how they operate. They are investing heavily in advanced machinery to boost production speeds and meet strict compliance standards.
The economic growth of this industrial sector is highly consistent. According to market data from The Insight Partners, the global capsule filling machine market sat at an estimated value of US$ 211.32 million in 2021. Driven by widespread technological updates, the market size is projected to reach US$ 290.92 million by the year 2028. This upward trend represents a steady compound annual growth rate (CAGR) of 4.7% over the specified time frame.
Powerful Factors Driving Industry Growth
1. The Surging Demand for Preventive Health and Wellness Products
The primary force accelerating this market is the dramatic worldwide shift toward preventive healthcare. Consumers are buying massive amounts of vitamins, herbal products, and probiotic supplements. Consequently, nutraceutical companies and dietary supplement brands face intense pressure to upscale their production lines.
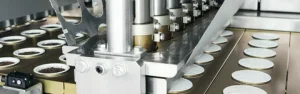
To keep pace with this demand, contract manufacturing organizations are purchasing advanced filling equipment. These machines help them process granules, fine powders, and delicate pellets quickly. This surge in wellness product consumption ensures a steady demand for high-capacity equipment.
2. Rapid Automation in Pharmaceutical Manufacturing Lines
Automation has officially become a mandatory requirement in modern drug production. Pharmaceutical companies are actively replacing older systems with smart equipment. These automated systems maximize production efficiency and reduce human error. They also maintain consistent dosing accuracy across massive product batches.
Furthermore, strict regulatory guidelines force companies to monitor their production lines in real time. Automated machinery effortlessly handles complex tasks like automated capsule sealing and immediate quality verification. This reliability makes automation a primary driver for the global market.
3. Incorporating Robotics and Smart Mechatronics
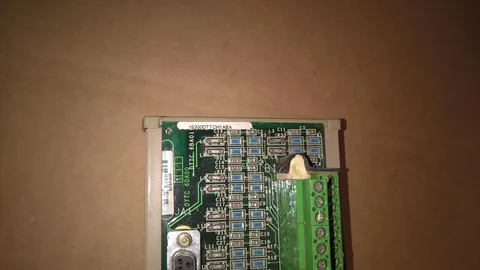
Advanced robotics and mechatronic capabilities are completely transforming pharmaceutical packaging lines. Equipment builders are directly integrating collaborative robots into modern filling setups. These intelligent robots manage heavy material handling and streamline capsule sorting.
Additionally, manufacturers are equipping modern machines with Internet of Things (IoT) connectivity and smart sensors. These connected systems collect detailed performance data. Operators then utilize this real-time analytics data to optimize machine efficiency. This smart technology also helps facilities predict when a machine needs maintenance, preventing costly unexpected downtime.
Technical Insights into Market Segmentation
The capsule filling machine landscape splits into clear divisions based on automation levels and operational capacities.
-
By Automation Level: The market features manual, semi-automatic, and fully automatic machines. Fully automatic capsule filling machines dominate the global market share. Large-scale manufacturing facilities rely on these high-speed systems to maintain intense production schedules. Conversely, semi-automatic machines are gaining significant traction among small and mid-sized enterprises. These compact systems offer excellent flexibility for contract manufacturers who handle frequent formulation changes.
-
By Capacity: Systems are divided into small, medium, and high-capacity machinery. Small-capacity machines handle up to 50,000 capsules per hour. This specific segment commands a massive share of the market. Research laboratories, medical clinics, and independent supplement startups prefer these smaller machines because they require less upfront capital. They also support controlled batch testing for personalized medicine.
Comprehensive Overview of Regional Performance
The adoption of capsule filling technology varies significantly across global geographic regions. North America currently commands a major leading share of the global landscape. This regional dominance is supported by a sophisticated pharmaceutical infrastructure and immense research investments. North American manufacturers also face strict regulatory oversight. This environment forces them to adopt highly advanced, cleanroom-ready equipment to avoid product contamination.
Europe stands firmly as the second-largest regional marketplace. European growth relies on a strong tradition of precision engineering and growing regional demand for nutraceutical supplements.
Meanwhile, the Asia-Pacific region is positioning itself as the fastest-growing market on Earth. Countries like India and China are rapidly expanding their domestic drug manufacturing hubs. This explosive growth is driven by cost-efficient production capabilities and supportive government policies. As a result, the region represents a massive growth opportunity for machinery exporters.
The Highly Competitive Global Environment
The global capsule filling machine sector is intensely competitive. Success in this specialized field requires constant engineering innovation and deep distribution networks. Machinery builders must consistently upgrade their equipment designs. They want to provide faster changeover times, simplified cleaning processes, and modular filling platforms.
Several prominent engineering firms anchor the global industry. Industry leaders like Syntegon Technology GmbH (formerly Bosch Packaging Technology) and IMA Group dominate large-scale facilities with ultra-high-speed automated systems. MG America and Harro Höfliger capture massive market share by offering highly precise dosing systems.
At the same time, companies like ACG and SaintyCo provide exceptional competition. They deliver versatile, cost-effective machinery to emerging pharmaceutical hubs. These top-tier competitors frequently establish strategic partnerships with automation software providers. This collaboration allows them to build fully digitalized, connected ecosystems that streamline regulatory compliance for their clients.
Long-Term Future Outlook
The long-term future of the capsule filling machine market points toward sustained expansion. The industry is moving rapidly toward fully digitalized, high-precision manufacturing environments. Moving forward, the rise of personalized medicine will require machines to support ultra-small batch sizes without sacrificing output accuracy.
Furthermore, the ongoing integration of Industry 4.0 concepts will make production lines completely self-optimizing. As international health systems expand and wellness trends continue to sweep the globe, the demand for advanced filling systems will remain incredibly strong. Driven by continuous software integration and expanding healthcare needs, this market will remain a cornerstone of global pharmaceutical infrastructure.
Author

Author
In today’s highly competitive manufacturing environment, precision and efficiency are absolutely essential for every CNC workshop. Machine shops give immense attention to cutting speeds, advanced materials, and raw machine capabilities. However, operators frequently overlook one critical component—the chamfering tool.
Chamfering might seem like a minor finishing operation. Yet, this single process plays a pivotal role in improving part quality, workplace safety, and production throughput. Whether a shop produces automotive components, aerospace parts, industrial machinery, or custom-crafted products, proper edge finishing is necessary to meet strict quality standards.
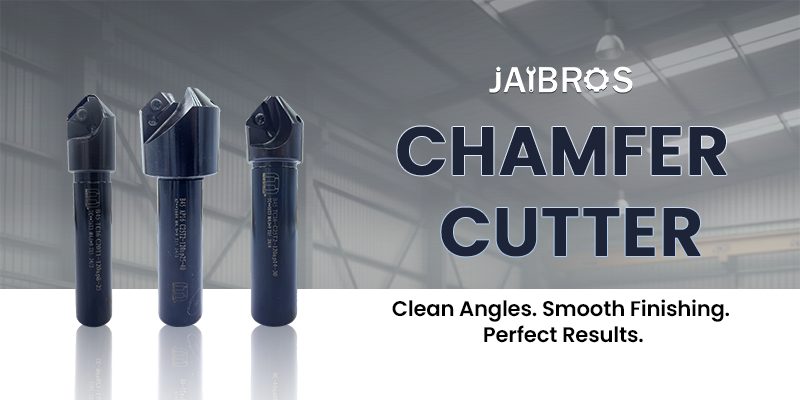
This is where a premium chamfer tool becomes an indispensable part of the machining process. A high-quality chamfering solution removes razor-sharp edges, improves component assembly, reduces stress concentration, and creates a professional aesthetic finish. Every CNC workshop should invest in dependable chamfering tools to guarantee long-term manufacturing success.
What Is a Chamfer Tool?
A chamfering tool is a specialized cutting instrument. It creates angled or beveled edges on a machined workpiece. Instead of leaving sharp 90-degree corners after initial milling, the tool removes a small amount of material to form a smooth, sloping edge.
Machinists generally use chamfering to accomplish several key manufacturing goals:
-
Eliminating dangerously sharp edges
-
Improving final product appearance
-
Preparing raw components for assembly
-
Reducing burr formation
-
Enhancing worker handling safety
-
Preparing materials for optimal weld penetration
Selecting a properly designed chamfer tool allows shops to achieve highly consistent edge quality. Furthermore, this automation drastically reduces the need for manual, time-consuming hand finishing.

The Critical Importance of Edge Finishing
Many manufacturers focus all their energy on basic dimensional accuracy. However, final edge quality is equally critical to a part’s success.
Poorly finished edges cause serious manufacturing bottlenecks. They frequently lead to assembly difficulties, severe safety hazards, accelerated component wear, high product rejection rates, and eventual customer dissatisfaction. Chamfering ensures that machined parts are immediately ready for use, assembly, or secondary surface treatments without requiring costly manual rework.
Why Modern CNC Workshops Require Premium Tooling
Improved Product Quality
Customers expect finished components that meet both strict dimensional limits and exceptional visual standards. High-quality chamfering tools create perfectly uniform bevels and incredibly smooth surfaces. This clean execution yields professional-looking components. Uniform edge finishing also drastically improves overall product reliability and structural functionality over time.
Increased Machining Efficiency
Manual deburring and edge scraping consume massive amounts of valuable production time. By incorporating automated chamfering operations directly into CNC programs, workshops can drastically reduce total cycle times. This smart integration eliminates secondary manual benches, optimizes internal workflow efficiency, and increases overall machine utilization.
Enhanced Worker Safety
Sharp metal edges pose serious physical risks during manual handling and assembly phases. Automated chamfering completely removes these workplace hazards. Consequently, it creates a much safer environment for machine operators, assembly technicians, and end-users alike.
Better Component Assembly
Chamfered edges help mating components slide together with minimal resistance. Precision applications like bearings, rotating shafts, bushings, fasteners, and threaded connectors benefit immensely from smooth, angled entry points. This geometry simplifies complex assembly operations, reduces installation time, and minimizes the risk of part-on-part damage.
Key Applications and Tool Types
Chamfering serves several distinct roles across a wide variety of machining operations. Machinists use it for basic edge breaking to eliminate sharp corners. It is also excellent for deep deburring, as it clears away the ragged metal fragments generated by heavy milling cutters. For weld preparation, beveled edges allow for deeper weld penetration and stronger joints. Additionally, chamfering acts as countersinking to prepare pre-drilled holes for flat-head screws and flush-mounted fasteners.
Different machining requirements call for distinct tooling profiles:
-
Standard Chamfer Mills: Ideal for general-purpose edge breaking and simple deburring.
-
Countersink Tools: Specifically engineered for creating conical openings for standard fasteners.
-
Spot-Chamfer Combination Tools: These designs combine hole-spotting and chamfering into a single toolpath to boost productivity.
-
Back Chamfering Tools: A back chamfer tool machines internal surfaces or hard-to-reach rear edges. Aerospace, hydraulic, and precision medical industries rely heavily on back chamfer tools because standard tools cannot access these hidden internal zones.
-
Indexable Chamfering Tools: These systems utilize replaceable carbide inserts, making them the perfect choice for high-volume manufacturing lines.
The Role of Automation and Lathe Operations
Modern manufacturing relies heavily on automated production systems. Setting up a dedicated CNC chamfer tool allows workshops to program edge-finishing routines with extreme accuracy. Automated control ensures perfectly repeatable results, faster production runs, and minimal operator intervention. This systematic approach lowers labor costs and stabilizes process reliability.
Turning centers also require fast edge finishing after machining cylindrical workpieces. A dedicated lathe chamfer tool creates clean, beveled edges during high-speed rotation. Operators use these tools constantly when turning shafts, bushings, threaded connectors, and precision mechanical fittings. Lathe-based chamfering keeps the part inside a single machine envelope, which drastically improves shop workflow.
Lowering Production Costs Through High-Quality Tools
Many shops make the mistake of focusing strictly on the upfront purchase price of a cutting tool. Premium chamfering tools provide superior long-term cost-saving advantages through extended tool life. Advanced tool coatings and high-grade substrates resist heat and friction far better than cheap alternatives.
Furthermore, premium tools yield consistent dimensions that eliminate part rejection and expensive scrap material. Their efficient cutting geometries reduce cycle times, increase part throughput, and minimize machine downtime caused by frequent tool changes.
Selecting the Right Tooling Solution
Choosing the perfect tool for your shop depends on several critical operational variables:
-
Workpiece Material: Different materials require unique cutting geometries and specialized coatings. Aluminum requires sharp, polished edges, while stainless steel, titanium, and cast iron demand durable, heat-resistant coatings.
-
Chamfer Angle: Engineering blueprints dictate specific required angles. The most common varieties include 30°, 45°, 60°, and 90° configurations.
-
Machine Compatibility: Operators must match tools correctly to their specific CNC machining centers, turning centers, tool holders, and maximum spindle speeds.
-
Production Volume: High-volume jobs benefit most from indexable insert systems to reduce long-term tooling overhead.
Future Trends and Conclusion
As machining technology advances, emerging trends continue to optimize chamfering performance. Modern workshops increasingly adopt real-time tool wear monitoring, advanced micro-grain carbide substrates, specialized multi-layer coatings, and automated tool management carousels. These innovations help machine shops push productivity boundaries while maintaining exceptional edge quality.
Ultimately, a premium chamfer tool is much more than a basic finishing accessory. It is a critical component of modern precision engineering. By investing in reliable, high-performance chamfering tools, manufacturers can establish greater efficiency, flawless consistency, and total customer satisfaction. For workshops seeking dependable tooling solutions, partnering with specialized precision manufacturers ensures your production line stays ahead of the competition.
Author


Stussy Hoodie: Streetwear History, Logos & Global Popularity

Drop Dead Clothing: Alternative Streetwear Brand Founded

Europe Trip Packages for Corporate Retreats: Tours & Travel

Dynaclean Sweeper Machines: Industrial Cleaning Equipment

Manchester Bus tour: Stress-Free Tours for Families & Teams

Manchester Bus Tour: Group Sightseeing & Minibus Hire

Full-Spectrum vs Broad-Spectrum CBD: The Right Skincare

Jaded London Jeans & Dresses: Modern Street Style

Midwest Company; USA Beauty Product Manufacturer

MacBook on Rent in Mumbai: Flexible Plans for Students

Cybersecurity Consulting Company SequelNet Provides Critical IT Support Services to Medical Billing Firm, Medical Optimum

Meet the Megalodon: The Shark Star of ‘Meg 2’

Reduce Video Game Lag: Level Up Your Gaming Performance
Balancing India’s Entertainment: Cricket vs. Bollywood

Jetsetter’s Secrets: Unveiling Our Favorite Travel Hacks for a Seamless Adventure

The 5 Best Live Sports Streaming Sites: Legal and Exciting!

Hollywood Labor Unrest: The Impact of ‘What About Us?’ Strikes

Unveiling the Magic of Dream Fulfillment at the Late NBA Draft

Illuminate Your Skin: Dr. Axe Unveils Natural Remedies for Lightening Knees and Elbows

Bright Choices: Navigating the Pros and Cons of Skin Whitening Creams with Dr. Axe
-

 Business3 years ago
Cybersecurity Consulting Company SequelNet Provides Critical IT Support Services to Medical Billing Firm, Medical Optimum
-
Entertainment3 years ago
Meet the Megalodon: The Shark Star of ‘Meg 2’
-
Entertainment3 years ago
Reduce Video Game Lag: Level Up Your Gaming Performance
-
 Sports3 years ago
Balancing India’s Entertainment: Cricket vs. Bollywood
-
Entertainment3 years ago
Jetsetter’s Secrets: Unveiling Our Favorite Travel Hacks for a Seamless Adventure
-
Productivity3 years ago
The 5 Best Live Sports Streaming Sites: Legal and Exciting!
-
Art /Entertainment3 years ago
Hollywood Labor Unrest: The Impact of ‘What About Us?’ Strikes
-
Sports3 years ago
Unveiling the Magic of Dream Fulfillment at the Late NBA Draft


