
Technology
How to Make the Most of Your New iPhone: 23 Expert Tips


Every growing business reaches a stage where technology becomes essential for daily operations. Companies invest in different software solutions to improve performance, increase productivity, and solve specific business challenges. A CRM system helps manage sales and customer relationships. An ERP solution improves operational control. Project management tools help teams organize tasks and deadlines. Customer support platforms make communication easier.
Initially, every new application brings value. However, after several years, many organizations face a common challenge. Instead of making work easier, multiple systems create complexity. Teams struggle with disconnected information, slow communication, and difficult decision-making. The problem is not that these software solutions fail. The real challenge is that every new system creates another connection that requires management and maintenance. Eventually, businesses reach what is known as the integration ceiling. This happens when adding more applications creates more complexity than actual business benefits.An Enterprise Platform helps organizations overcome this limitation by connecting applications, data, workflows, and business processes within one unified environment.
Business Growth Creates More Connections
Many business leaders associate growth with more employees, higher revenue, and a larger customer base. However, growth also creates more connections between departments and processes.For example, sales teams need accurate information from finance. Finance teams depend on procurement data. Procurement relies on inventory updates. Project teams require customer details, while support teams need access to complete customer histories.As businesses expand, these connections increase quickly. The number of relationships between departments often grows faster than the size of the organization itself.When companies use separate systems for each department, information often moves through emails, spreadsheets, and manual updates. This process slows operations and increases the chance of errors.The challenge is not business growth itself. The real issue is disconnected technology.
The Hidden Impact of Disconnected Systems
The integration ceiling usually does not appear overnight. Instead, businesses notice small operational problems that gradually become bigger challenges.Employees may enter the same customer details into several different platforms. Managers may spend hours collecting reports because different departments have inconsistent data. Sales teams may make promises without knowing current operational capacity.At the same time, finance departments often spend unnecessary time matching transactions that should already be connected. Customer support teams may waste valuable hours searching for information instead of helping customers.These tasks consume company resources without creating real value.An Enterprise Platform removes these barriers by creating a connected operational environment. It allows information to move smoothly between teams, reduces manual work, and helps employees focus on activities that support business growth.

Creating Customer Experiences with CRM Workflow Automation
Many businesses use CRM Workflow Automation to improve sales processes, customer communication, and approval workflows. These improvements help organizations manage customer relationships more effectively.However, the customer journey does not end after a successful sale. Once a customer places an order, several other processes begin.Operations need order details. Finance needs billing information. Project teams need customer requirements. Support teams need complete interaction records.without an integrated system, CRM automation only moves information from one disconnected application to another.With an Enterprise Platform, CRM Workflow Automation becomes part of a complete business process. Every action automatically connects with thenext step of the customer journey.This creates faster workflows, better communication, and a smoother experience for both employees and customers.

Why Business Flexibility Matters
Modern businesses must constantly adapt. Customer expectations change. Markets evolve. Industry regulations develop. Companies need technology that can adjust quickly.
Traditional systems often require expensive development work whenever businesses need to change workflows or create new processes.A Low Code Application Platform provides a more flexible approach. It allows organizations to adjust applications, dashboards, forms, approvals, and business rules without rebuilding entire systems.As a result, businesses can respond faster to new opportunities and challenges.Instead of changing business strategies to match software limitations, companies can customize technology to support their goals.This flexibility helps organizations improve continuously while maintaining stable operations.
Connecting Operations Through a Cloud ERP Platform
Winning customers is only one part of business success. Companies must also manage inventory, finances, projects, and internal operations effectively.A modern Cloud ERP Platform connects these important activities through real-time data.With an integrated ERP system, inventory information reflects current demand. Finance teams work with accurate operational data. Project teams receive approved customer requirements. Business leaders gain a complete view of company performance.When ERP capabilities operate within an Enterprise Platform, departments no longer depend on manual data transfers.
Instead, information flows automatically across the organization. This improves accuracy, reduces delays, and supports faster decision-making.
Why Air tool Uses an Enterprise Platform Approach
Air tool takes a different approach to enterprise technology. Instead of providing separate applications that require complicated integrations, Air tool creates a connected environment where business solutions work together.The platform combines CRM Workflow Automation, Enterprise Software, Cloud ERP Platform capabilities, analytics, artificial intelligence, and business applications into one unified ecosystem.Through its Low Code Application Platform, organizations can update workflows and develop solutions without disrupting daily operations.The unified architecture also ensures that business information remains consistent across departments.Rather than spending time managing multiple disconnected systems, companies can focus on improving efficiency, making smarter decisions, and creating better customer experiences.
Building a Scalable Future with an Enterprise Platform
Every successful organization eventually reaches a point where adding more software creates additional challenges. This situation does not represent a technology failure. Instead, it indicates that the current system structure needs improvement.The integration ceiling shows that businesses need a more connected approach.An Enterprise Platform removes this limitation by replacing isolated applications with a complete operational foundation. It connects data, workflows, and decisions so businesses can operate more efficiently.When CRM Workflow Automation, Enterprise Software, Cloud ERP Platform solutions, and Low Code Application Platform capabilities work together, organizations gain more than improved productivity.They gain better visibility, greater flexibility, and the ability to grow without increasing unnecessary complexity.For modern businesses, the future is not about adding more software. It is about creating a connected ecosystem where technology supports growth, innovation, and long-term success.
Author
Companies invest heavily in CRM workflow automation. They anticipate rapid growth and newfound efficiency. Leads accelerate through the pipeline. Follow-ups occur automatically. Sales teams reclaim their time from administrative tasks. These goals remain perfectly valid. Yet, many enterprises face a sudden realization after deployment. The CRM software functions perfectly. The business, however, fails to improve. This paradox stems from a single oversight. Automation usually ends exactly where the sales pipeline concludes. Truly successful businesses require automation that lasts far beyond the initial deal.
Automation Must Extend Beyond the Sale
Imagine a customer signs a contract today. In many organizations, that moment marks the finish line for CRM automation. The sales representative marks the opportunity as “Won.” From that point forward, the process relies entirely on manual effort. Operations teams wait for project details. Finance departments request customer information yet again. Support teams start from scratch because they lack complete context. Each department works incredibly hard. They simply fail to work together. The customer experiences unnecessary delays. This frustration happens because automation never extended past the sales department.
Connecting the Entire Business Ecosystem
Effective CRM workflow automation moves beyond simple reminders. It does not just assign follow-up tasks. Instead, it connects the customer journey from start to finish. A customer moves from marketing to sales. Next, they progress to implementation. Then, they reach finance. Finally, they engage with support. Information should travel automatically during every step. Duplicate data entry disappears. Repeated, frustrating conversations cease. No team suffers from missing context. Automation creates real value when it removes friction between departments. It should not merely organize the work of a single team.
Why Traditional Systems Fail
Many CRM platforms rely on outdated design philosophies. They focus specifically on helping sales representatives manage their opportunities. Modern businesses require much more than a digital rolodex. Customers demand instant responses. Projects start the moment contracts receive signatures. Finance needs accurate billing data immediately. Operations teams require precise delivery schedules. Management expects real-time visibility into every metric. Standalone CRM tools struggle to support these interconnected processes. Businesses do not need more software. They require connected, intelligent automation.

The Power of an Enterprise Platform
An Enterprise Platform changes the conversation entirely. It stops treating the CRM as an isolated island. Instead, it connects customer data directly with finance, projects, procurement, inventory, and reporting. Automation becomes a central nervous system for the entire company. It does not serve one department. It empowers the whole organization. This shift creates faster execution. Manual handovers decrease significantly. The customer enjoys a consistent experience across every interaction.
Agility Through Flexible Automation
Customer expectations shift rapidly in today’s market. Internal business processes change just as quickly. Organizations need the ability to adjust workflows. They should not rebuild their applications every few months. A modern Low Code Application Platform allows teams to evolve. Staff can modify approval flows, onboarding processes, and notifications. They can update customer journeys in minutes. Instead of accepting rigid workflows, businesses improve their automation continuously. They learn more about their customers and adapt their processes to match.
The Synergy with Cloud ERP
Automation becomes significantly more powerful when customer activities connect to core business operations. A modern Cloud ERP Platform ensures that orders, invoices, inventory, and financial records reflect customer activity instantly. Departments no longer operate in isolation. Everyone works from the same real-time business information. This integration reduces delays. It also improves operational accuracy across the board. Every single team views the same truth. This transparency creates a culture of accountability and speed.
The Airtool Approach
Airtool treats CRM Workflow Automation as a core business capability. It offers far more than a simple sales feature. Built on a connected Enterprise Platform, Airtool enables organizations to automate the entire customer lifecycle. It ignores the traditional boundary of isolated CRM activities. Its integrated Low Code Application Platform allows businesses to customize workflows. It removes unnecessary complexity from the process. Meanwhile, its Cloud ERP Platform connects customer interactions directly with operational tasks. The result transforms the entire organization. Airtool improves sales productivity, but it also elevates the performance of every other department.
Designing for a Connected Future
Talk to an Airtool Architect today. They help you create workflows that unite your teams. You can bridge the gaps between sales, operations, finance, and customer service. Every interaction you have with a customer will drive measurable business value. You stop wasting time on manual data entry. You start focusing on building stronger relationships.
Final Thoughts
Many organizations search for better CRM software. Often, they simply need better automation strategies. The goal involves more than automating a few repetitive tasks. The true objective requires removing the gaps between people, departments, and decisions. When CRM Workflow Automation becomes part of a connected enterprise, the results change. Businesses respond faster. Teams collaborate better. Companies create consistent, reliable customer experiences. That is where automation delivers its greatest return on investment. It creates value across the entire business, not just inside the CRM.
Frequently Asked Questions
What constitutes CRM Workflow Automation?
This technology automates repetitive tasks related to customers. It handles lead assignment, follow-up emails, internal approvals, and status notifications. Businesses use these tools to improve efficiency and reduce manual labor. Consequently, they deliver a more consistent experience to every client.
How does this automation boost productivity?
Automation removes routine administrative burdens from the team. Employees focus on high-value activities instead of manual data entry. Collaboration improves because customer information remains accurate and accessible to every department. The entire company works from a single source of truth.
How does an Enterprise Platform enhance CRM tools?
A standard CRM often works alone. An Enterprise Platform connects that CRM to finance, operations, and project management. This integration creates seamless workflows across the whole organization. It eliminates data silos and significantly improves end-to-end business efficiency.
Author
Anyone who has stood at the back of a conference room and watched a presentation fall apart knows the feeling. The microphone cuts out for a second. The slides lag behind the speaker. The lighting washes out the stage right when the CEO steps up to talk. None of these moments are dramatic on their own, but together they chip away at how an audience experiences an event, and they rarely happen by accident. They happen because the technical planning was rushed.
This is where working with a team that offers audio visual rentals Toronto organizers can rely on tends to make the biggest difference. It is not just about having a projector in the room or a few extra speakers on standby. It is about someone thinking through the room, the audience size, the acoustics, and the flow of the day before a single cable gets run. A well planned event feels effortless to the people watching it, even though there is an enormous amount of coordination happening behind the scenes to make that possible.
Why Technical Planning Deserves More Attention
Most event budgets get scrutinized down to the last catering line item, yet the AV plan is often finalized in the final weeks. That is backwards. Sound, lighting, and video are not decorative additions to an event. They are the medium through which almost everything gets communicated. If a keynote speaker cannot be heard clearly in the back row, the content of that keynote barely matters.
Planning early also gives a production team time to walk the venue, check power access, measure sightlines, and identify problems that would otherwise surface on the day of the event. A ballroom that looks great on a floor plan might have support columns that block half the room’s view of the stage. A hotel’s in house sound system might be fine for a wedding toast but completely inadequate for a three hundred person panel discussion. These are the kinds of details that only become obvious through experience, which is exactly why so many organizers choose to bring in a dedicated production partner rather than trying to assemble everything themselves.
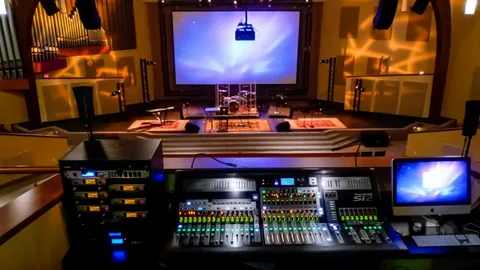
The Equipment That Carries an Event From Start to Finish
Every event has different needs, but a few categories of equipment show up again and again. Staging and rigging give a physical anchor to the event, whether that is a raised platform for a panel or a full truss system for a product launch. Lighting shapes mood far more than most people expect, and the difference between flat overhead lighting and a properly designed lighting plan is the difference between a room that feels like an office and one that feels like an occasion.
LED walls have become one of the more requested elements in recent years, largely because they replace the old rear projection setups that struggled with ambient light and awkward screen sizes. A high resolution LED wall can display sharp graphics even in a brightly lit room, which makes it a practical choice for daytime conferences as much as evening galas. Video production and live streaming equipment matter just as much for events that need to reach people who are not physically in the room, something that has become a standard expectation rather than a bonus feature since hybrid formats took hold.
Sound systems round out the list, and this is often where the biggest gap exists between amateur and professional setups. A few powered speakers might work for a small meeting, but larger rooms need proper line arrays, wireless microphone systems, and mixing that accounts for the room’s specific acoustics. Getting this wrong is one of the fastest ways to lose an audience’s attention.

How Thoughtful Technology Choices Shape the Guest Experience
Guests rarely notice good AV. They notice bad AV. That asymmetry is worth remembering, because it means the goal is not to impress people with technology but to remove every obstacle between them and the content. Clear audio lets people focus on what a speaker is saying instead of straining to hear. Balanced lighting keeps presenters visible without creating glare on screens. Reliable streaming keeps remote attendees engaged instead of watching a frozen frame.
There is also a psychological layer to this. A well produced room signals to attendees that the event is worth their attention. Poor sound or a flickering screen sends the opposite message, even if the content itself is strong. Production quality and perceived credibility are more connected than most organizers realize.
Mistakes That Quietly Undermine Otherwise Good Events
A common mistake is underestimating room size relative to audio coverage, leading to dead zones where sound simply does not reach. Another is booking a venue without confirming power capacity, only to discover on event day that the electrical setup cannot support the lighting and video equipment planned. Organizers also tend to treat AV as an afterthought during rehearsals, running through the agenda without actually testing microphones, transitions, or video cues with the full production team present.
Perhaps the most avoidable mistake is assuming that any rental company can handle any event. A team suited for small corporate meetings may not have the crew or equipment depth for a large trade show, and the reverse is also true. Matching the scale of the provider to the scale of the event prevents a lot of last minute scrambling.
What to Look for in an AV Partner
Experience matters more than a long equipment list. A seasoned production team has already seen most of what can go wrong and builds contingencies into the plan before problems appear. Ask about their process for site visits, their approach to backup equipment, and how many similar events they have produced in the past year. A partner who asks detailed questions about your audience, your goals, and your venue is usually more valuable than one who simply quotes a price list.
Communication throughout the planning process is another strong indicator. The best AV partners act less like vendors and more like collaborators, checking in as the event date approaches and adjusting the plan as details change.
Where Event Technology Is Heading
Hybrid and virtual components are no longer optional extras, and production teams are investing accordingly in streaming infrastructure and multi camera setups. LED technology continues to improve in resolution and flexibility, making creative staging design more accessible than it used to be. Automation in lighting and audio mixing is also reducing the margin for human error during live cues, freeing technical directors to focus on the bigger picture rather than manual adjustments.
None of these trends replace the fundamentals, though. Good planning, the right equipment for the room, and an experienced crew will always be the foundation that everything else builds on.
Bringing It All Together
Events succeed or struggle based on details most attendees never consciously notice. Sound that carries clearly, lighting that flatters the room, video that renders without lag, all of it works together to create an experience that feels effortless. Getting there takes planning, the right equipment, and a team that has done it enough times to know where the pitfalls are.
If you have an event on the horizon and want a production partner who will handle the technical details with the same care you put into everything else, AV-Canada is ready to talk through what your event needs and build a plan around it.
Author


Update QuickBooks Desktop: Easy Steps to Fix Update Problems

Business Opportunities in Peru: Top Investment Sectors for 2026

Coffee Marketing Agency: Strategies to Grow Your Coffee Shop

Enterprise Platform for Business Growth and Digital Transformation

Exhibition Stand Builder Frankfurt for Creative Booth Solutions

Ami Paris Germany: Luxury Fashion Consumers Prefer Quality

Social Media Marketing Agency Toronto for Business Growth

Hair Transplant Dubai: Benefits, Procedure & Recovery Guide

Essentials Hoodie Styling Guide: 15 Outfit Ideas for Every Season

Invoice Factoring for MSMEs: Improve Cash Flow with Fast Funding

Cybersecurity Consulting Company SequelNet Provides Critical IT Support Services to Medical Billing Firm, Medical Optimum

Meet the Megalodon: The Shark Star of ‘Meg 2’

Reduce Video Game Lag: Level Up Your Gaming Performance
Balancing India’s Entertainment: Cricket vs. Bollywood

Jetsetter’s Secrets: Unveiling Our Favorite Travel Hacks for a Seamless Adventure

The 5 Best Live Sports Streaming Sites: Legal and Exciting!

Hollywood Labor Unrest: The Impact of ‘What About Us?’ Strikes

Unveiling the Magic of Dream Fulfillment at the Late NBA Draft

Illuminate Your Skin: Dr. Axe Unveils Natural Remedies for Lightening Knees and Elbows

Bright Choices: Navigating the Pros and Cons of Skin Whitening Creams with Dr. Axe
-

 Business3 years ago
Cybersecurity Consulting Company SequelNet Provides Critical IT Support Services to Medical Billing Firm, Medical Optimum
-
Entertainment3 years ago
Meet the Megalodon: The Shark Star of ‘Meg 2’
-
Entertainment3 years ago
Reduce Video Game Lag: Level Up Your Gaming Performance
-
 Sports3 years ago
Balancing India’s Entertainment: Cricket vs. Bollywood
-
Entertainment3 years ago
Jetsetter’s Secrets: Unveiling Our Favorite Travel Hacks for a Seamless Adventure
-
Productivity3 years ago
The 5 Best Live Sports Streaming Sites: Legal and Exciting!
-
Art /Entertainment3 years ago
Hollywood Labor Unrest: The Impact of ‘What About Us?’ Strikes
-
Sports3 years ago
Unveiling the Magic of Dream Fulfillment at the Late NBA Draft


