
Home Garden
Unlocking Oven Cleaning Secrets
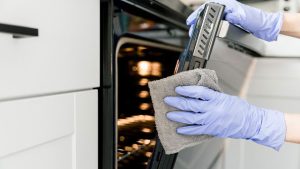
Master the Art of Oven Cleaning
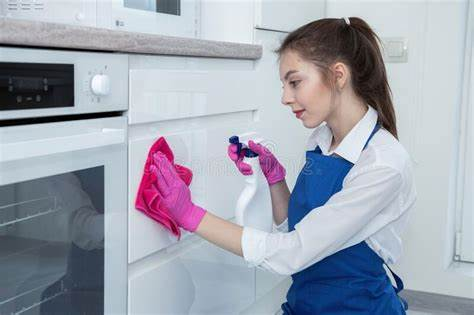
Is there anything more satisfying than seeing your oven go from grimy to gleaming? For all you home and lifestyle enthusiasts out there, I’m here to take you on a journey from that pesky oven grime to a sparkling, pristine appliance. I’ve gathered advanced techniques, insider tips, and in-depth insights to help you master the art of oven cleaning. Let’s roll up our sleeves and make your oven shine like never before. Before we dive into the advanced stuff, let’s ensure we have a solid foundation. Oven cleaning might not be the most glamorous task, but with the right knowledge and tools, it can be a breeze. One of the most common mistakes in oven cleaning is to use harsh chemicals that can damage your oven’s interior or leave harmful residues. Instead, let’s focus on the power of natural ingredients and smart cleaning techniques. Martha Stewart advises that you gather the following essential tools and materials to get started:
https://d12mivgeuoigbq.cloudfront.net/magento-media/catalog/product/8/2/82c786d0-a1cb-4bd9-8ea4-1f8593d6f1c7.jpg?w=640
Understanding the Oven Cleaning Basics
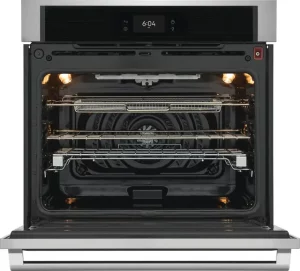
Oven cleaning is often seen as a chore, but with the right knowledge and tools, it can be a breeze. The key to successful oven cleaning lies in understanding the basics. We’re not talking about fancy chemicals or complex equipment; instead, we’re looking at simple, natural ingredients that you might already have in your kitchen.
Baking soda is the star of the show. It’s a versatile, non-abrasive cleaner that excels at removing baked-on grime without scratching your oven’s surfaces. Combine it with water to create a thick paste, and you’ve got yourself a powerful cleaning agent.
White vinegar is another essential. This natural degreaser can cut through grease and grime, making it a fantastic addition to your cleaning arsenal. It also has a handy fizzing reaction when paired with baking soda, which helps break down stubborn residues.
Dish soap is your friend when dealing with grease and stubborn residues. It’s particularly useful for cleaning oven racks and other removable parts.
But it’s not just about the cleaning agents; having the right tools is equally important. Oven-safe dishes, rubber gloves, scrubbing pads, and microfiber cloths all play their part in the cleaning process. So, gather your tools, and let’s dive into the advanced techniques.

https://d12mivgeuoigbq.cloudfront.net/magento-media/blog/iStock-859430656%20_1_.jpg?w=700
Products and Tools for Oven Cleaning
| Product/Tool | Purpose |
|---|---|
| Baking Soda | Gentle Abrasive Cleaner |
| White Vinegar | Natural Degreaser |
| Dish Soap | Cuts Through Grease |
| Oven-Safe Dish | Contains Spills |
| Rubber Gloves | Hand Protection |
| Scrubbing Pads | Removes Stubborn Stains |
| Microfiber Cloth | Provides a Final Polish |
Advanced Techniques Mastering the Art
Now that we have our cleaning arsenal ready, let’s delve into the advanced techniques that will make your oven cleaning experience efficient and effective. These methods will help transform your grimy oven into a sparkling, pristine appliance.
1. Preparing Your Oven
Before you begin, safety is paramount. Turn off your oven and allow it to cool completely. Once it’s cool, remove all the oven racks, thermometers, and anything else that can be taken out. Place an old towel or newspaper at the base to catch any drips or spills that may occur during cleaning.
2. The Power of Baking Soda and Vinegar
One of the most effective techniques for cleaning your oven involves a dynamic duo: baking soda and white vinegar. This approach is both natural and highly efficient.
Baking Soda Paste: Create a thick paste by mixing a 1/2 cup of baking soda with a few tablespoons of water. Apply this paste to the interior surfaces of your oven, excluding the heating elements. Focus on areas with heavy grime buildup and let it sit overnight.
Vinegar Application: The next day, use a spray bottle to apply white vinegar over the baking soda paste. This results in a fizzing reaction that helps break down the grime. Let it sit for at least 15 minutes, allowing the chemical reaction to work its magic.
Scrubbing: Once the fizzing subsides, use a scrubbing pad or an old toothbrush to gently scrub away the baking soda and the grime. This requires patience and thoroughness, especially when dealing with stubborn spots.
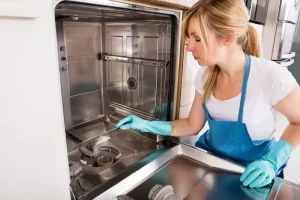
3. Cleaning Oven Racks
Soaking: Fill your bathtub or a large container with hot, soapy water. Submerge the oven racks and let them soak for a few hours or overnight.
Scrubbing: After soaking, use a brush or scrubbing pad to remove any remaining grime. Rinse them thoroughly and dry them before placing them back in the oven. Now that you’ve mastered these advanced techniques, maintaining a clean and efficient oven becomes much easier. But let’s not stop here; there are important maintenance tips to follow.
Maintenance and Tips
Cleaning your oven is a satisfying task, but it’s equally essential to maintain its cleanliness. Here are some maintenance tips to help you keep your oven in a pristine condition with minimal effort.
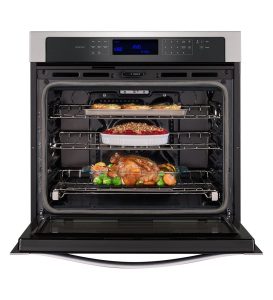
1. Prevent Spills
To avoid major cleaning sessions, consider placing an oven-safe dish or tray on the rack below your food. This simple trick catches any drips or spills, making cleanup much more manageable. It’s a preventive measure that can save you a lot of time and effort in the long run.
2. Regular Wipe Downs
After each use, take a moment to wipe down your oven’s interior with a damp cloth or sponge. This simple practice prevents the buildup of tough grime. By addressing spills and splatters as they occur, you reduce the need for intense cleaning sessions.
3. Stay Safe
Always remember safety when cleaning your oven. Turn off your oven, and make sure it’s cool before starting the cleaning process. Safety is a top priority, and adhering to proper safety measures ensures that your cleaning efforts are both effective and risk-free.
https://blogger.googleusercontent.com/img/b/R29vZ2xl/AVvXsEhHkr-bt9YNlVm9w81eef7L8274iK_PczoNOwHIJHGdyIXutuKxkLZDXvHNSo-6yFTF0t6qO9FifXjN39xSCHmS1xbyX91PE9Icpo2AEGpw8Ea6W_hCgH_nWJRmDniulwnEyh8qww5_q186UQCVFgwIbQXkPSLE-HbzZSbXUqlgBWuw3lvg1ahwPWkA-w/w640-h360/greenleaf_ovencleaning.jpg
Maintenance and Tips
| Maintenance Tip | Description |
|---|---|
| Prevent Spills | Use an oven-safe dish or tray to catch drips and spills. |
| Regular Wipe Downs | Wipe down the oven’s interior after each use. |
| Stay Safe | Turn off and cool down the oven before cleaning. |
Conclusion:
Oven cleaning may not be a task we eagerly anticipate, but the satisfaction of a sparkling, pristine appliance is a reward worth the effort. we’ve embarked on a journey to master the art of oven cleaning, and it’s essential to revisit the key takeaways. We began by understanding the oven cleaning basics. The cornerstone of our cleaning strategy is the use of everyday household items baking soda and white vinegar. These natural, non-abrasive agents are the unsung heroes of our cleaning arsenal. While they are gentle on your oven, they pack a powerful punch when it comes to dissolving grime and grease. Our exploration continued with a detailed look at advanced techniques for oven cleaning. We learned how to prepare our oven by ensuring safety, a step often overlooked but crucial. The power of a baking soda pastes, and vinegar application was unraveled. Maintenance is key to preserving the hard-earned shine. The prevention of spills by placing an oven-safe dish or tray to catch drips can save you from extensive cleaning sessions. Regular wipe-downs after each use further reduce the need for deep cleaning, keeping your oven in tip-top shape. we’ve not only learned the secrets of oven cleaning but also understood that maintaining a sparkling, efficient oven is a straightforward process. A cleaner, safer, and more efficient appliance, and the satisfaction of having mastered the art of oven cleaning. So, with newfound knowledge and practical insights, it’s time to roll up your sleeves and enjoy the satisfaction of transforming your oven from grime to shine. Happy cleaning!
Author

Sensor-Driven Layered Curtains
Smart curtains in 2026 are quieter, simpler, and far more intuitive. Instead of dramatic automation, the focus is on layered control that works in the background. These living room window curtains typically combine sheer panels with functional liners that adjust throughout the day.
What this looks like in real homes:
- Opacity adjusts based on daylight levels or preset schedules.
- Controls work through apps or voice assistants you already use.
- Reduced glare during work hours and softer light in the evening.
- Better heat control for cities like Pune with shifting sunlight.
The result is a space that feels balanced all day without constant manual adjustment.
Bio-Based Performance Weaves
Sustainability in curtains has grown up. In 2026, eco-friendly fabrics are no longer rough, dull, or high-maintenance. Weaves made from bio-based and plant-derived materials are now specifically created for living room window curtains, providing comfort and functionality.
Key characteristics homeowners are choosing:
- Breathable fabrics suited for warm and humid climates.
- Low-allergen and skin-friendly materials.
- Subtle texture that adds warmth without heaviness.
- Longer lifespan compared to fast décor fabrics.
These materials support wellness while still looking refined and contemporary.
Light-Diffusing Surface Finishes
Instead of bold prints or heavy embroidery, many 2026 interiors are choosing curtains that play softly with light. Light-diffusing living room window curtains use micro-textures and refined weaves to scatter sunlight gently across the room.
Why this trend works:
- Creates visual depth without darkening the space.
- Makes compact living rooms feel more open.
- Reduces harsh glare without blocking daylight.
- Works well with neutral, minimalist interiors.
This approach is especially effective in apartments where natural light needs to be managed carefully.

Climate-Smart Curtain Hardware
Curtain hardware has stepped into the spotlight. In 2026, rods and tracks are no longer hidden details. For living room window curtains, hardware now supports both comfort and aesthetics.
What is changing:
- Improved insulation at mounting points
- Finishes like brushed brass and muted metallic
- Cleaner profiles that suit modern interiors
- Better compatibility with layered and motorized systems
Good hardware ensures curtains hang better, last longer, and feel intentional rather than added on later.
Nature-Inspired Intelligent Prints
Prints are back, but they are softer and more thoughtful. Instead of bold motifs, 2026 focuses on patterns inspired by nature’s geometry. These living room window curtains feature subtle, repeating designs drawn from organic forms like leaves, waves, and soft spirals.
Why designers like them:
- Visually calming rather than distracting
- Easy to pair with solid upholstery and wood finishes
- Adds interest without overwhelming the room
- Supports wellness-led interior concepts
The effect is quiet detail that reveals itself over time.
Style Your 2026 Oasis
Styling living room window curtains well in 2026 is more about proportion than decoration.
A few simple ideas go a long way:
-
Install curtains above the window frame to enhance the perception of height.
- Choose floor-length panels for a clean, finished look.
- Layer sheers and functional curtains for flexibility.
- Let texture do the work instead of bold colors.
Quick Setup and Care Hacks
Installing modern living room window curtains does not need to be complicated.
Simple steps that make a difference:
- Mount curtain rods 15 to 20 cm above the window frame.
- Set smart layers according to local daylight patterns.
- Air natural fabrics once a month to keep them fresh.
- Spot clean textured curtains instead of frequent washing.
These habits extend fabric life and reduce unnecessary replacements.
Conclusion
In 2026, living room window curtains are shaped by small but meaningful shifts. Smarter layering that adjusts on its own, breathable bio-based fabrics, and finishes that work quietly with light rather than against it. Together, these trends are less about novelty and more about ease.
Imagine living room window curtains that simply feel right, filtering harsh sunlight without fuss, breathing with the space, and lasting through seasons of real living. Thoughtful choices like textured linens, gentle diffusion, or responsive layers reflect the direction brands like GM Fabrics stand for, where quality and care guide design.
This is not about chasing what looks new for the sake of it. It is about choosing living room window curtains that support how you live now and how your home will evolve, holding everyday moments and quiet routines year after year. What little adjustment would make your windows seem more homely?
Author
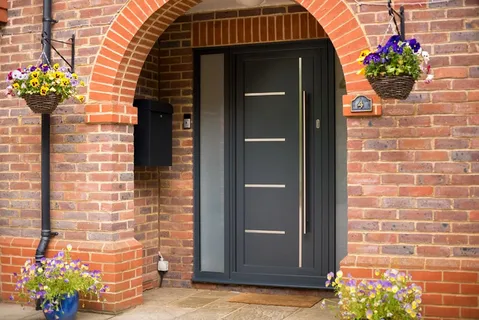
Upgrading your home starts at the front. Literally. Your exterior door welcomes guests. It keeps your family safe. It also fights against harsh weather. Choosing the right exterior door in Toronto is one of the most important investments you can make. An exterior door does more than provide an entry point. It defines your home’s character and enhances curb appeal. It protects your family from the elements. Homeowners need a door that combines durability, beauty, and advanced security. Toronto homes demand nothing less.
Surviving Toronto’s Tough Climate
Toronto weather keeps everyone guessing. Freezing winters arrive without warning. Humid summers follow soon after. Then comes everything in between. Your exterior door stands on the front line. It faces snow, ice, rain, and blazing sun. That is why you need superior insulation and weather resistance.
High-quality doors use premium materials. Steel offers strength and security. Fiberglass resists dents and corrosion. Solid wood provides timeless beauty. Each material serves a specific purpose. Proper sealing makes a huge difference. Energy-efficient cores reduce heat loss. Your home stays warmer in winter. It stays cooler in summer. Your energy bills drop as a result.
The Beauty of Front Doors with Sidelights
One upgrade stands out among homeowners. Exterior front doors with sidelights have become extremely popular. Sidelights frame your door on one side or both. They allow natural light to flow into your entryway. Suddenly, your entrance feels bright and welcoming. No more dark, gloomy hallways.
Natural light creates a warm atmosphere. It also makes your home feel larger. Guests receive a positive first impression before they even step inside. Security remains a top concern. Many homeowners worry that glass panels weaken security. Modern sidelights solve this problem. Manufacturers use reinforced glass. They also offer decorative, shatter-resistant options.
You can choose from many glass styles. Clear glass maximizes light. Frosted glass adds privacy. Textured glass creates visual interest. Each option balances brightness with security.
Custom Designs for Every Home
Every home has a unique personality. Your exterior door should reflect that. Front doors with sidelights come in countless designs. Traditional homes look beautiful with paneled doors and classic glass patterns. Modern homes shine with clean lines and minimal frames.
Finish options also vary widely. Paint your door in bold colors for a statement look. Choose natural wood stains for warmth and elegance. Select neutral tones for timeless appeal. At Flavia Sliding Doors, we help homeowners match doors to their architectural style. We offer custom designs that fit both modern and traditional homes perfectly.

Why Professional Installation Matters
You can buy the best door in the world. But it will not perform properly without professional installation. Exterior door installation requires precision. A door that hangs crooked will not seal correctly. Air leaks in. Energy leaks out. Water finds its way inside. Security weakens. Experienced technicians follow a careful process. First, they measure your opening accurately. Older homes often have uneven frames. Good installers account for this.
Next, they prepare the opening. They remove the old door carefully and inspect the frame for damage. They make repairs before proceeding. Then comes the installation. The team sets the new door level and plumb. They secure it firmly and add insulation around the frame. They install weathers tripping for an airtight seal. Finally, they test everything. The door should open and close smoothly. The lock should engage easily. No drafts should sneak through. Professional workmanship ensures your door performs as designed. It also extends the life of your investment.
Security Features You Can Trust
Your exterior door protects everything inside your home. Security should never be an afterthought. Quality doors come with reinforced cores. These resist forced entry.
Energy Efficiency Saves Money
Heating and cooling costs add up quickly. A poor-performing door forces your HVAC system to work harder. Energy-efficient exterior doors help you save money month after month. Look for doors with insulated cores. Polyurethane foam provides excellent thermal resistance.
Weathers tripping creates a tight seal around the door. It blocks drafts effectively. It also keeps out dust and insects. Low-E glass coatings reduce heat transfer. They reflect heat back into your home during winter. They block solar heat during summer. Your home stays comfortable without overworking your furnace or AC.
Many energy-efficient doors qualify for rebates. Check with local utility companies. You might save even more money.
The Installation Process from Start to Finish
At Flavia Sliding Doors, we make installation simple. Our process begins with a consultation. We listen to your needs. We help you select the right door. Next, we schedule a precise measurement appointment and measure your opening carefully. We check for level and plumb and note any irregularities.
We order your custom door. Production takes several weeks for made-to-order products. On installation day, our team arrives on time. We protect your floors with drop cloths and remove your old door carefully and inspect the frame and make repairs as needed.
We install your new door with precision and ensure perfect alignment and seal all gaps and test operation and security. Before we leave, we clean up thoroughly. We remove your old door. We answer any questions you have.
Final Thoughts
Your exterior door makes a lasting impression. It welcomes guests and protects your family. It fights Toronto’s tough weather. Avoid accepting a low-quality door. Avoid relying on inexperienced individuals for installation. Choose a door that merges strength, elegance, and safety.
Choose premium materials. Add sidelights for natural light. Hire experienced technicians for installation. Your home deserves the best entrance possible. Upgrade your exterior door today. Enjoy better curb appeal. Lower your energy bills. Sleep better knowing your family is safe. The right door changes everything.
Author
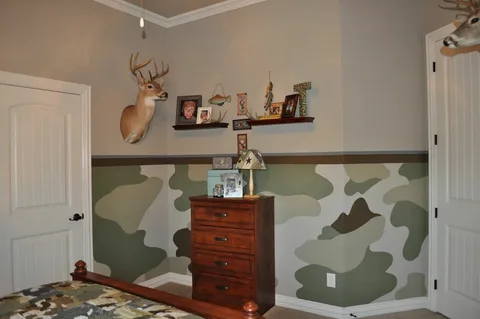
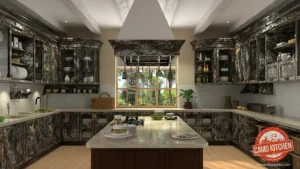
Modern interior design continues to evolve as homeowners and businesses search for affordable ways to refresh existing spaces. Among the many decorative surface solutions available today, camo wrap has emerged as a distinctive option that combines visual appeal with practical functionality. Whether applied to cabinets, countertops, furniture, or commercial interiors, camouflage-inspired vinyl films can dramatically transform surfaces without the expense of a full renovation.
As architectural film technology advances, today’s camouflage wraps offer impressive durability, realistic textures, and a wide range of design options that suit both residential and commercial environments.
What Is a Camo Wrap?
A camo wrap is a self-adhesive decorative vinyl film featuring camouflage-inspired patterns. Designed to cover existing surfaces, it provides an alternative to painting, resurfacing, or replacing fixtures and furniture.
Manufacturers create these wraps using advanced vinyl materials that adhere securely to smooth surfaces while maintaining flexibility during installation. Many modern products include protective coatings that resist scratches, moisture, stains, and everyday wear.
Understanding Camouflage Vinyl Films
Camouflage wraps are available in various colors, textures, and styles. While traditional military-inspired patterns remain popular, designers now produce modern interpretations featuring urban, woodland, desert, digital, and abstract camouflage themes.
These films often replicate premium finishes while adding a bold visual statement. Their versatility makes them suitable for both decorative and functional applications.
Where Wraps Are Commonly Used
- Kitchen cabinets
- Countertops
- Furniture surfaces
- Retail displays
- Reception desks
- Feature walls
- Doors and panels
- Commercial fixtures
The adaptability of these films allows designers to create personalized spaces without extensive construction work.
Camo Wrap Is Growing in Popularity
Several factors contribute to the increasing demand for camouflage vinyl wraps. Consumers are becoming more conscious of renovation costs, project timelines, and sustainability considerations.
Unique Visual Appeal
Unlike traditional solid-color finishes, camouflage patterns create depth, texture, and character. A carefully selected camo design can transform an ordinary surface into a focal point within a room.
Modern interior trends increasingly embrace personalized design elements. Camouflage wraps help property owners express individuality while maintaining a contemporary appearance.
Affordable Alternative to Renovation
Replacing cabinets, countertops, and furniture can require substantial investment. A high-quality vinyl wrap provides a cost-effective alternative that delivers a fresh appearance at a fraction of the cost.
Many renovation projects also involve labor expenses, demolition, and disposal fees. Wrapping existing surfaces minimizes disruption while extending the life of current fixtures.
Key Benefits of Using Wrap
The popularity of camouflage wraps stems from several practical advantages beyond aesthetics.
Cost Efficiency
Wrapping existing surfaces typically costs significantly less than complete replacement. This affordability makes camo wrap attractive for both homeowners and businesses working within budget constraints.
Easy Installation
Durability and Protection
Modern architectural films are engineered to withstand everyday use. Quality wraps resist:
- Scratches
- Moisture
- UV exposure
- Stains
- Surface abrasion
These protective properties help preserve underlying materials while maintaining appearance over time. For example, a retail counter exposed to constant customer interaction may experience less visible wear when protected by a durable vinyl film.
Design Flexibility
One of the strongest advantages of camouflage wraps is design versatility. Property owners can choose from numerous patterns, colors, and finishes to complement existing décor. Some manufacturers even offer custom printing services, allowing businesses to incorporate branding elements into camouflage-inspired designs.
This flexibility supports creative projects ranging from subtle accents to complete room transformations.
Types of Wrap Designs
The market now offers an extensive selection of camouflage styles tailored to different aesthetic preferences.
Traditional Military Camouflage
Traditional camouflage remains a classic choice. These designs typically feature green, brown, black, and tan tones inspired by military uniforms and outdoor environments. They work particularly well in rustic, industrial, and outdoor-themed spaces.
Modern Urban Camouflage
Urban camouflage introduces contemporary color palettes such as gray, charcoal, white, and black. Digital patterns often create a sleek, modern appearance suitable for commercial interiors and contemporary homes. This style appeals to individuals seeking a sophisticated interpretation of traditional camouflage.
Custom Printed Camouflage Patterns
Advances in digital printing technology allow manufacturers to create fully customized designs. Property owners can combine camouflage elements with logos, brand colors, graphics, or unique artistic concepts. Custom solutions are especially valuable for businesses looking to strengthen visual identity through interior design.
Installation Process and Practices
Proper installation plays a significant role in achieving professional results.
Surface Preparation
Before applying any wrap, installers should thoroughly clean the surface to remove dust, grease, and contaminants. Smooth, dry surfaces typically produce the best adhesion and finish quality. Repairing chips, cracks, or imperfections beforehand helps prevent visible defects after installation.
Application Techniques
Professional installers often use heat guns and specialized tools to conform vinyl around edges and corners. Careful alignment prevents wrinkles, bubbles, and stretching issues. Large projects generally benefit from professional installation, particularly when complex shapes or extensive surface areas are involved.
Maintenance Tips
Maintaining a camo wrap is relatively simple.
Recommended practices include:
- Cleaning with mild soap and water
- Avoiding abrasive cleaning products
- Wiping spills promptly
- Inspecting edges periodically
With proper care, many high-quality wraps maintain their appearance for years.
Choosing the Right Camo Wrap
Selecting the ideal camouflage wrap requires consideration of several factors. Surface type, environmental conditions, design objectives, and expected durability all influence product selection. For kitchens and high-traffic commercial spaces, prioritize wraps with strong scratch resistance and moisture protection. For decorative accent applications, focus on color harmony and visual impact.
Working with reputable architectural film suppliers helps ensure product quality, performance, and long-term satisfaction. Reviewing installation specifications and warranty information before purchase can also prevent costly mistakes.
Author


Charger Case: Hard Shell Case Is Essential for Tech Protection

Lost Intricacy: The Complete Guide to Modern Streetwear Style

Edge Finder: Manual vs Electronic for Precision CNC Machining

Crypto Marketing: Strategies to Build and Grow Blockchain Projects

High-Speed Leased Line Services Whitefield for Business Growth

Co-Ord Set: The Ultimate Style Guide for Every Modern Woman

Monsoon Treks: Himalayan Trails to Explore During the Rainy Season

Toronto SEO Services: Guide to Growing Your Business Online

Celebrity Fashion: Stylish Outfit Ideas for Every Modern Woman

Event Marketing vs Event Management: Key Differences Explained

Cybersecurity Consulting Company SequelNet Provides Critical IT Support Services to Medical Billing Firm, Medical Optimum

Meet the Megalodon: The Shark Star of ‘Meg 2’

Reduce Video Game Lag: Level Up Your Gaming Performance
Balancing India’s Entertainment: Cricket vs. Bollywood

Jetsetter’s Secrets: Unveiling Our Favorite Travel Hacks for a Seamless Adventure

The 5 Best Live Sports Streaming Sites: Legal and Exciting!

Hollywood Labor Unrest: The Impact of ‘What About Us?’ Strikes

Unveiling the Magic of Dream Fulfillment at the Late NBA Draft

Illuminate Your Skin: Dr. Axe Unveils Natural Remedies for Lightening Knees and Elbows

Bright Choices: Navigating the Pros and Cons of Skin Whitening Creams with Dr. Axe
-

 Business3 years ago
Cybersecurity Consulting Company SequelNet Provides Critical IT Support Services to Medical Billing Firm, Medical Optimum
-
Entertainment3 years ago
Meet the Megalodon: The Shark Star of ‘Meg 2’
-
Entertainment3 years ago
Reduce Video Game Lag: Level Up Your Gaming Performance
-
 Sports3 years ago
Balancing India’s Entertainment: Cricket vs. Bollywood
-
Entertainment3 years ago
Jetsetter’s Secrets: Unveiling Our Favorite Travel Hacks for a Seamless Adventure
-
Productivity3 years ago
The 5 Best Live Sports Streaming Sites: Legal and Exciting!
-
Art /Entertainment3 years ago
Hollywood Labor Unrest: The Impact of ‘What About Us?’ Strikes
-
Sports3 years ago
Unveiling the Magic of Dream Fulfillment at the Late NBA Draft


