


Wireless earbuds seem to dominate the modern world. However, true audiophiles, hardcore gamers, and remote professionals know a vital secret. Physical cables still reign supreme. Wired connections offer zero audio latency. They eliminate battery anxiety completely. Furthermore, you will never experience frustrating Bluetooth pairing handshake issues.
Of course, manufacturers do not create all cables equally. Perhaps you once bought a cheap auxiliary extension cord. You likely discovered that your microphone stopped working entirely. Alternatively, the audio might crackle every single time you move your head. These annoying situations expose the reality of poor engineering.
FEDUS operates as a leading direct-to-consumer brand for network and IT hardware in India. We firmly believe that even a simple audio cable deserves elite engineering. This comprehensive guide will break down everything you need to know about 3.5mm extension cables. We will explore the technical differences between different audio jacks. We will also reveal why the right-angle design represents an ergonomic masterpiece.
The Anatomy of an Audio Jack: What Are Those Rings?
Misunderstanding the rings on an audio jack causes the highest number of e-commerce returns. Consumers often buy the wrong cable because they do not look at the metal tip closely. You must understand these rings to get the best performance.
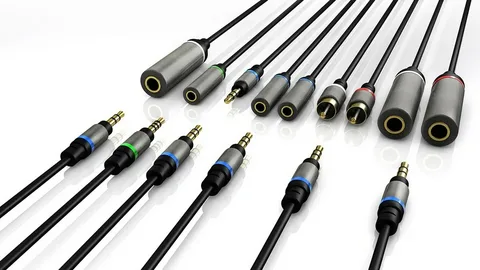
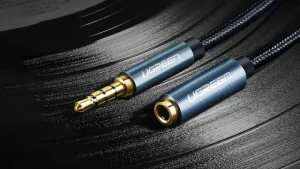
TRS (Tip-Ring-Sleeve) Connectors
A standard TRS cable features two plastic rings on the metal tip. These rings divide the jack into three distinct metal sections.

-
Best Uses: This design works perfectly for connecting traditional stereo speakers or old MP3 players. It carries left and right audio channels effectively.
-
The Big Downside: A TRS connection cannot carry a microphone signal at all. If you plug a modern gaming headset into a TRS extension, you will hear the game audio clearly. However, your teammates will never hear your voice.
TRRS (Tip-Ring-Ring-Sleeve) Connectors
The FEDUS StealthLink Pro utilizes a premium TRRS configuration. This premium connector features three plastic rings. These rings divide the metal pin into four separate conductive sections.
-
The Power of Four: The fourth metal section carries the microphone data. It also transmits remote-control commands. These commands allow you to adjust the volume or skip tracks easily.
-
Universal Compatibility: This setup works flawlessly with modern smartphones and gaming controllers. It pairs perfectly with PlayStation 5, Xbox Series X, and modern laptops. These devices feature combo jacks that merge audio output and microphone input into a single port.
Why the 90-Degree L-Shape Design is a Game Changer
Traditional straight connectors suffer from a massive flaw. This flaw relates directly to basic physics. When a straight cable sticks out from your phone or laptop, any accidental bump creates a harmful lever effect. This physical pressure strains the internal solder points of your device’s motherboard. Over time, this constant stress loosens the port completely. Eventually, the port only works if you hold the cable at a highly specific angle.
The FEDUS right-angle design solves this issue through smart engineering:
-
Ergonomics for Mobile Gamers: Straight cables poke directly into your palm when you play popular games like BGMI or Call of Duty Mobile. This distraction completely ruins your grip. Our L-shape cable stays flush against your device. It provides a comfortable, professional-tier grip during intense gaming sessions.
-
Space Saving in Vehicles: Most car auxiliary ports sit in tight, awkward locations. You often find them near the gear shifter or deep inside the center console. The FEDUS right-angle design prevents the cable from bending sharply. This layout saves space and avoids structural damage.
-
Maximum Durability: The right-angle design naturally reduces the daily tugging forces on the wire. Therefore, it extends the operational life of the cable. It also protects your expensive smartphone or laptop port from wearing out.
Combating the Cable Hum: The Science of Shielding
You might occasionally hear a low buzzing or hissing sound when you use audio equipment. This noise occurs when an unshielded cable rests near a power outlet or a wireless router. Experts call this annoying distortion Electromagnetic Interference.
Cheap audio brands try to save money by using thin copper-clad aluminum wires. These inferior cords lack proper shielding layers. In stark contrast, FEDUS builds cables with High-Purity Oxygen-Free Copper. Pure copper acts as a superior conductor. It ensures the audio signal travels quickly from your device to your ears. It preserves the authentic color and depth of your music.
We wrap these premium copper cores in multiple protective layers to eliminate the cable hum entirely:
-
Aluminum Foil Shielding: This layer blocks high-frequency radio waves from disrupting your audio stream.
-
High-Density Nylon Braiding: This premium braiding creates a rugged physical barrier. It prevents friction and stops internal wires from rubbing together. Consequently, it removes static noise completely.
Does Cable Length Kill Audio Quality?
Many audio enthusiasts ask an important question on online forums. They want to know if a ten-meter extension cable will degrade their music quality. The honest answer depends entirely on the build quality of the cable.
Electricity naturally faces resistance as it travels across long distances. If a manufacturer uses thin wires, the voltage drops significantly over a long run. This drop reduces your volume and creates muddy, distorted bass frequencies.
FEDUS solves this problem by adjusting the internal wire gauge based on the specific length of the product. Our five-meter and ten-meter cables utilize much thicker internal conductors. This extra copper successfully compensates for the longer distance. Therefore, your high-fidelity audio remains crisp and clear. Your microphone sensitivity stays perfectly sharp whether you sit one meter or ten meters away.
Comprehensive Device Compatibility
We want to ensure you have an incredible experience right out of the box. You should check your specific device against our official compatibility parameters before your purchase.
Smartphones that feature a dedicated headphone port support full functionality. You will enjoy clear audio, microphone support, and volume control. Gaming controllers for the PlayStation 5 and Xbox Series X also provide full compatibility. You can experience game sound and party chat simultaneously.
Modern laptops with a single combo jack support your audio alongside your Zoom or Microsoft Teams microphone. However, older desktop computers require a slightly different setup. If your PC features separate green and pink audio ports, you must use a specialized Y-splitter to activate your microphone.
Professional DSLR cameras do not support this specific cable standard. These cameras usually require a traditional TRS plug or a powered microphone system. Finally, car auxiliary ports work beautifully with our extension. They deliver crystal-clear music playback across every journey.
How to Care for Your Braided Cable
We test our premium cables to survive more than fifteen thousand rigorous bends. However, a little bit of basic care will extend the life of your gear significantly.
First, you should never pull directly on the flexible wire when disconnecting your headphones. Always grip the solid aluminum shell firmly to unplug the device. Second, you must avoid tying tight knots in the cord. Our premium braiding naturally resists tangling. You should store the cable in a loose, circular coil to prevent internal structural strain.
Finally, you should clean the gold-plated pins once every few months. Wipe the connectors gently with a tiny drop of rubbing alcohol. This quick maintenance removes skin oils and dirt accumulation. It keeps your connection clean and prevents static pops during use.
The FEDUS Difference: India’s Leading Direct-to-Consumer Brand
The modern Indian market faces a massive flood of generic, white-label audio cables. These cheap products look decent in online photos. However, they almost always fail within a few weeks of daily use. FEDUS launched with a clear, alternative mission. We focus entirely on delivering premium hardware for the modern Indian consumer.
We do not just sell basic consumer cables. Instead, we deliver long-term reliability. Our direct-to-consumer business model cuts out expensive middlemen completely. Therefore, we can invest more money directly into high-grade aluminum and pure copper. We provide elite engineering while keeping our prices highly accessible.
Every single FEDUS StealthLink Pro purchase brings incredible peace of mind:
-
You receive a comprehensive one-year replacement warranty.
-
You gain access to our lifetime technical support network.
-
You enjoy the pride of supporting India’s top-rated network accessory brand.
Conclusion: Stop Bottlenecking Your Audio Gear
You likely spent thousands of rupees on your favorite pair of headphones. Your smartphone or laptop cost you tens of thousands of rupees. You should never bottleneck the performance of your premium devices with a cheap, low-quality local cable.
The FEDUS right-angle 3.5mm TRRS Extension Cable represents a small, smart investment. It protects your expensive hardware ports from physical damage. It enhances your gaming performance by clearing space for your hands. Furthermore, it ensures your voice sounds crisp and professional during every virtual meeting. Upgrade your everyday audio experience today. We offer our premium cables in convenient lengths of one, three, five, and ten meters to fit your lifestyle perfectly.
Common Troubleshooting Guide
My microphone does not work on my desktop computer!
You should inspect the audio ports on your PC case. If you see two separate inputs for audio and microphone, you need a FEDUS 3.5mm female-to-male splitter. This accessory separates the combo signal into two distinct lines.
Sound only comes out of one earbud!
This issue almost always occurs because you did not push the jack fully into the port. We design our sleek connectors to remain case-friendly. However, they still require a firm click to seal the connection. Give the metal housing a strong push to resolve the issue.
Is this cable compatible with an iPhone?
Yes, it works perfectly. However, you must connect the original Apple adapter first. Plug our extension cable directly into your official Lightning or USB-C adapter to enjoy your media.
Frequently Asked Questions
Q: Will this cable work seamlessly with my PlayStation 5 or Xbox controller?
A: Absolutely. Modern gaming controllers rely heavily on the TRRS connection standard. We specifically designed this extension cable to lengthen your headset cord while keeping your chat functions fully active.
Q: My microphone volume sounds incredibly low. How can I fix this?
A: Low microphone volume typically indicates high electrical resistance inside an inferior, long cable. FEDUS uses thick American Wire Gauge copper conductors in our long-distance models. This design choice maintains high microphone sensitivity over long distances.
Q: Can I use this product to extend the auxiliary line inside my car?
A: It fits car setups beautifully. Vehicle owners prefer our right-angle design because it stays out of the way. It prevents the wire from tangling with your gear shifter or blocking your cup holders.
Q: Does this cable support high-resolution audio formats?
A: Yes. Our high-purity copper conductors and gold-plated tips easily handle lossless audio streams. You will experience high-bitrate streaming music without any compression or frequency loss.
Q: What should I do if my cable stops working after six months of use?
A: We treat every single customer like family. Your purchase includes a dedicated one-year replacement warranty. Simply contact our India-based customer support team through our official website to get a fast solution.


